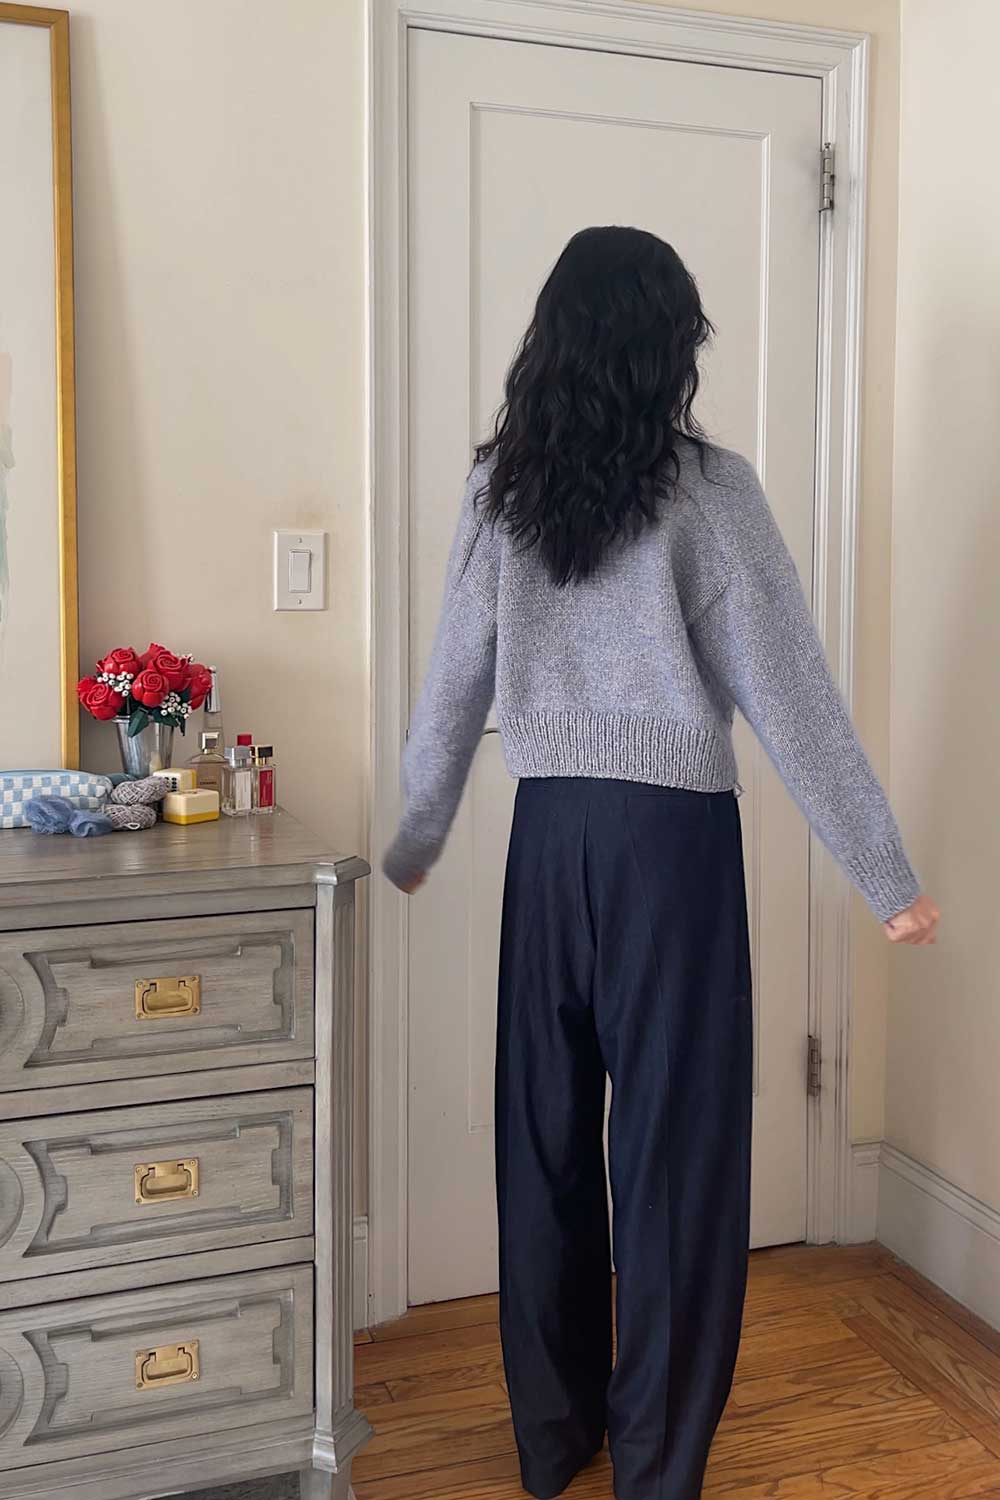
Lakes V-Neck by Ozetta
I just finished knitting my first sweater!
Here’s how it went..
About a month ago, I got it in my head to try knitting for the first time.
I fell down a rabbit hole of TikTok videos I guess.
After watching an endless stream of people showing off their ‘WIP Wednesdays’ and ‘FO Fridays’ I wanted to try it for myself.
I watched a couple tutorials on how to knit and purl, picked up a couple beginner knitting books and set out to make myself this wool sweater.
Beginner Sweater Patterns
Everyone recommended the Step by Step Sweater by Frances. It’s a beginner-friendly raglan sweater, constructed top-down.
The reason people recommend it is the pattern designer created an in-depth (2 hour long!) Youtube video so you can knit the entire sweater alongside her.
I thought that all sounded very beginner friendly and like the perfect guide for an ambitious plan of making a sweater as my knitted object.
The only problem was… I don’t really like raglan sweaters.
I prefer looser, more oversized winter knits and when I saw this Lakes V-Neck pullover I immediately felt the urge to knit this sweater instead.
So I did!
Now that I finished, I can definitely say it would have been easier to attempt the Step by Step Sweater.
Having knit-along video instructions for a first sweater project would have been priceless.
But, overall the Lakes V-Neck is a very well-written pattern and doable for a motivated beginner.
Here’s my notes on the project, the yarn I chose, tips I found helpful and modifications I made.
- Project Overview
- Yarn
- Affordable Beginner Tools
- Difficulty Level
- Project Notes
- Tips
- Modifications
- Blocking
- Finished Object Thoughts
Lakes Pullover
| Pattern | Lakes V-Neck by Ozetta |
| Construction | Top-Down, Saddle Shoulder Sweater |
| Yarn | Wooldreamers Saona in Fratelli |
| Biches & Bûches Le Petit Silk & Mohair in Medium Blue | |
| Needles | 5.5mm + 5mm circular needles |
| Date Started | September 21, 2025 |
| Date Finished | November 5, 2025 |
| Time Spent | ~52 days |
Yarn
The Lakes pullover calls for 3 strands of yarn held together:
- 2 strands of heavy fingering weight
- a third strand of lace weight yarn
I realized all the sweaters I loved have that “held with mohair” combination so I followed this as well.
I spent an ungodly amount of time searching for ‘the right’ yarn.
Who knew yarn came in so many types and brands?
Or that knitting was a pricey hobby??
After a week of debating yarn brands, pricing out various yarn combinations and comparing web colors vs people’s IRL pictures, I went with:
(drumroll)
Wooldreamers Saona in the color Fratelli for the base yarn
It’s a heathered steel grey flecked with blue.
For the halo yarn, I picked Biches & Bûches Le Petit Silk & Mohair in the color Medium Blue, a pretty periwinkle blue.
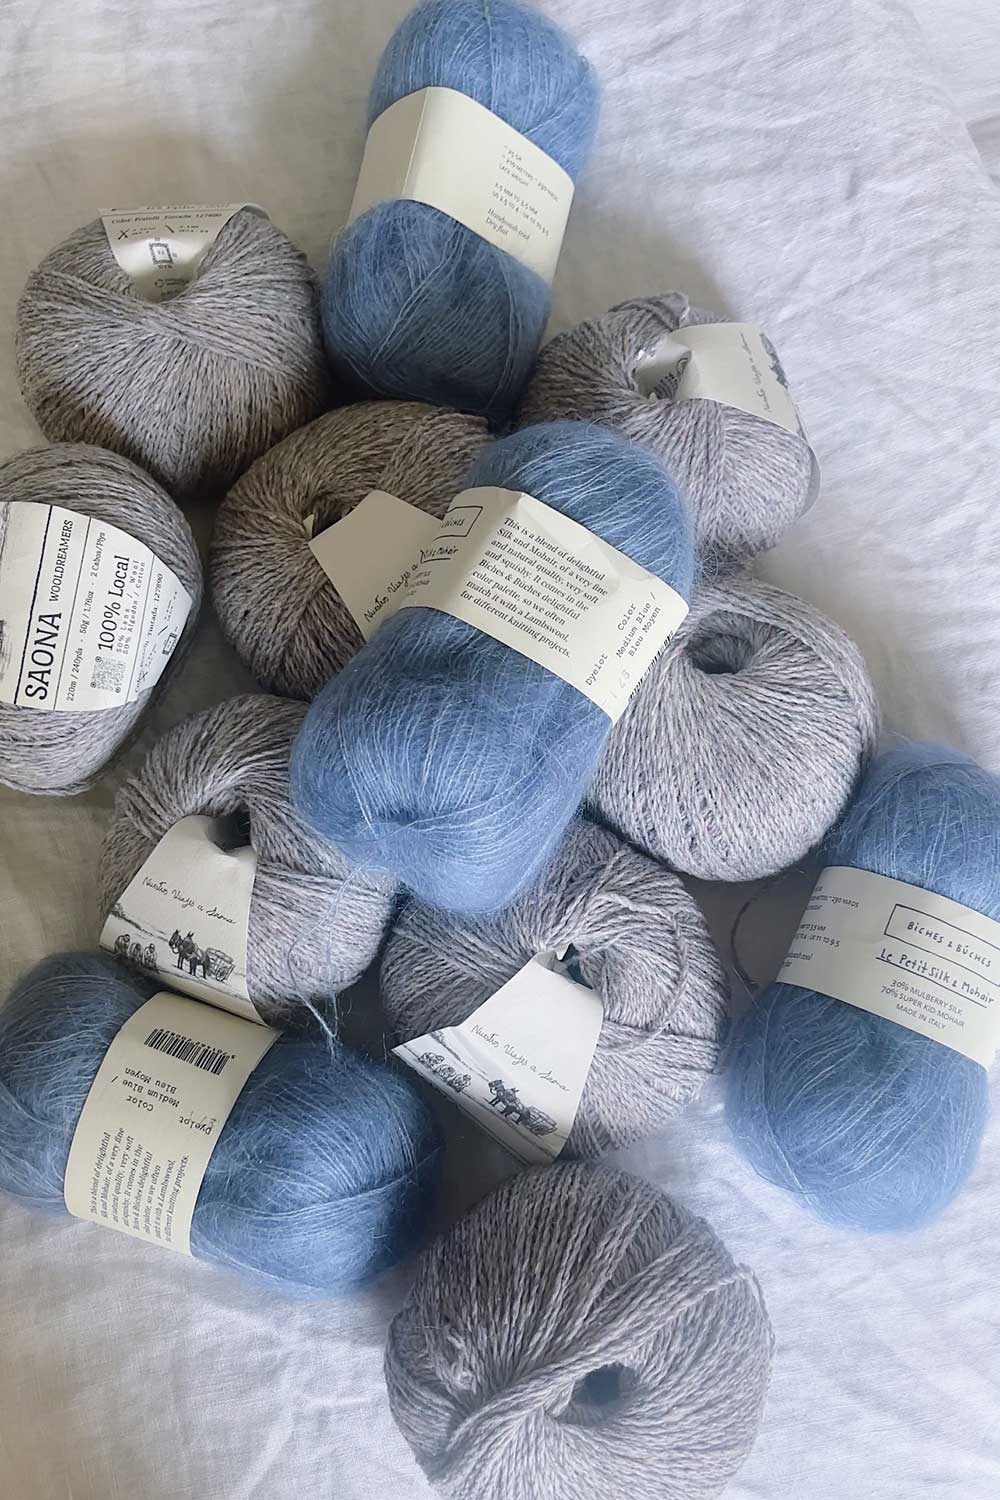
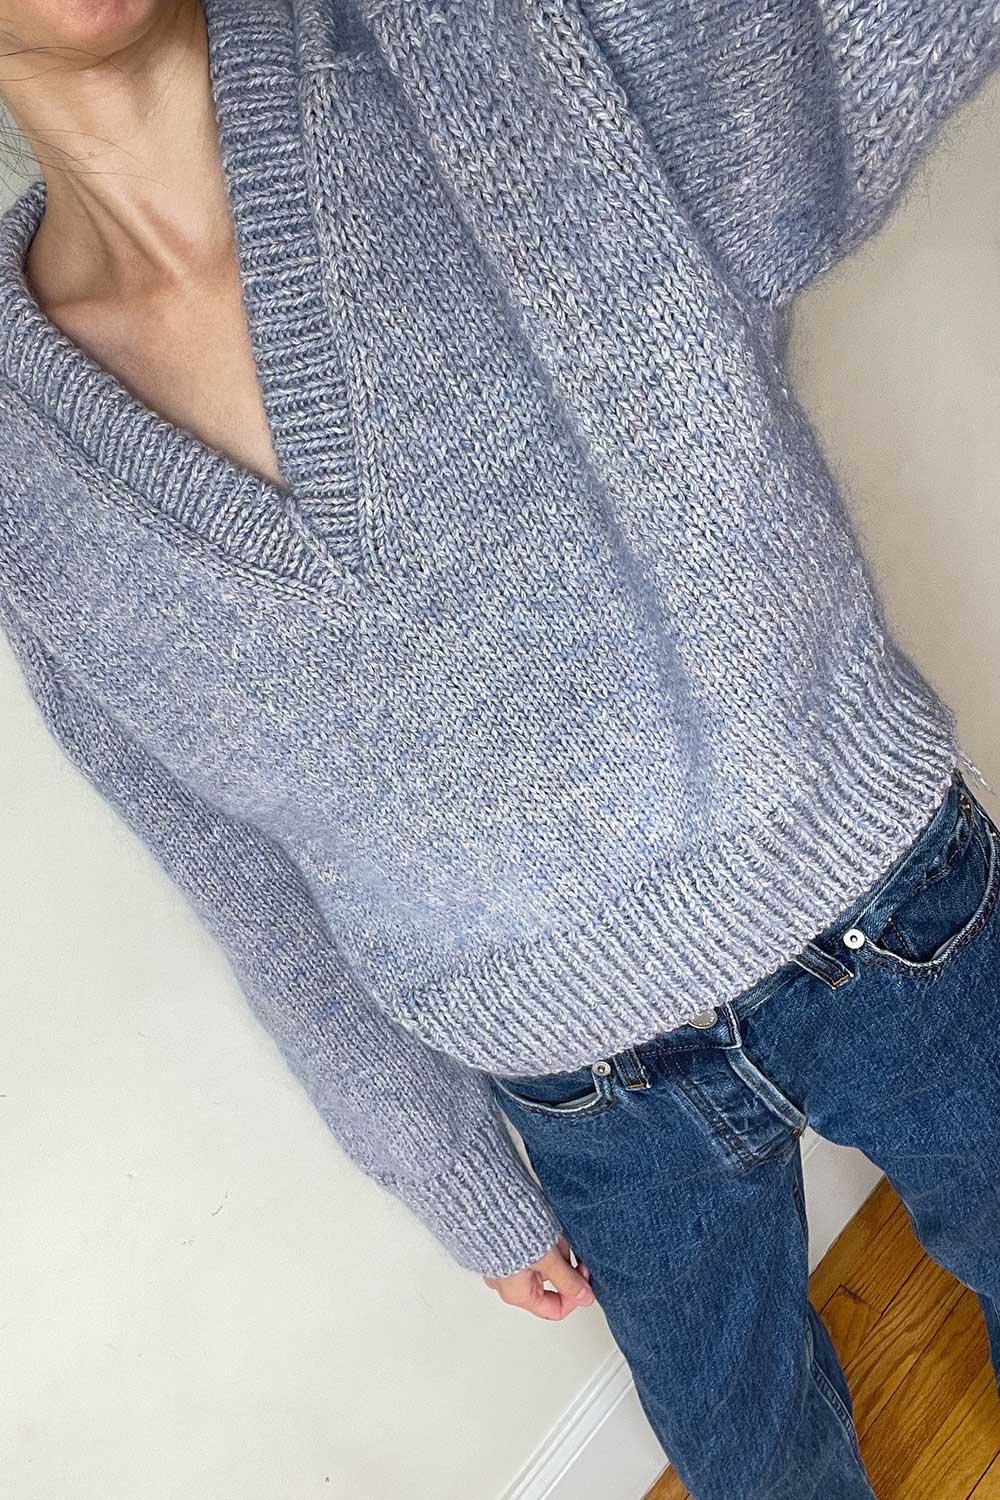
the yarns I chose – I loved this combo!
Alpaca vs Mohair
For the lace weight yarn, I debated between alpaca and mohair.
They’re often used interchangeably in knitting patterns as ‘halo’ yarns, but they do have slight differences.
Mohair comes from Angora goats and tends to give a shiny, hairy halo to knits. Alpaca comes from alpacas and adds softness and a fuzzy halo effect.
Both add warmth, structure and durability.
I love the trend of holding mohair / alpaca with a base yarn because I notice all the knitwear held double like this has a beautiful drape.
It’s really evident in the finished garment compared to sweaters made from just wool.
Read more: Yarn Review: Biches et Buches Le Petit Silk et Mohair
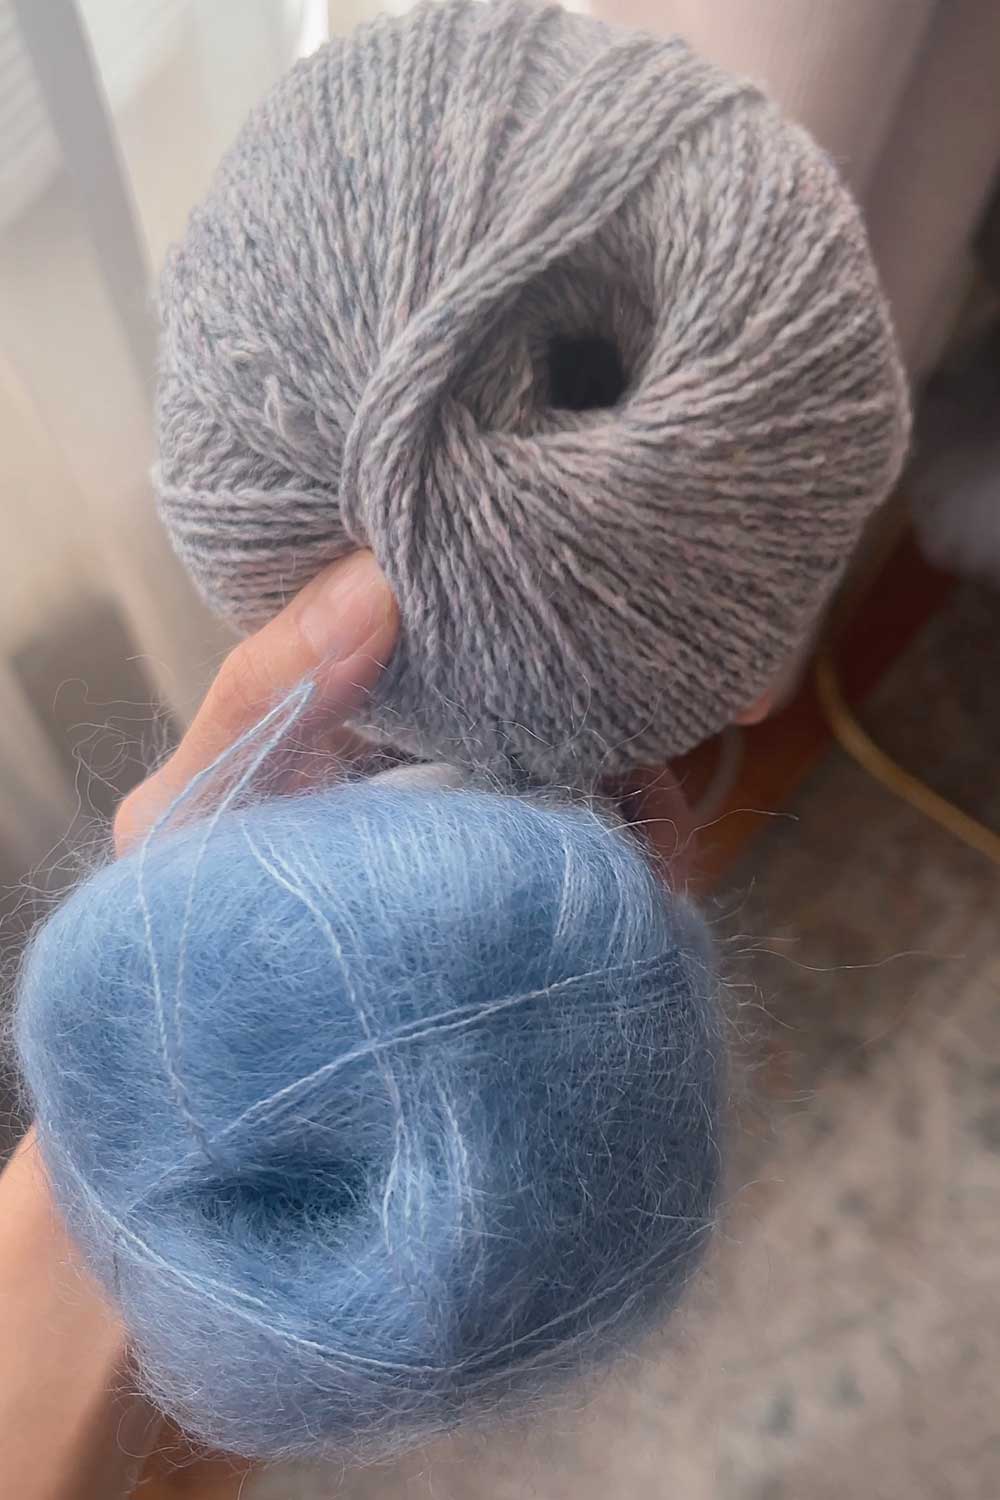
Base Yarn Held with Mohair
But one thing I didn’t realize about holding a strand of yarn with mohair was the color change!
I really loved the steel grey-blue color of Ozetta’s sample sweater and wanted that exact same look.
I used the same base yarn, but opted for a different brand and color of mohair.
Silly me thought that the sweater color mostly came from the base yarn (especially as it was held double).
It turns out mohair leaves its stamp!
I used a baby blue mohair. Ozetta’s pattern sample used Isager Silk Mohair in the color skyline, a more similar shade match of grey blue.
As a result my sweater is a bit more blue in tone than hers.
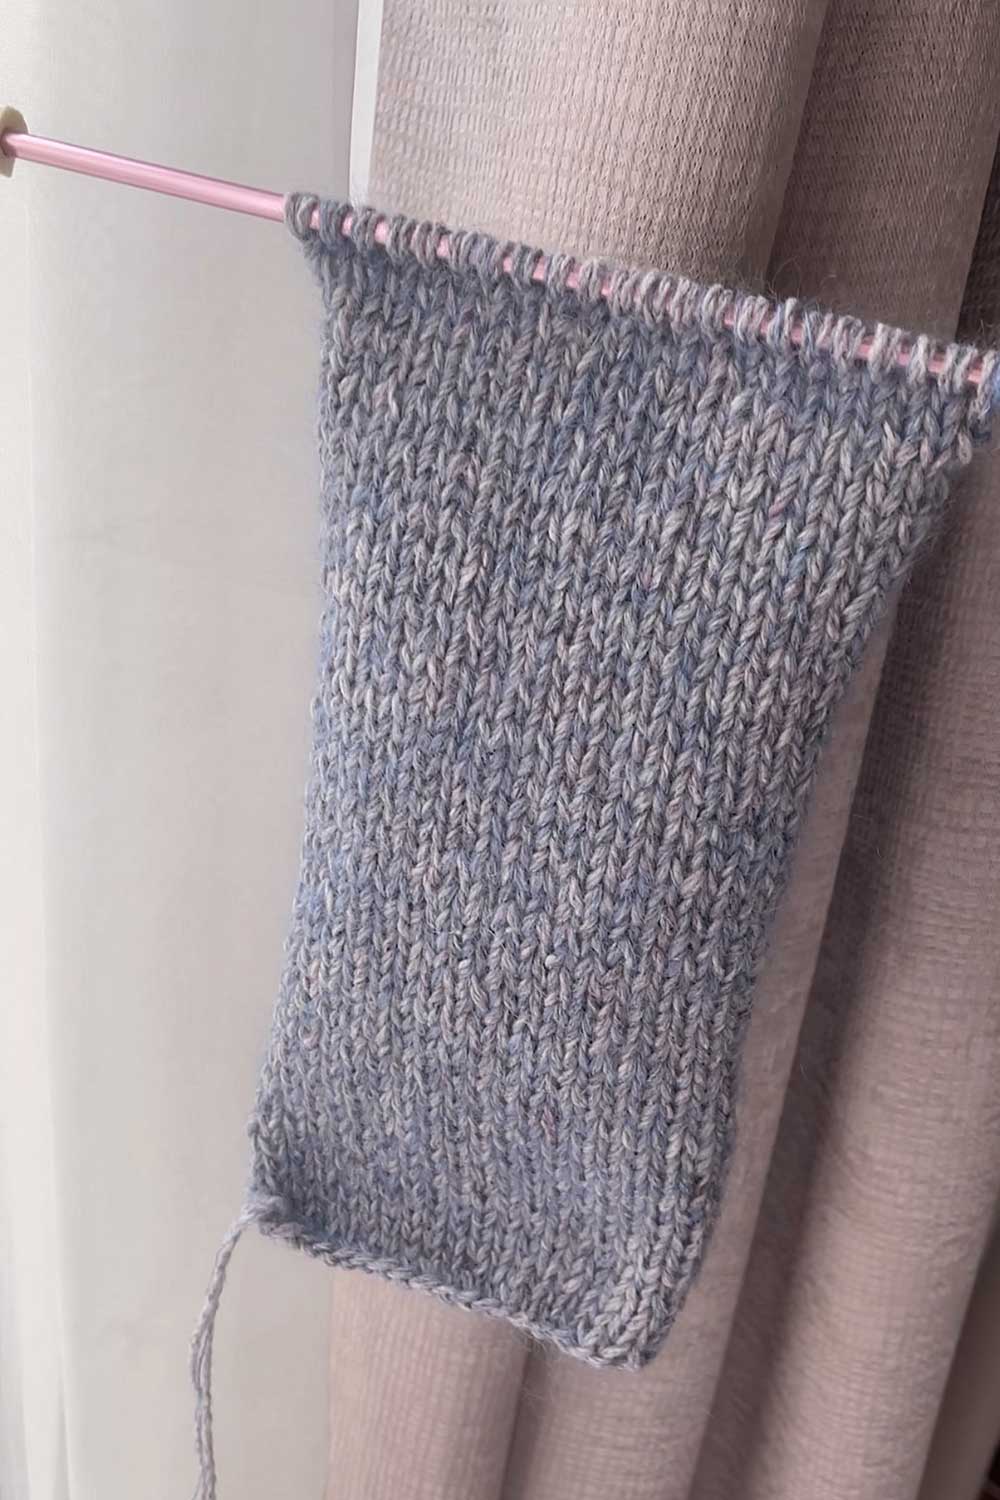
The finished sweater has a slight marled color that can change depending on the light.
Overall, it’s much more blue.
I’m now obsessed with the all the possible color effects that can come from various mohair + base yarn combinations!
Read more: Yarn Review: Wooldreamers Saona
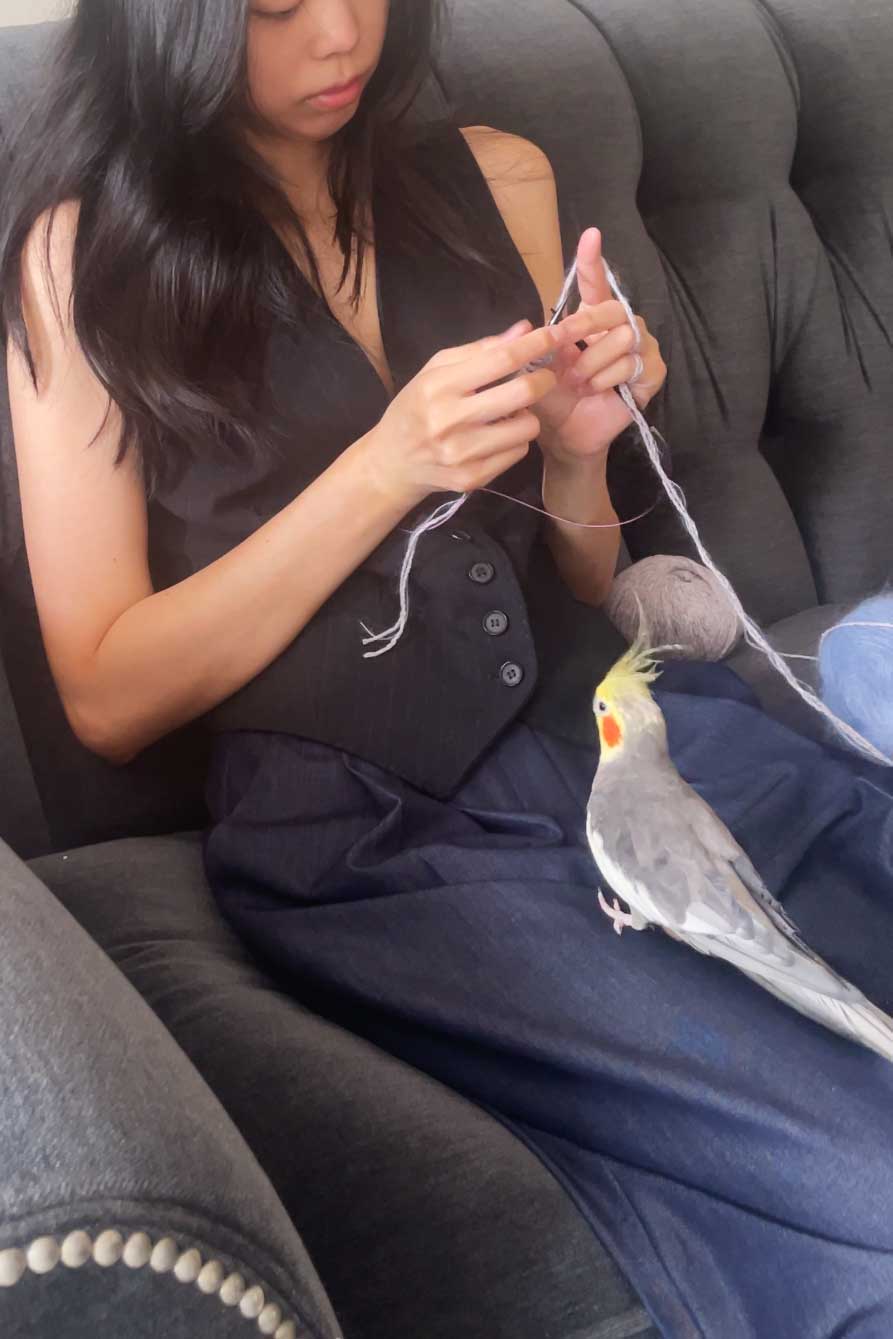
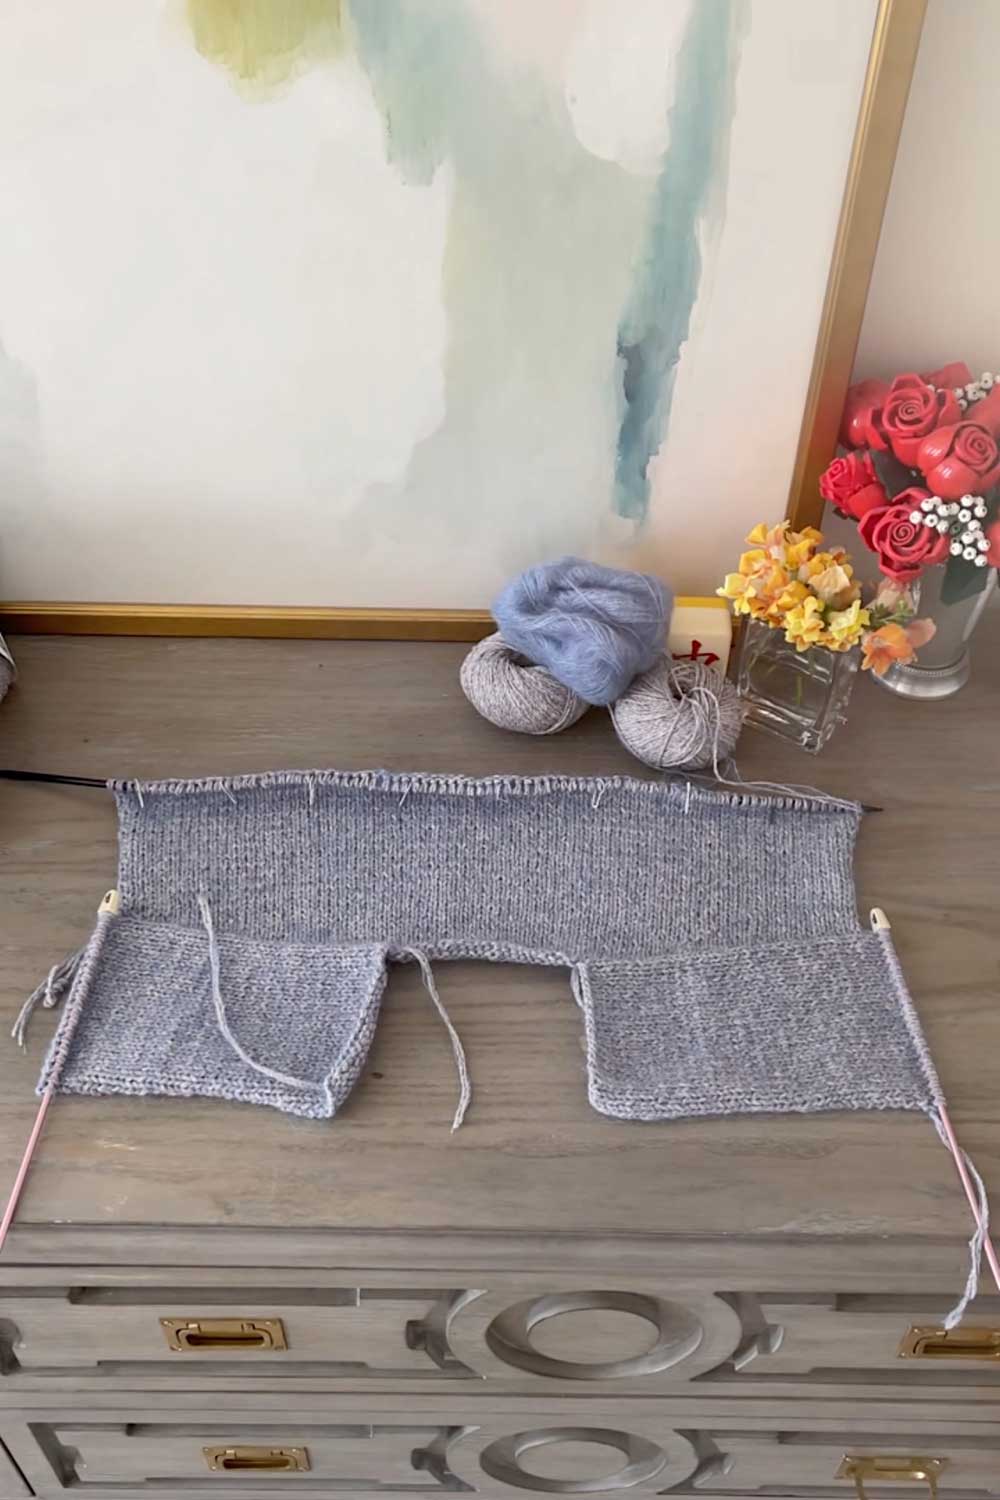
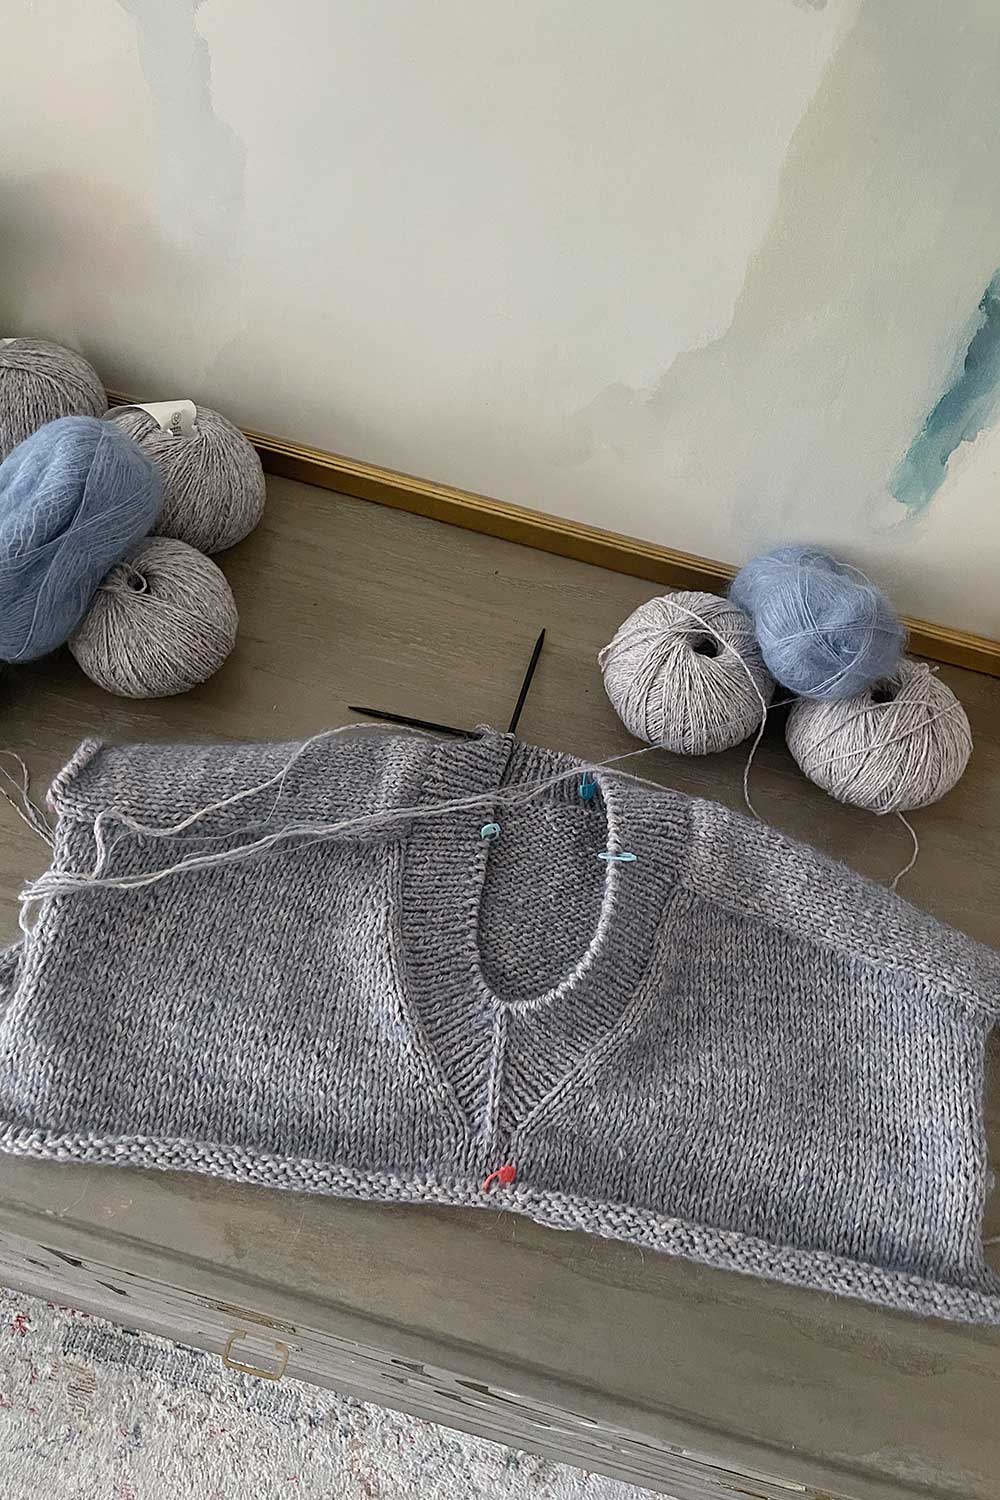
knitting in progress
Yarn Used
I knit a size small.
For this size, the pattern called for 10 balls of the base yarn and 5 balls of the halo yarn.
I purchased 8 balls of Wooldreamers Saona and 4 balls of Biches et Buches Mohair, figuring the pattern called for a little extra.
I cropped the body slightly (to fit my shorter torso) and ended up with just a small amount leftover yarn.
So I think 9 balls of Saona and 5 balls of Mohair would be the perfect amount for a true-to-pattern size small.
Needles
I borrowed a pair of fixed circular US 7 needles from my mom, but quickly realized they weren’t usable for this project.
The cable was way too long for the project, plus the cable itself is made of plastic and had fixed itself into a really annoying circle.
It turns out circular needs come in different lengths. After realizing you need various cord lengths to knit a sweater, I decided to buy this inexpensive set of interchangeable circular needles.
It was really affordable ($35 for a complete set!) and it ended up being perfect.
The Best Interchangeable Circular Needle Set for Beginners
The cables are made from a nice, memory-less material.
So as you knit, the cables don’t have this weird twist to them, but are free flowing.
The case included a complete set of needles from sizes 3 to 8 mm (US sizes 2.5 – 11), as well as 4 flexible cords in varying lengths.
So many people rave about this Chiagoo set, but I couldn’t justify spending quite that much just yet.
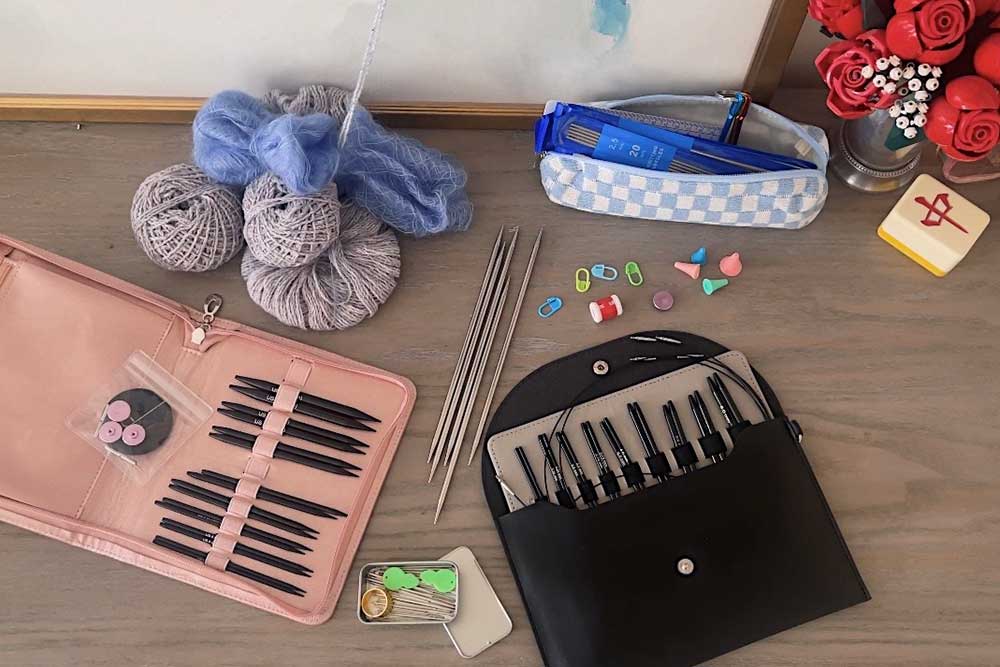
I was really impressed with the quality of these interchangeable needle sets! The pink case is the main set (and can be used for the entire project) but I also picked up a set of double pointed needles (DPNs) and a short interchangeable needle set (shorties) to do the sleeves
Short Circular Interchangeable Needles
When it came time to do the sleeves, I picked up this affordable set of shorties.
There’s not many brands selling affordable short circular needle sets.
Most people seem to use their long cords in the Magic Loop method or double pointed needles, so I was happy to find a good inexpensive shorties set.
It worked really well for knitting both sleeves!
I also like the pouch it came in.
DPNs
I also picked up this inexpensive DPN set to eventually learn how to use them (for projects like socks, hats, baby knits).
It’s even more affordable than the short circular needle set, and comes with a cute checkered pencil case pouch.
I like that it comes with 5 DPNs for each needle size, so you have the option of knitting with 3 or 4 at a time.
I find that using 4 DPNs makes it easier to divide stitches evenly.
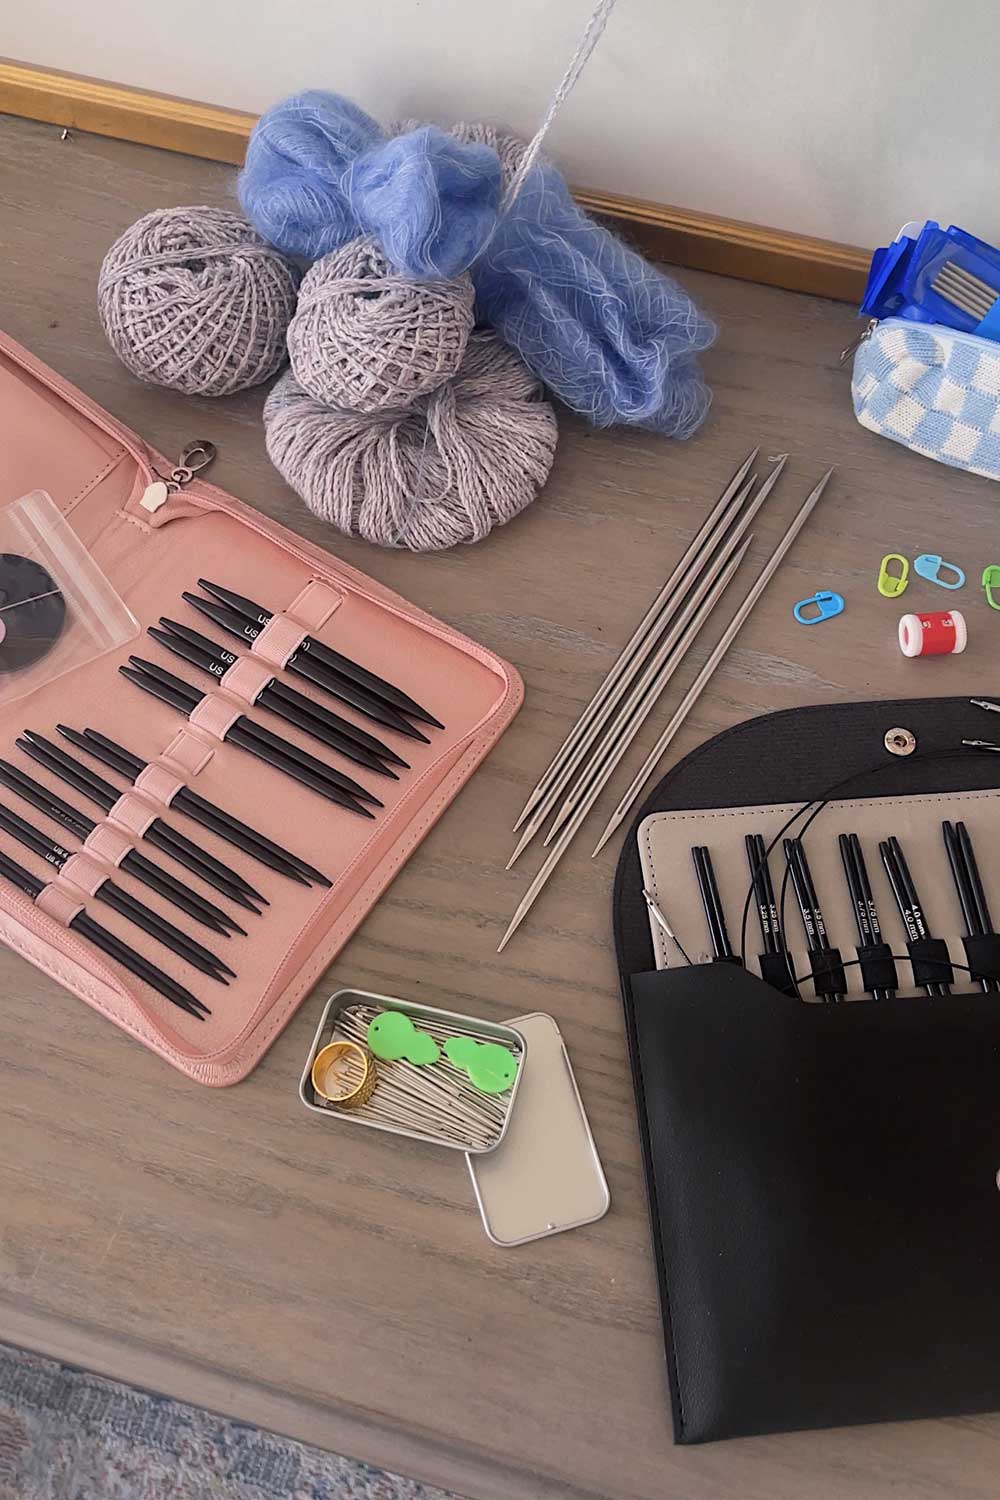
really happy with these affordable needle sets! I don’t think you can beat the quality for the price
The DPN set also came with a bunch of helpful knitting tools like a tapestry needle, stitch markers and crochet hooks.
I was going to buy those notions separately but didn’t need to thanks to the DPN set!
I ended up using the tapestry needle to weave in all my ends and the crochet hooks countless times to fix dropped or messed up stitches, so it was worth buying the needle sets for the accessories alone.
I also found it very helpful to get a row counter.
This little tool helps you keep track of what row # you’re on.
Pattern Difficulty
I watched some tutorials to learn how to make a knit stitch and a purl stitch.
I practiced that back and forth on some cheap scrap yarn for a day or two, then started on the Lakes sweater.
This meant I had to look up how to do things as I was making the sweater..
So in hindsight maybe I should have practiced making something simple like coasters or a scarf first..
But those honestly sounded very boring to me.
And in the end, I was able to make the pullover!
For the more difficult skills, Ozetta has some video tutorials (for example, picking up stitches, German short rows, casting on stitches in the middle of the project, etc).
But I did a lot of googling on my own, for things like joining in new balls of yarn, weaving in ends and more step-by-step guides for making increases and decreases.
Read More: My Favorite Knitting Books, as a Beginner Knitter
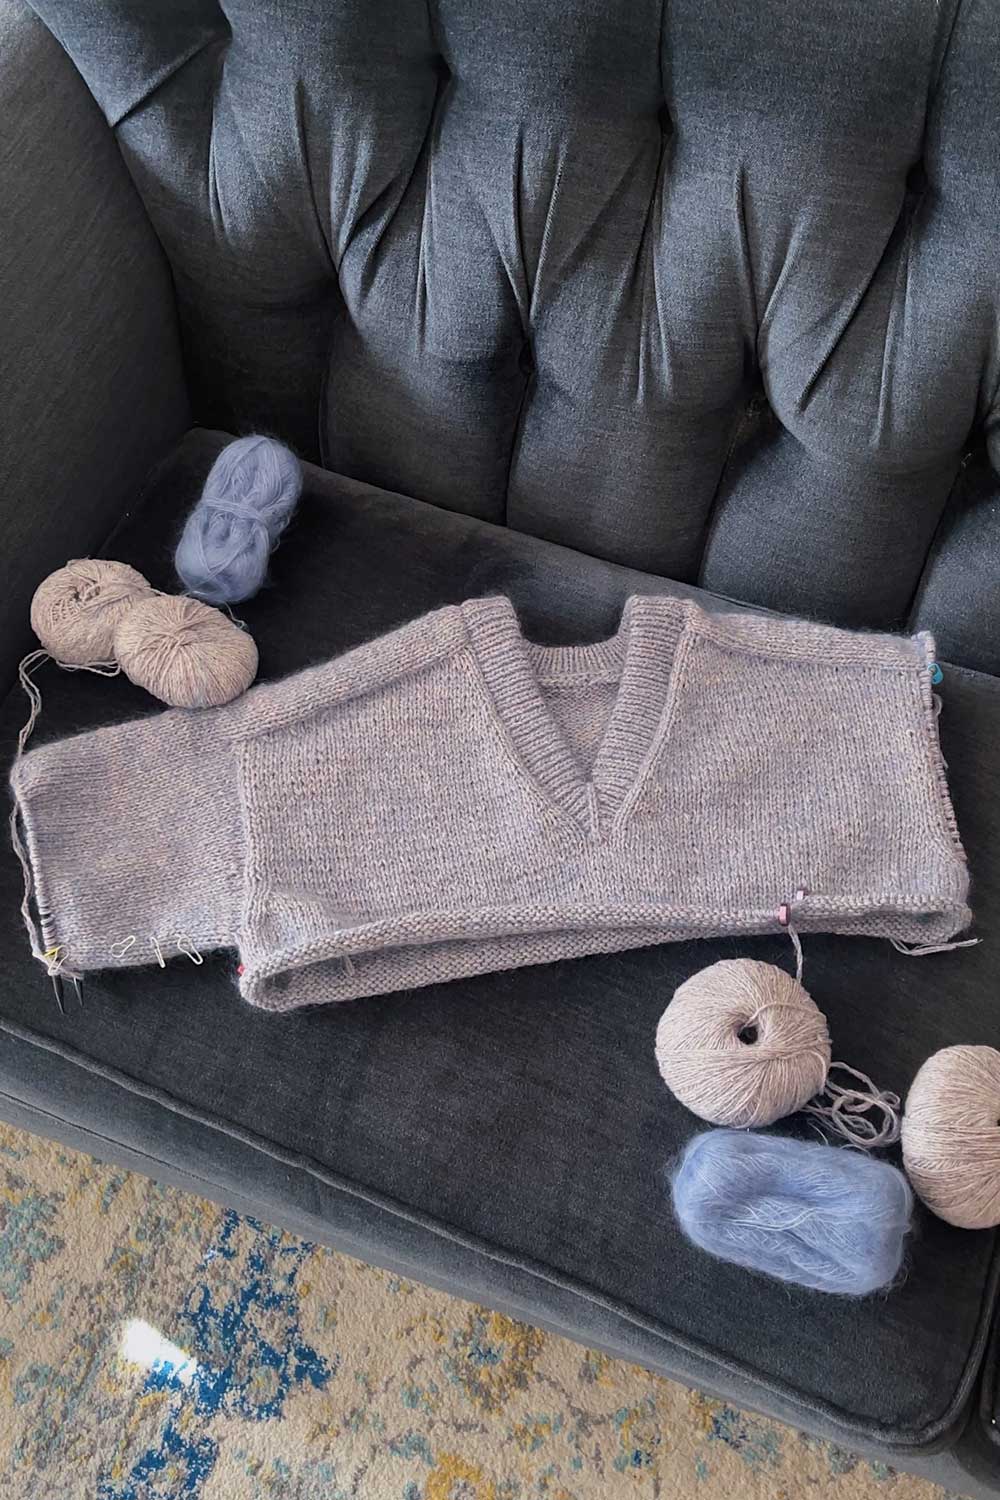
Making the Lakes Pullover
The sweater is designed with two saddle shoulders.
It took me ages just to knit the first rectangle (I ended up frogging and re-knitting it a second time).
By the time I got to the second shoulder, I got more in the rhythm of knits and purls. So you can see some obvious tension differences between the two saddle pieces – oops.
Then, the sweater is worked along the back.
You pick up stitches along each edge to create the yoke and pick up more stitches to knit the right and left front sections.
I realized at this point that I dread picking up stitches.
My perfectionist tendencies make me want to pick up stitches in an exact, even method so I had to do some mental math and re-do it until I got a nice, smooth pick-up.
Because you pick up stitches in so many places, there are also a lot of ends to weave in.
I tried to do these along the way so that I wouldn’t have 50 ends to weave in at the end.
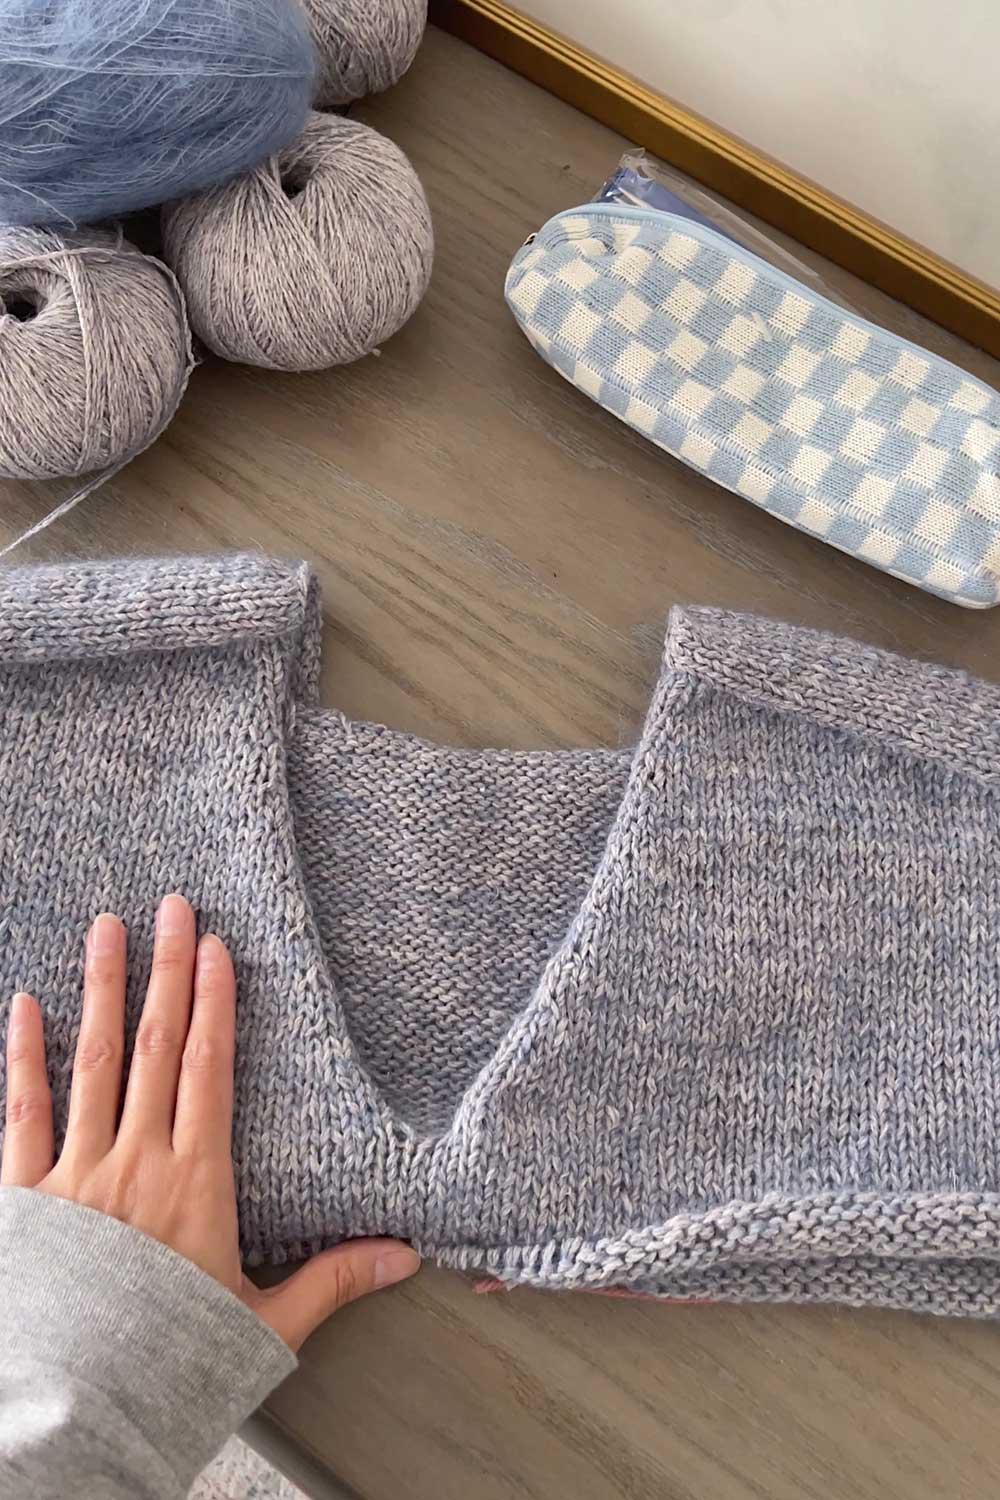
Once I finished the yoke, I decided to bounce around out of order and make the collar.
I think a finished collar immediately turns a knit piece from ‘scrappy hobby project’ to the beginnings of an actual sweater, so I was excited to shape the v-neck.
more things knitwear + indoor gardening on my tiktok! @shershegrows
Tips
V-Neck Collar
The collar is where I ran into difficulty.
First, it required picking up stitches again, around the entire neckline. 150 stitches to be exact.
I had a really loose cast on stitch in the middle of the left and right fronts, so I opted to pick up stitches a little deeper in the V.
I ended up redoing just the pick-up portion at least twice.
And then for the life of me, I couldn’t figure out how to shape the V-neck to create those nice center stitches when the collar ribbing was a 1×1 pattern.
To be honest, I find Ozetta’s videos a little light, so I dug around until I found tutorials that had voice over instructions.
I think it’s just because I was a complete beginner though – other people didn’t seem to have any issues!
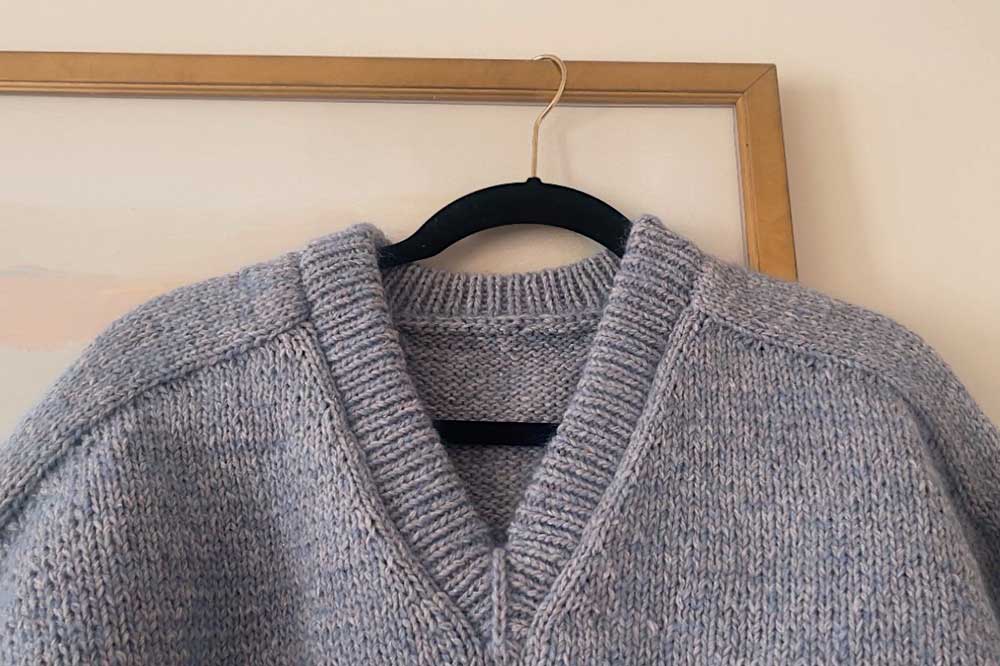
I had to frog and redo the collar 5x before getting the hang of it
1 x 1 Ribbing
My main confusion stemmed around the 1×1 pattern on either side of the center stitch.
When the V is followed by a purl, you ignore and knit the stitch right after the center stitch. Once I tried that, I started seeing the nice V-shape take effect.
For the collar, I also learned how to knit combination, knitting the knits western but the purls eastern.
I found that this created a much nicer, more uniform rib pattern.
Double Folded V-Neck Collar
I also was very confused by how to knit the double collar so that the upper portion perfectly matched the lower portion.
This reddit post has a photo of the exact same issue I was running into.
Essentially, you form the V shape by decreasing stitches flanking the center stitch, so that the collar starts to taper in. I did this for 11 rows.
Then, you start to add increases, so the collar starts to flare out – kind of like a hourglass.
But, while the lower portion of decreases looks really nice and uniform, the upper half of increases looked really tight – definitely not a mirror image.
I searched endlessly to see if anyone had solutions but it seems like most people make double folded round collars, not double folded V-necks.
I think the unevenness stems from the way you make increases.
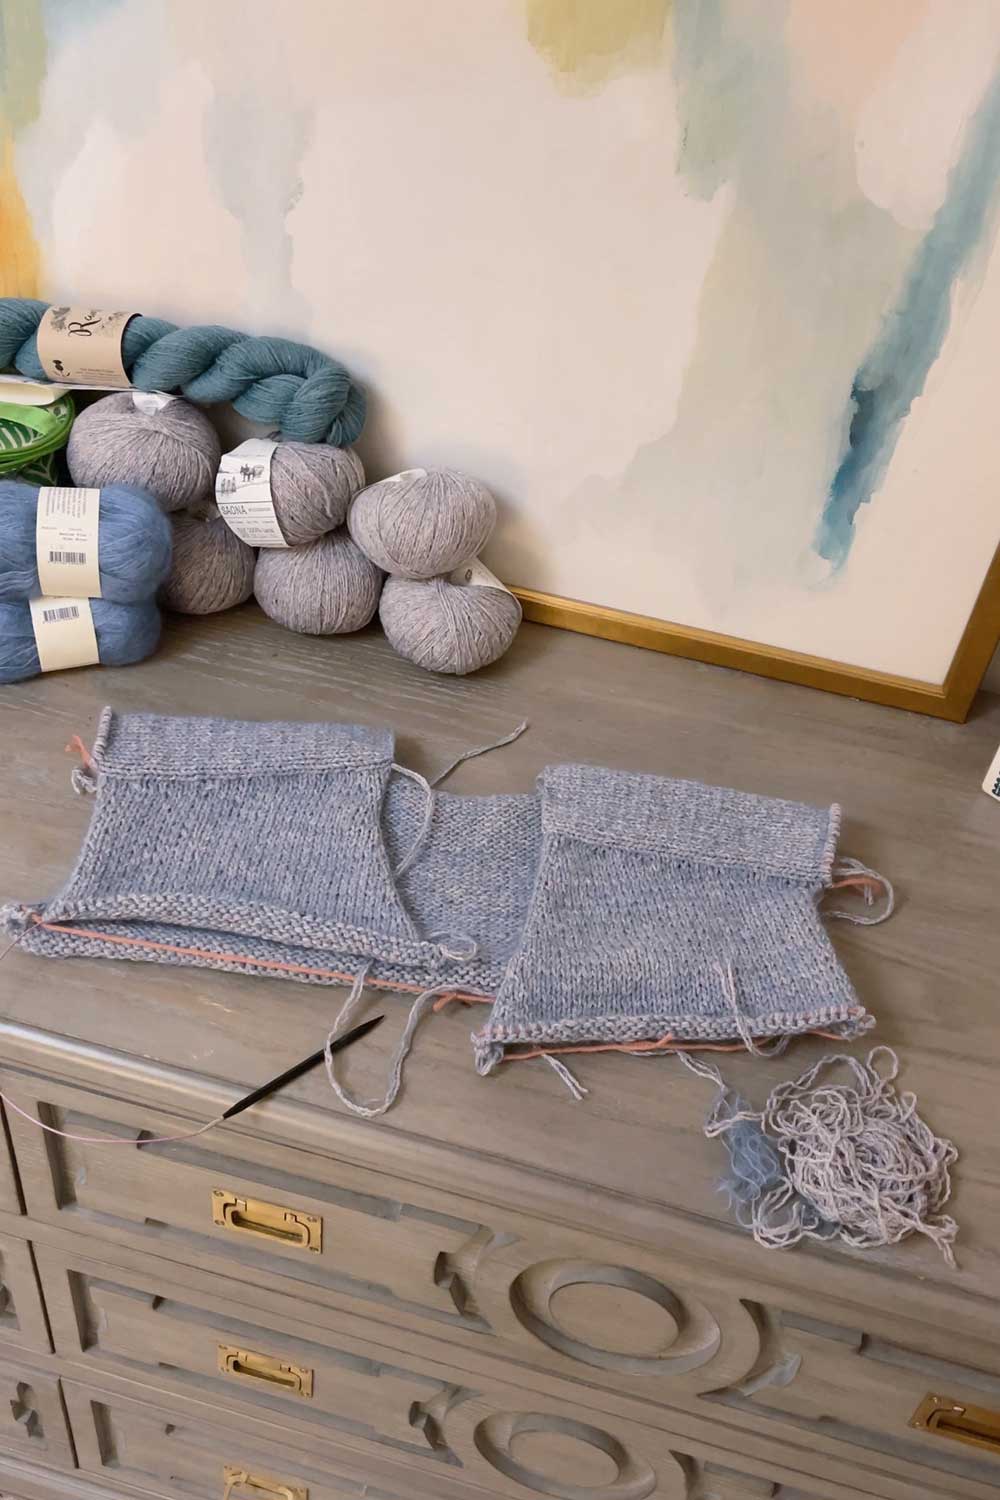
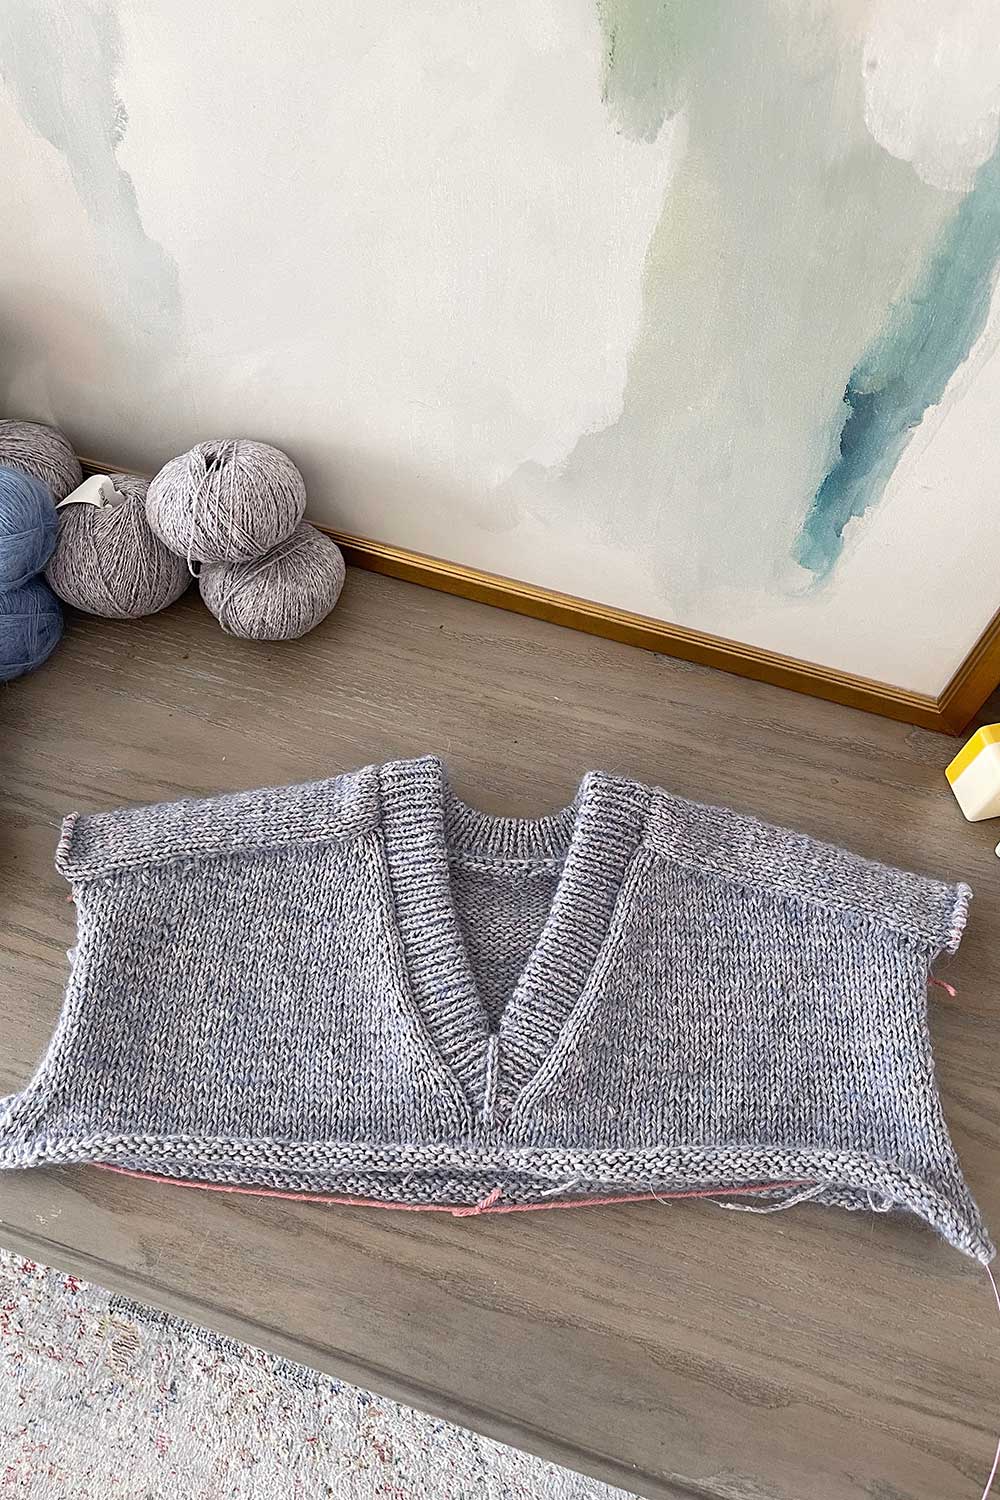
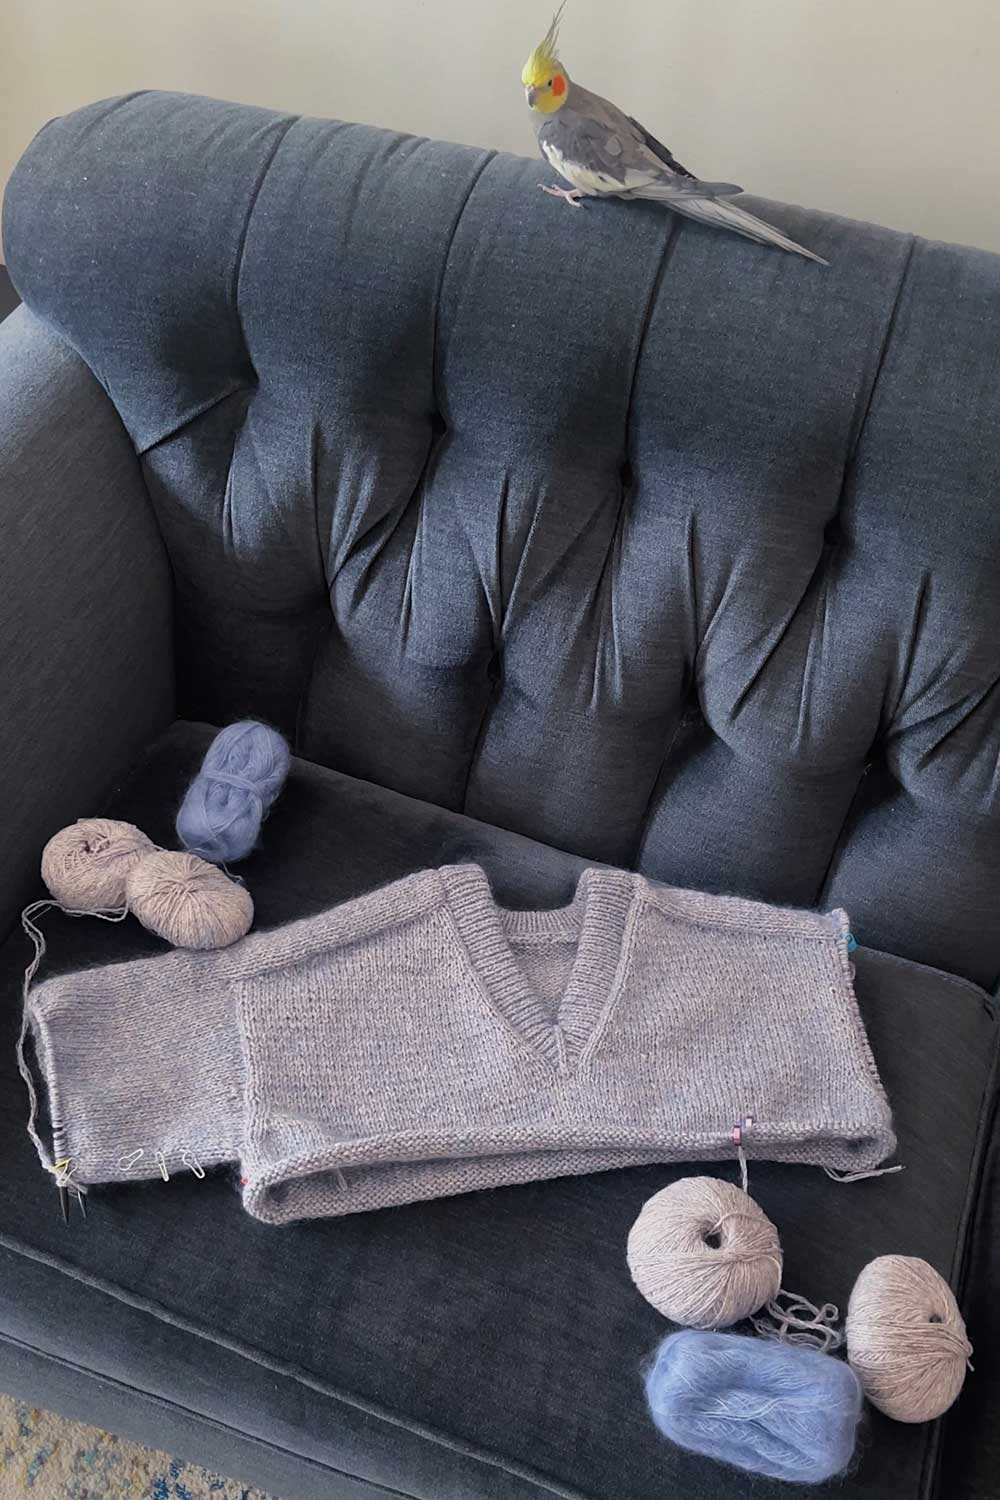
the top of the sweater slowly coming together
Make One Right vs Right Lifted Increase
M1R and M1L take shape by pulling up the bar in-between stitches, where there isn’t much slack so the increases become incredibly tight.
I ended up making lifted increases (RLI + LLI) instead. These increases work by creating new stitches out of the legs of existing stitches.
While they were still tight, they weren’t as dense as the M1R/M1L.
I decided to push through and knit all 11 increase rows, and once the upper portion is folded down and bound off on the inside, you can’t see the visual differences.
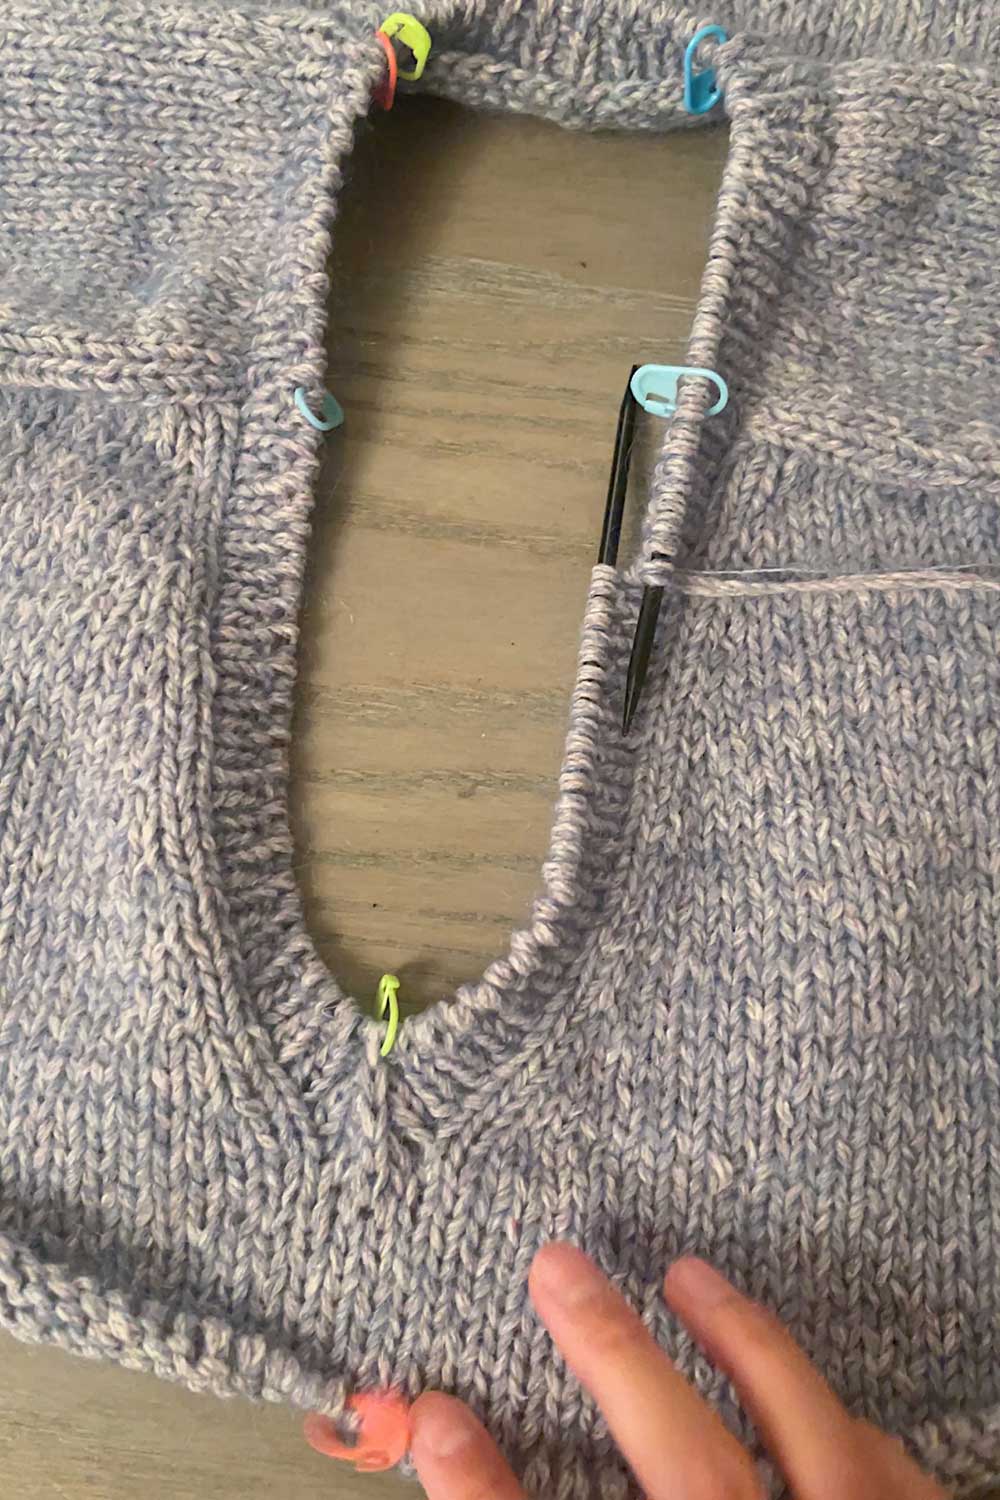
Creating a V-Neck
I kind of wish my V-neck came to a more definitive pointed V on the center seam, the way the pattern photo looks.
But I looked at the finished projects on Ravelry and noticed most had the same gap as mine..
So, I’m not sure how to fix that.
- Is it due to the way I picked up stitches?
- Is it from how you sew down the collar on the inside?
Maybe I’ll try another pattern V-neck in the future to see if there’s a better method of making a neat double folded V-neck.
In total, I spent a week bogged down in the collar, re-doing the 1×1 rib and V-neck over and over.
But I’m pretty proud of my finished collar!
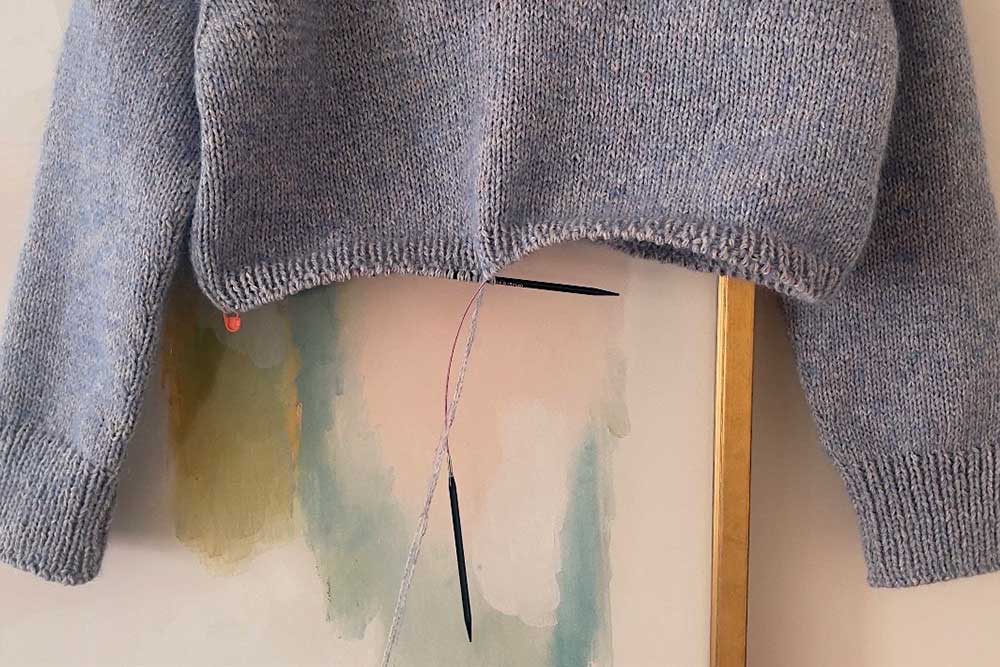
the home stretch! I bopped around and did the collar and sleeves before finishing the body
Short Rows
I had some big mistakes making short rows on the front yoke.
I didn’t realize you have to pull the double stitches very tight, and so I have some strange crosses and gaps in the upper front of the sweater.
I watched a couple more video tutorials until I got the hang of it, and by the time I knit the sleeves, I had fixed a lot of tension and short row issues.
So my two sleeves are knit much more neatly than the front of the sweater, ha.
Part of me wishes I had taken the time to frog and re-knit the yoke, but it’s too late now.
I will forever stare at the sweater and internally groan at how the front looks so much wonkier than the sleeves, ha.
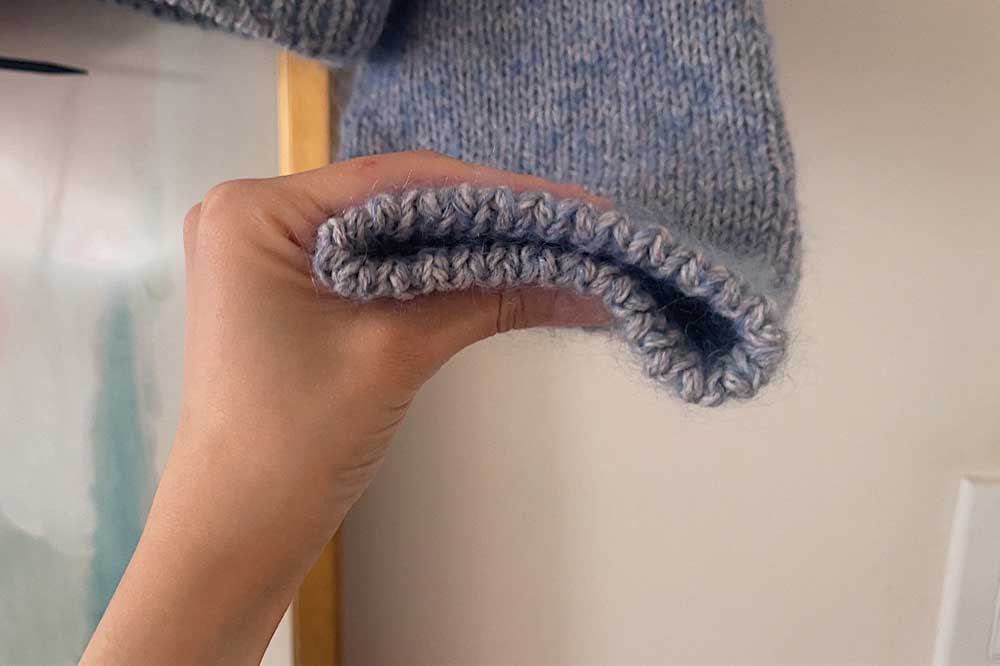
attempted the Italian bind-off! I like how it creates a plump squishy edge to the cuffs
Modifications
Overall, the pattern was very clear and well written – even for a complete beginner!
The only real modification I made was in the sleeves.
I picked up 4 more stitches on each sleeve, right under the arm, to prevent gaping or holes.
Then I knit a row to decrease the extra picked up stitches before starting the German short row shaping.
I also found the sleeve were slightly short so I added an extra 10 rows to each sleeve (~2 inches) before beginning the ribbing.
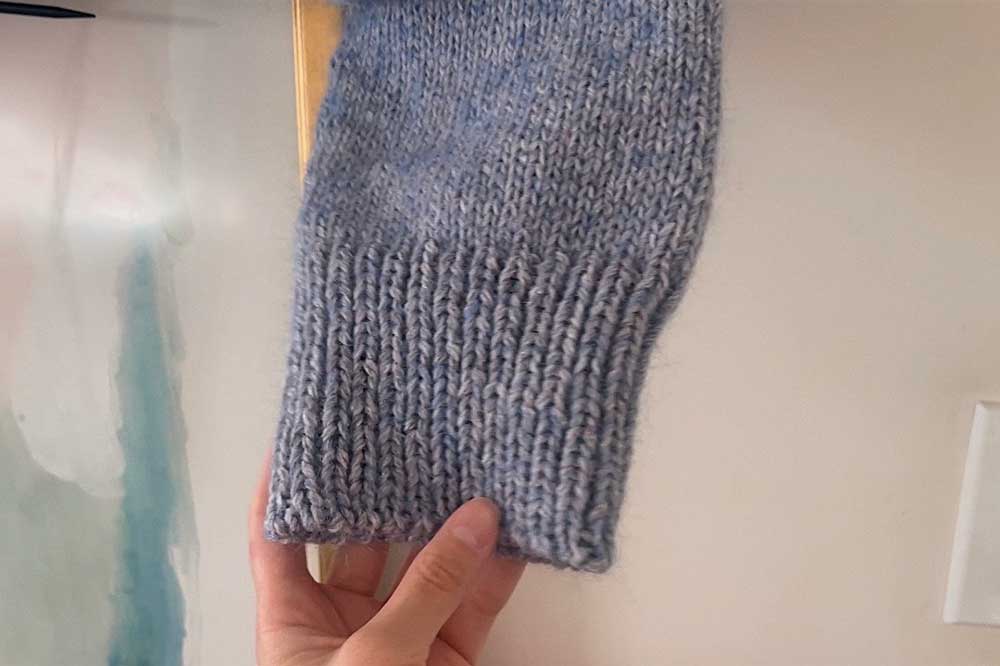
I extended the sleeve length and did combination ribbing
Overall, I thought the sweater pattern was fantastic – it’s just the right amount of ease (10”) and relaxed-ness that I like in my knitwear.
I dug out one of my favorite sweaters and compared the Lakes pullover to it as I knit.
I found doing this really helpful, to gauge if the final finished object would have the fit, length and ease that I was looking for.
Doing it along the way also allowed me to make modifications in real time.
Finding this post helpful?
Support me by buying me a coffee on Ko-fi!
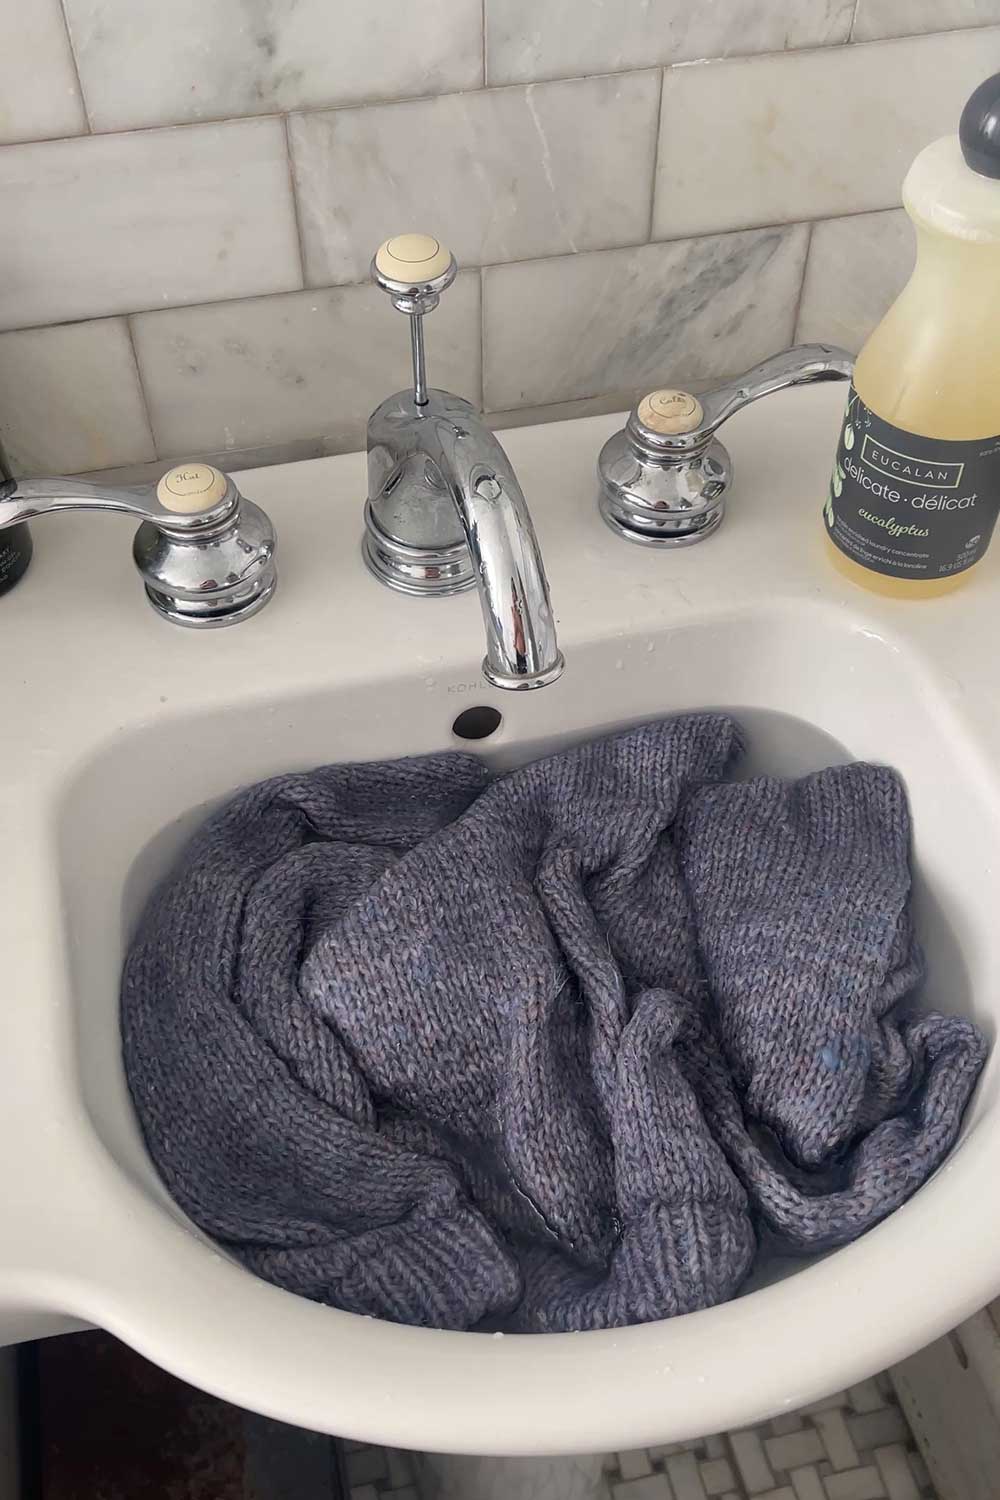
Blocking
I picked up this bottle of wool wash to wash my finished sweater.
Having never blocked anything before, I was a little nervous to try..
I debated doing a preliminary block once the length of my sleeves was where I wanted them (blocking before starting the sleeve cuffs).
That way, if the sleeves were still short, I could add more length before doing all the ribbing.
In the end I just decided to go for it and err on the side of making the sleeves longer rather than shorter.
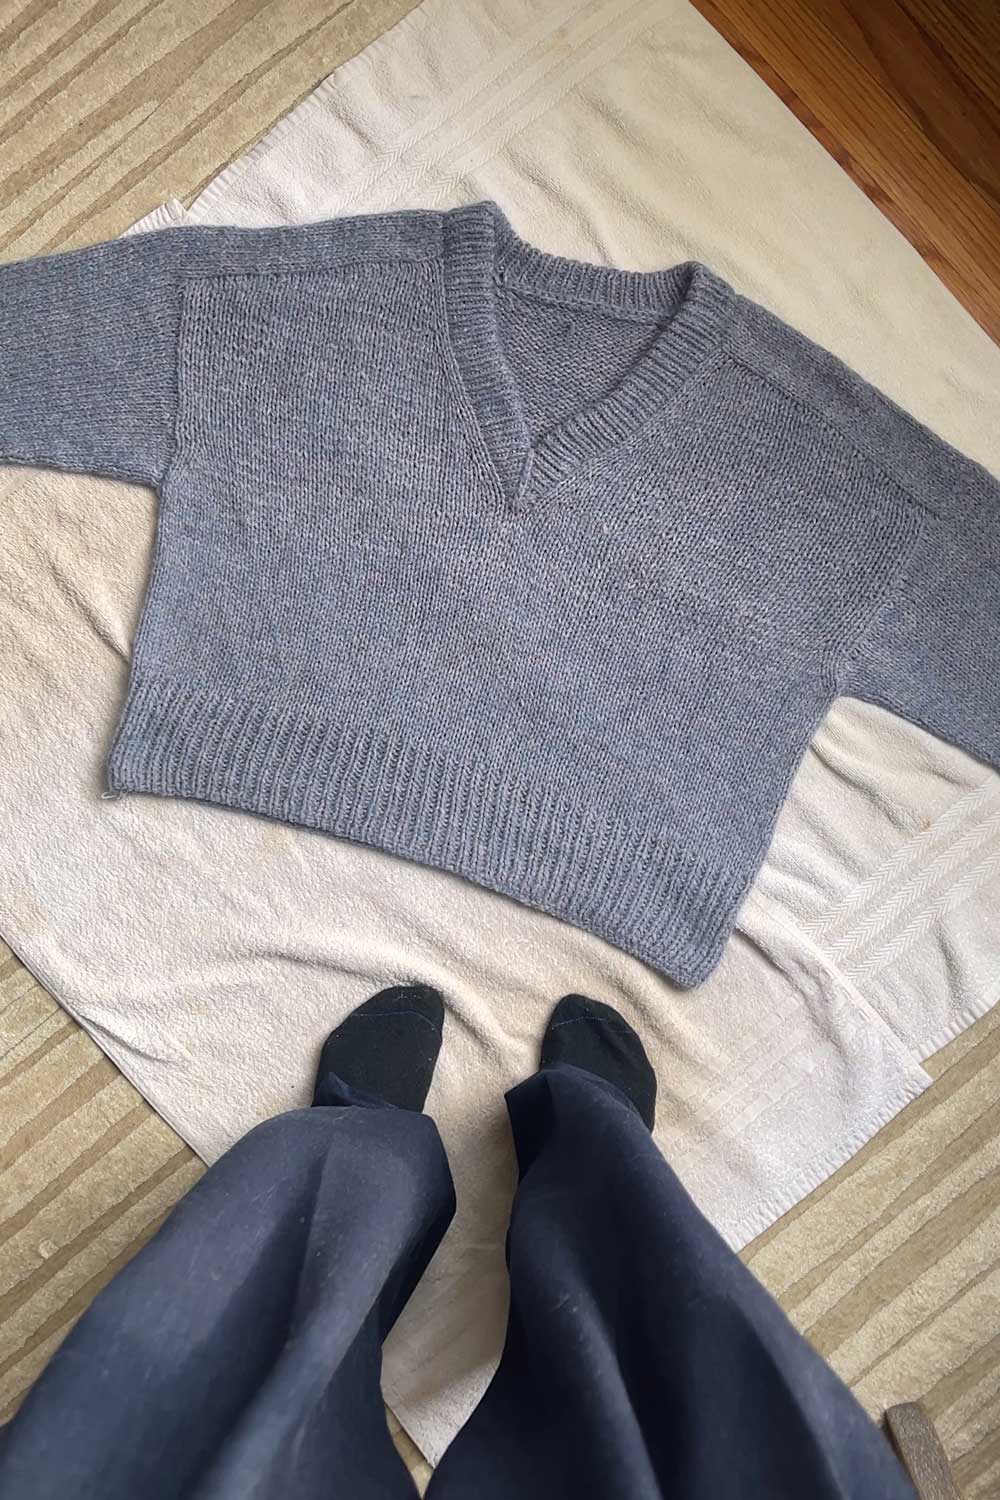
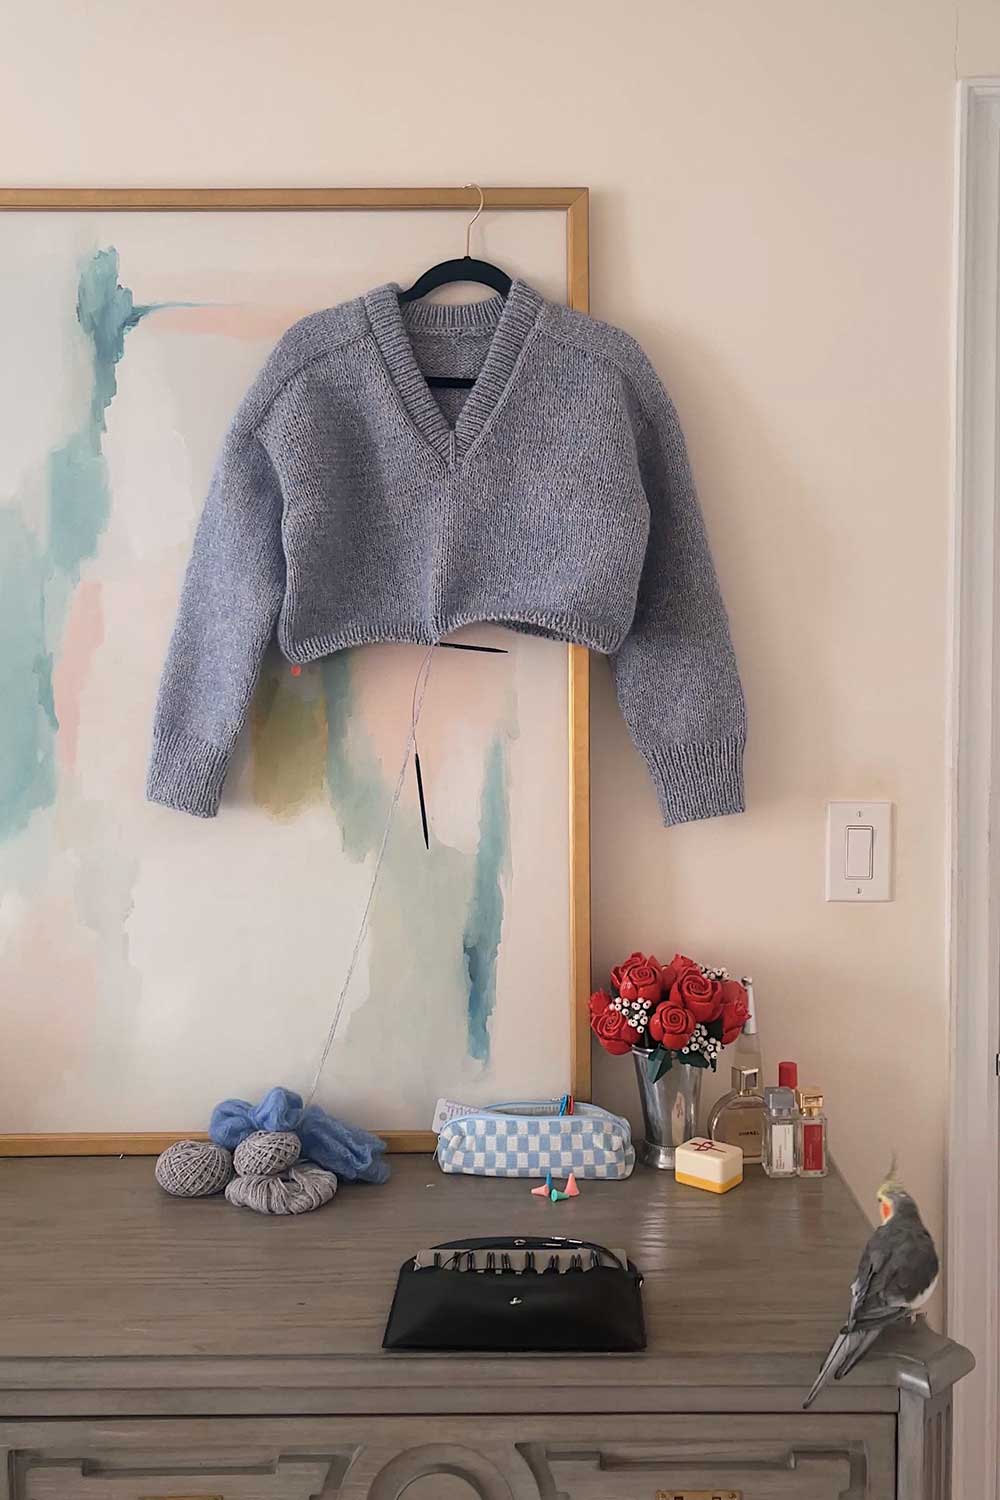
pre blocking!
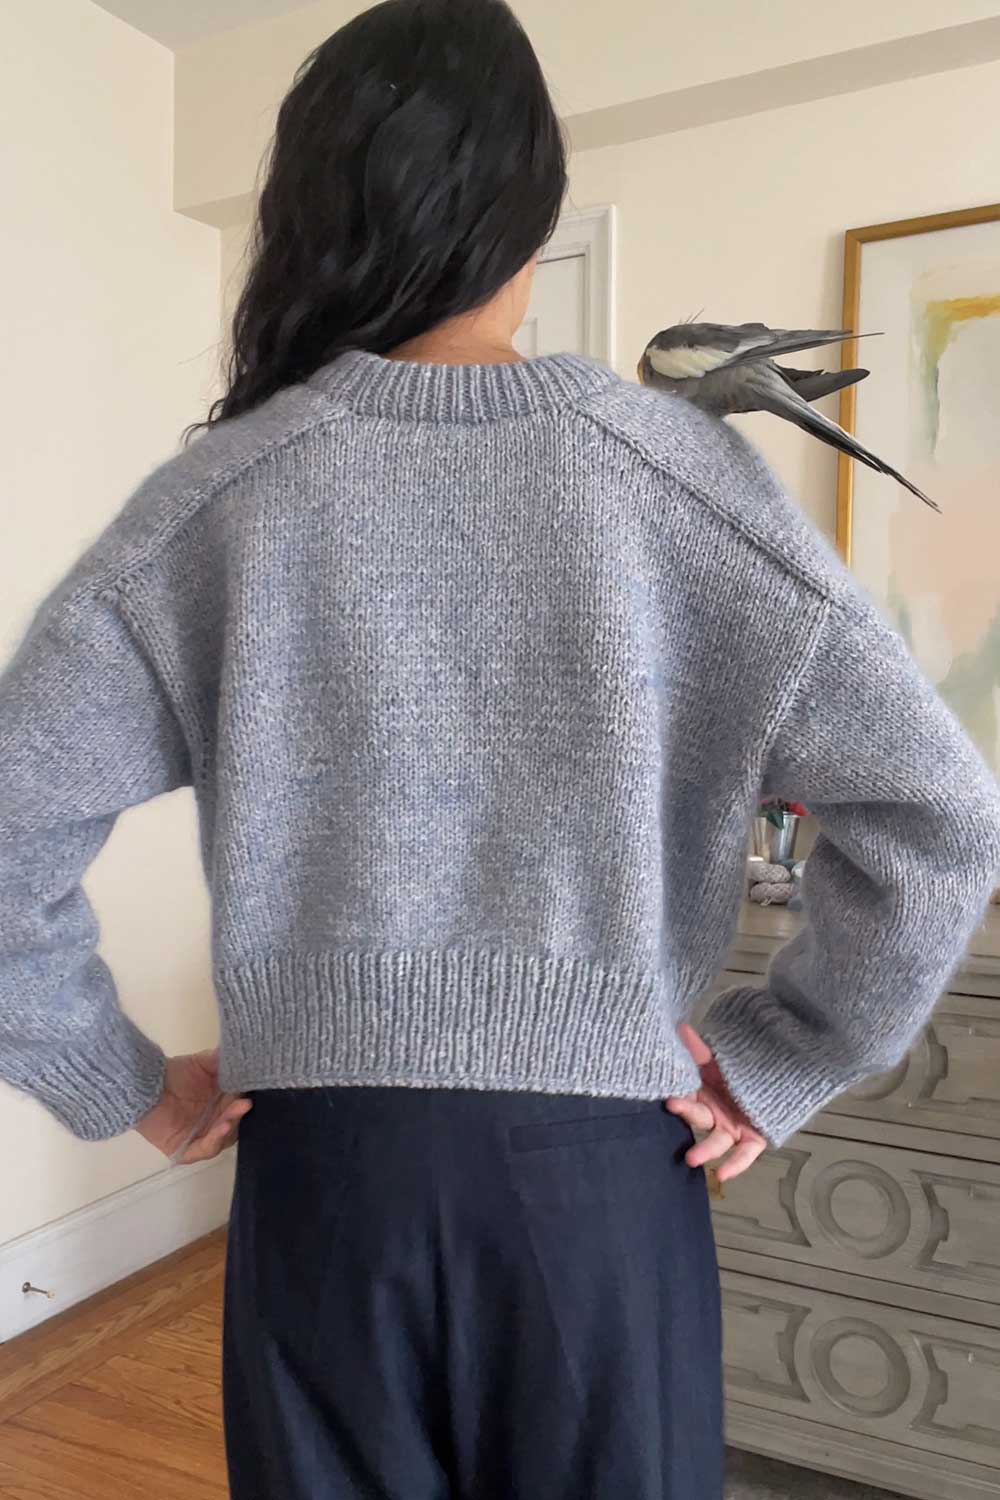
Final Thoughts
Overall, I thought this pattern was very doable – even for a beginner brand new to knitting.
I do wish my skills were a little more refined since I think you can see my tension issues as the sweater takes shape from top to bottom, ha.
But overall, it was very fun to make and definitely a versatile, everyday sweater that I’ll wear often!
| Difficulty | 1/5 |
| Final Product | 5/5 |
| Yarn | Wooldreamers Saona in Fratelli – 5/5 |
| Biches & Bûches Le Petit Silk & Mohair in Medium Blue 4/5 | |
| Fit | 5/5 |
Follow me on
Youtube | Tiktok | Instagram | Ravelry | ShopMy
![]()

Hi! I just read your blog post and I wanted to see what you think of the mohair you used now that you’ve gotten to wear the sweater a bit. Do you find the mohair itchy? I’m planning on making this pattern with this specific yarn combination and I would love to know how it actually feels like when wearing it.
I’m also wondering if either of you found the yarn combo itchy. Love the look!
Author
oops realized i never replied! i did a longer tiktok on it, but i don’t find it itchy! its very soft but i also always wear a base layer underneath sweaters
i’m obsessedddd with how your sweater came out!!!!! you absolutely knocked it out of the park it looks incredible on you! i love the colours you chose, the blue makes it so unique!