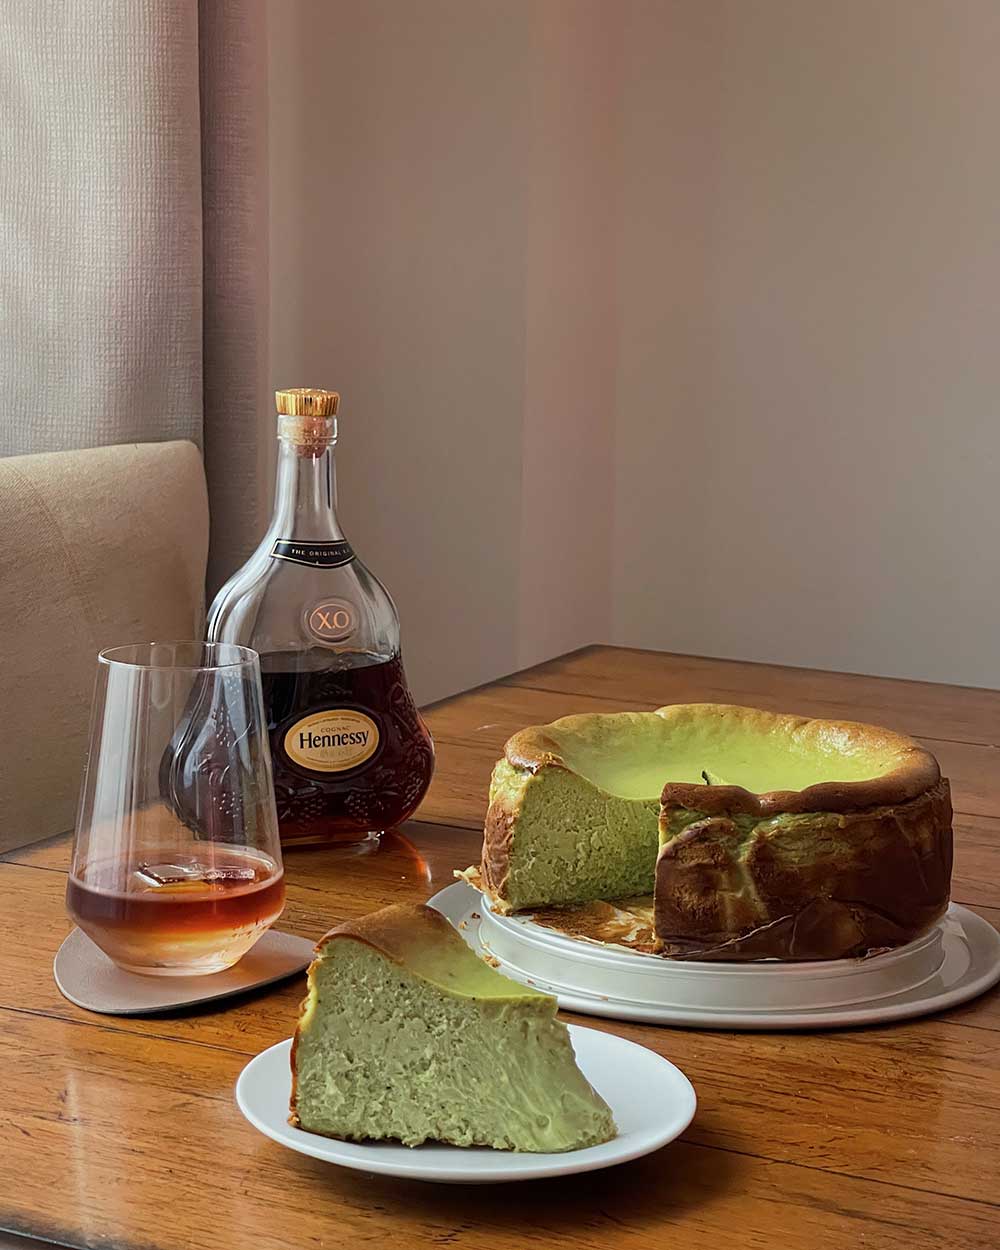
Matcha Basque Cheesecake
Growing up, my mom used to make a New York style cheesecake. It’s delicious, but time consuming, requires a ton of ingredients and a difficult bake.
I’m not much of a baker (and hate following directions) so when I discovered basque cheesecake, I was hooked!
This burnt style of cheesecake was created in Spain’s Basque region and is just as good as traditional cheesecake but impossible to mess up – it’s supposed to look burnt, cracked and rustic.
For a twist, I added matcha powder to make a matcha flavored basque cheesecake.
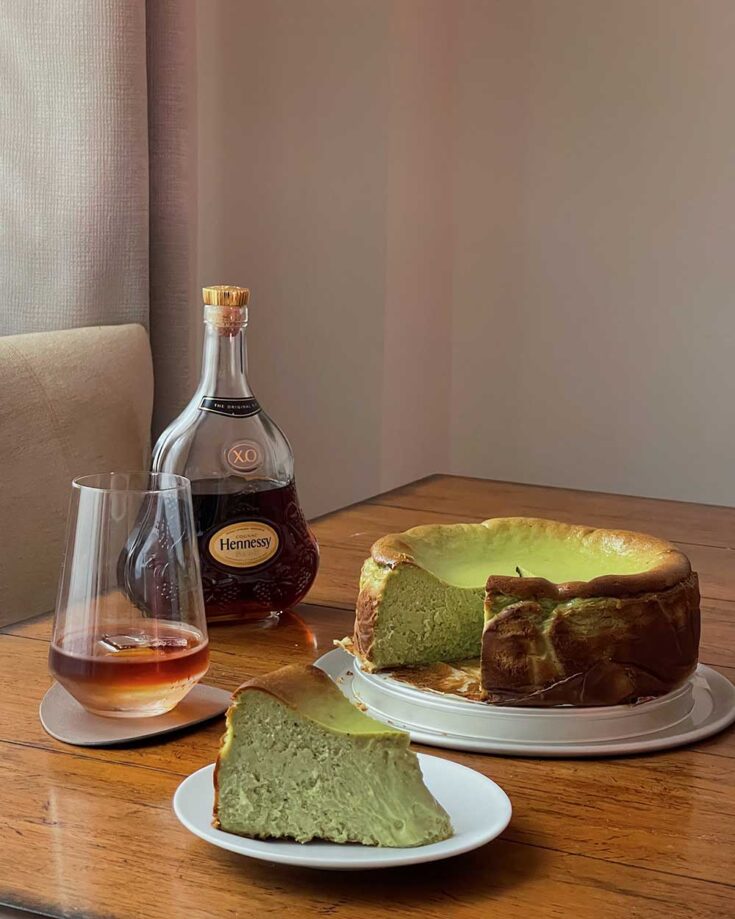
I love matcha anything, but especially matcha desserts, so this is kind of a Japanese meets Spanish twist. The green tea powder adds a subtle earthiness that balances out the creamy custard.
And of course, the vibrant green makes for a distinctive look!
Burnt Cheesecake
Burnt cheese was created by chef Santiago Rivera in San Sebastian, Spain. It’s a relatively new recipe (developed in the 90s) that breaks all the rules of traditional cheesecake, but somehow still tastes delicious.
The inside is really creamy and light.
But the outside is iconic – burnt, tall and cracked.
Matcha Basque Cheesecake Recipe Video
@shershegoes matcha basque cheesecake + a glass of cognac always hits ✨ #basquecheesecake #matchacheesecake #matchadesserts #matchaburntcheesecake #cognac
What You’ll Need
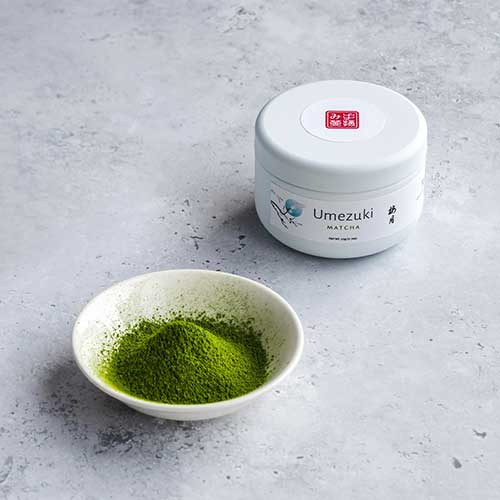
Good quality matcha powder
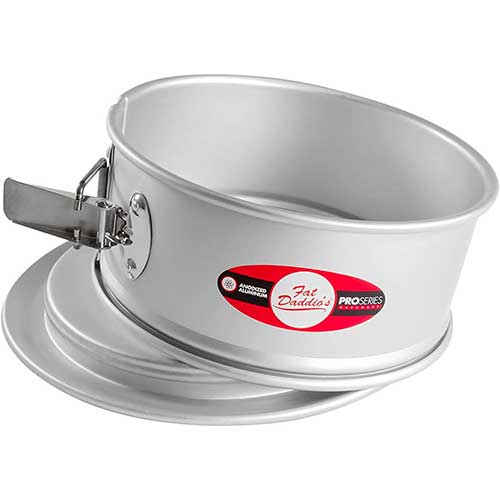
This cheesecake rises a lot during baking, so I do recommend a high 10″ springform pan like this one.
Still, if you have a smaller pan try the recipe anyway and just make sure to line with parchment paper (standing up along the sides).
Use a baking tray underneath to catch any potential drips.
Cheesecake and Cognac
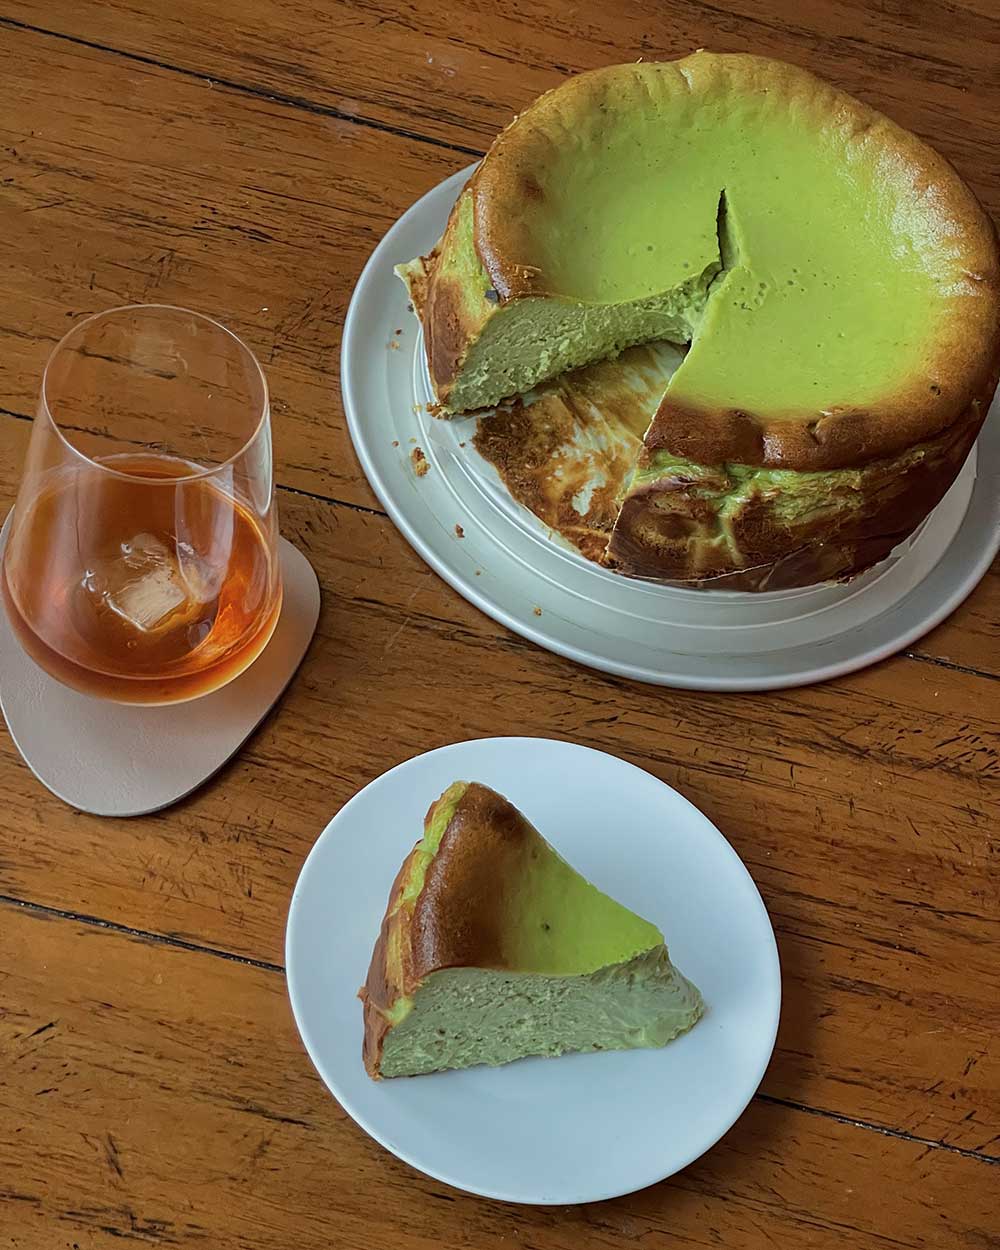
This basque cheesecake recipe is quite rich, thanks to the 6 eggs and 2 cups of heavy whipping cream. It tastes nice and light though, don’t worry!
Anyway to cut the heaviness, basque cheesecake in Spain is often served along with a glass of Spanish sherry, a sweet dessert wine.
Personally, I love whiskey and cognac.
A whiskey like Dalmore’s 12 year is aged in Spanish sherry casks so it has a sweeter finish, and a 10 year aged cognac like Henessey XO is also quite sweet.
Try a slice with any of these and see what you think! :)
Tips and Tricks for Baking Cheesecake
Make Sure Your Cream Cheese is At Room Temperature
For the best possible texture, all your ingredients should be at room temperature – especially your cream cheese.
I made this on Thanksgiving and was impatient and used cream cheese right out of the refrigerator. It completely affected the batter and the mixing process, so don’t make my mistake!
Cold cream cheese won’t mix as easily, will gunk up your whisks and can create lots of lumps.
As a quick fix, you can microwave the cream cheese to help warm it up!
Use a Good Quality Matcha
The first time I made this, I used some old matcha powder that I already had.
It was a little too dark in color and didn’t have much flavor.
The second time, I used a fresh packet of matcha that I had just gotten (this one from Tezumi). It was a bright vibrant green and the batter immediately smelled intensely earthy and bright.
Try to use fresh matcha for the best results!
How to Prevent Lumps in Cheesecake
You want your batter to be liquid-y smooth.
Since you’re adding flour (and very little of it) only at the last step, you don’t have to worry about over mixing.
In fact, it’s best to mix the batter thoroughly at each step before moving on to the next ingredient.
And, make sure to scrape down the sides of the bowl so you’re always incorporating all the batter. My mixer came with this handy scraper tool, but you can also use a rubber spatula.
Make Sure to Release Any Air Bubbles
After you pour your cheesecake batter into the springform pan, give the pan a little wiggle back and forth and gently bang it on your countertop to ensure that the batter settles evenly.
You want the batter to look smooth and even.
If you see tiny bubbles on top, you can also pop them.
I’ve always used a mixer to make this cheesecake, but recently I saw on tiktok that mixing by hand with a rubber spatula will create fewer air bubbles. So no need for any fancy gadgets, you can make this cheesecake by hand!
Is Parchment Paper Necessary?
Yes.
This is a souffle style cheesecake that will puff and rise rapidly in the oven, then deflate. So if you’re using an 8″ x 3″ pan like my recipe calls for, the batter will top it and the parchment paper helps keep the cake’s structure.
Let the parchment paper stand up instead of folding it down the sides.
I use a pan with higher sides (3″) but if you have a traditional springform pan, you can use that and the parchment paper will help.
I find greasing the sheets of parchment helps them to lay neatly on top of each other.
In any case, the look doesn’t matter too much. This is a ‘rustic’ style cheesecake with a burnt top and roughened edges, so don’t worry if the parchment is a little messy.
Crank your oven high.
If you’re not achieving the signature brown crust on top of your cheesecake, your oven likely isn’t hot enough. There’s a couple ways to try and adjust things:
- You can try pre-heating the oven extra hot to 500ºF for 30 minutes before your bake.
- You can also use a convection oven to circulate air and help evenly distribute hot air all around the oven
- You can move your rack higher (heat rises so the top of the oven is usually hottest)
Basque cheesecake is a bit like a souffle – it will rise rapidly in the oven and then deflate. So just make sure there’s enough room at the top for your cake to rise without touching the top of the oven or for the parchment paper to burn.
And try not to open the oven door during the bake, even to check on doneness!
Anytime you open the door, you cool the oven and affect the internal temperature. It’s ok if the cheesecake is slightly underbaked honestly.
How to Get the Burnt Top
My basques cheesecakes usually are on the lighter side, and not so burnt.
I like it that way, especially for this matcha basque cheesecake recipe, so that you can see the green color. But, if you want the burnt top and are having trouble getting it to burn nicely, check your oven.
Every oven runs a little differently, and it can also depend on your elevation.
Using an oven thermometer helps, and also just trial and error over time.
In the beginning I made the mistake of thinking a non-burnt top meant the cake wasn’t done, so I kept baking it longer and longer. Don’t make my mistake!
Even if the top isn’t burnt enough or the cake wobbles and jiggles, don’t keep baking. I ended up with overcooked cheesecake that tasted slightly egg-y and it wasn’t great ha.
To get the top to burn, you can pre-heat your oven at a higher temperature (500 to 550ºF) and then bake as normal.
Or, you can adjust your oven racks to raise your cake to the upper portion of the oven where it’s hotter.
Troubleshooting Texture
This cheesecake should be creamy and custardy. And, it needs to completely cool then be chilled before serving, so I usually make it a day in advance.
The final texture of your cheesecake can vary from oozy to firm.
It likely just needs some adjustment with the bake time. I’ve found that the sweet spot for my oven is 65 minutes, but you may find anywhere from 50 to 70 minutes works for your oven.
My Cheesecake Keeps Cracking
My cheesecake definitely cracks sometimes and I don’t mind.
That’s because the cake batter is rising high in the oven, unevenly, and then as it cools and falls, cracks form.
If this bothers you, try hand mixing with a bowl and spatula instead of a whisk or electric mixer. The less air you’re introducing into the batter, the more smooth and even the texture.
Make Ahead to Chill and Serve at Room Temperature
Cheesecake generally needs to be made in advance, so it has time to chill in the fridge and firm up. That makes it easier to slice and also helps firm up the texture.
When cutting it, I run the knife under warm water so it cuts nicely through the thick cheese.
Also, in between slices, you can clean off the knife in a paper towel and rinse in a cup of warm water so each slice is cut with neat sides.
Matcha Basque Burnt Cheesecake
Ingredients
- Unsalted butter or spray oil (for pan)
- 2 lb. cream cheese, room temperature (4 packs of 8 oz cream cheese)
- 1½ cups sugar
- 6 large eggs
- 2 cups heavy cream
- 1 tsp. kosher salt
- 1 tsp. vanilla extract
- 2 tbsp. matcha powder
- ⅓ cup all-purpose flour
- Cognac (for serving; optional)
Instructions
- Grease pan (using either unsalted butter or oil spray).
- Line the pan with 2 overlapping sheets of parchment and make sure the parchment comes at least 2" above the top of the pan around the full circumference.
- Place a rack in the middle of oven and preheat to 400°. Place pan on a rimmed baking sheet to catch any overflow.
- Beat cream cheese in stand mixer on medium speed. Make sure your cream cheese has been thawed to room temperature (you can zap it in the microwave to quicken the process).
- Add in sugar and continue mixing until fully dissolved (2-3 minutes).
- Occasionally scrape down the sides of the bowl so your mixture is very smooth, without any lumps.
- Start adding your eggs, one at a time. Beat each egg for roughly 15 seconds to ensure they're incorporated in the batter before adding the next.
- Add cream, salt, vanilla. Beat on medium until combined, about 30 seconds to 1 minute.
- Turn off mixer and sift matcha powder into batter using a fine mesh sieve. Beat on low speed until the mixture is a light, bright green. This may take a while as matcha is a powder and can clump if not mixed thoroughly.
- Sift flour into the batter and beat until the mixture is smooth and silky. Again, scrape down the sides of the bowl so everything is incorporated. We want a lump free cheesecake!
- Pour batter into your prepared pan.
- Ensure there are no air bubbles by tapping the pan on your countertop and jiggling it back and forth.
- Bake cheesecake until golden brown to burnt on top, roughly 50-65 minutes (depending on your oven). I baked mine for 65 minutes. It's ok if the center is still quite jiggly.
- Let the cheesecake cool until room temperature.
- Refrigerate cake until firm, then un-mold and carefully peel away the parchment paper from all sides.
- Slice and eat! Serve with a glass of cognac, sherry, cava or whiskey.
Notes
I've made this recipe three times now and it's a winner every time - easy, flavorful and rich. I also like that the end result is supposed to be rustic so even in the instances where I've messed up... no one can tell!
Recommended Products
As an Amazon Associate and member of other affiliate programs, I earn from qualifying purchases.
Nutrition Information:
Yield:
14Serving Size:
1Amount Per Serving: Calories: 475Total Fat: 37gSaturated Fat: 22gTrans Fat: 0gUnsaturated Fat: 12gCholesterol: 186mgSodium: 333mgCarbohydrates: 28gFiber: 0gSugar: 25gProtein: 8g
All information presented and written is provided as an estimate only. This information is intended for informational purposes only and comes from online calculators. Although we make every effort to provide accurate nutritional information, these figures are only estimates and should not be relied on for medical advice, diagnosis or treatment.
adapted from Bon Appetit and Just One Cookbook
Follow me on
