This riff on a traditional Basque cheesecake has espresso for extra-strong coffee flavor and coffee liqueur for a hint of creamy vanilla and chocolate touches.
Coffee Burnt Basque Cheesecake
I’ve made Basque burnt cheesecake many times, but was in the mood for something different.
So I thought I’d make a coffee flavored version!
Basque cheesecake is incredibly easy to make and always a crowd pleaser, so it’s one of those desserts that I make quite often.
And, since the base recipe is pretty simple, you can add whatever variations you want for a fun twist.
Previously I made this matcha basque cheesecake version, a plain version with raspberry jam and I also tried an ube version for a colorful purple cake.
I was making my morning coffee when I realized… coffee cheesecake would be so good!
So here’s how to make a coffee basque cheesecake.
Basque Cheesecake
Traditional cheesecake is a bit tricky to make.
It requires multiple different types of cheese, a water bath bake and a separate crust recipe. While it tastes great, it’s just too much work (imo!)
So, I’m a big fan of basque cheesecake.
Basque burnt cheesecake is a twist on classic cheesecake.
Created by a Spanish chef in San Sebastian, it’s a recipe that defies all the rules of traditional cheesecake but still tastes creamy, light and delicious.
The outside is meant to be tall, browned and cracked, so even if you make a mistake, no one will know :)
And plus, this recipe is so easy.
Honestly, the longest part of making it is waiting for all the ingredients to get to room temperature.
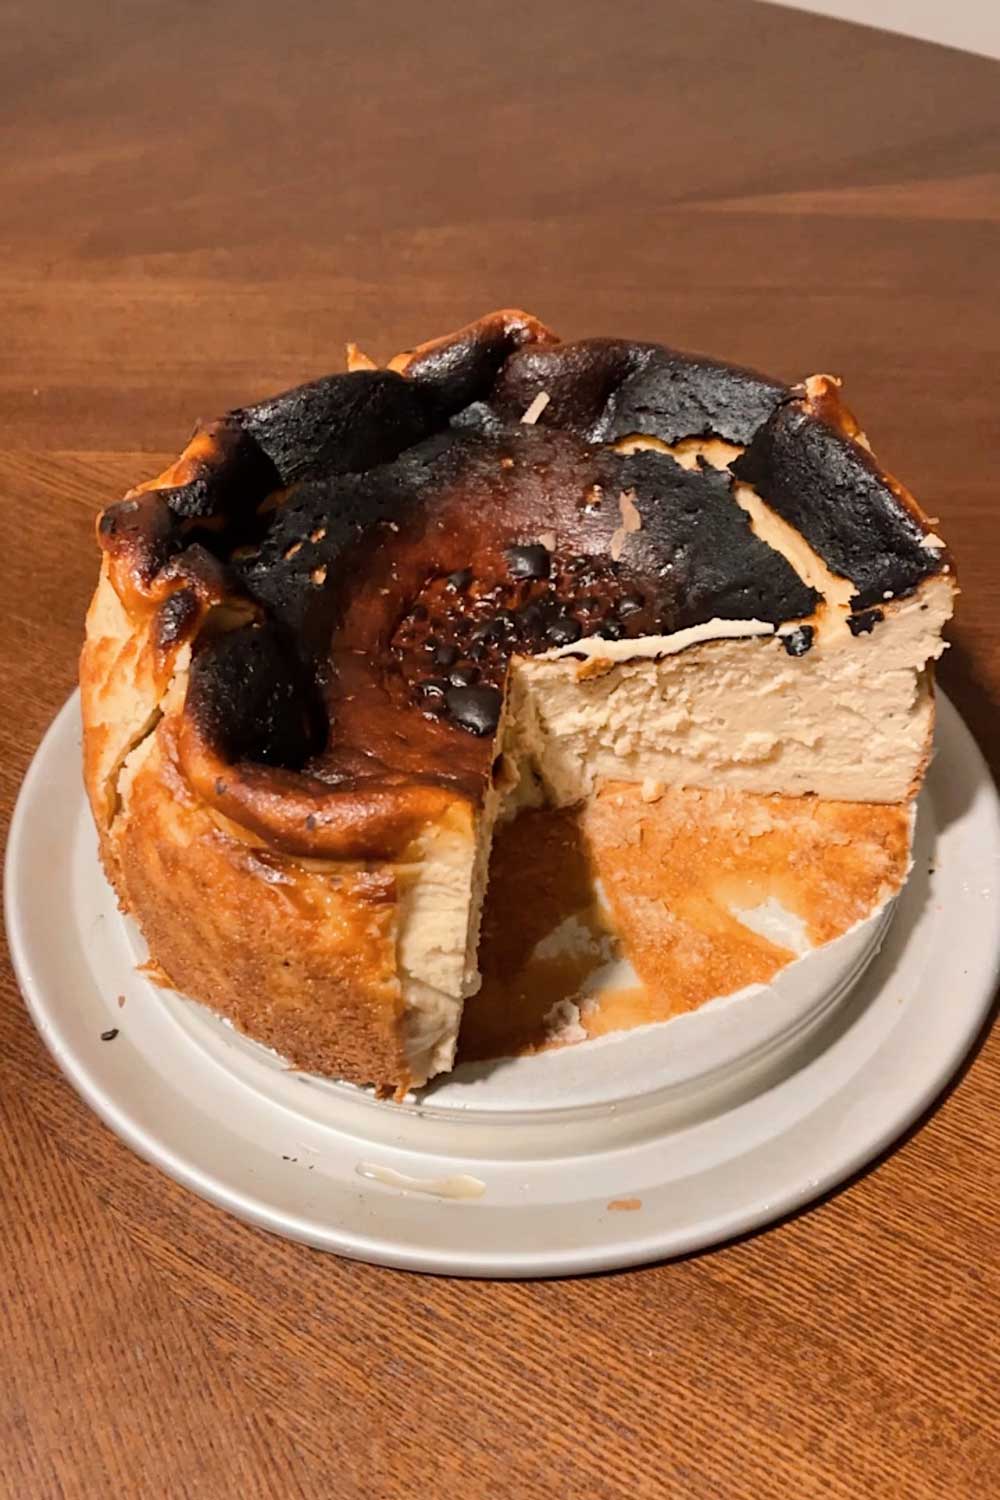
The final cheesecake is rustic, flavorful and not too sweet.
Coffee Basque Cheesecake Recipe Video
@shershegrows maybe my fave variation yet ☕️☕️☕️ #espressocheesecake #basquecheesecake #coffeecheesecake #burntbasquecheesecake #ankarsrum
What You’ll Need
Strong espresso
Coffee liqueur
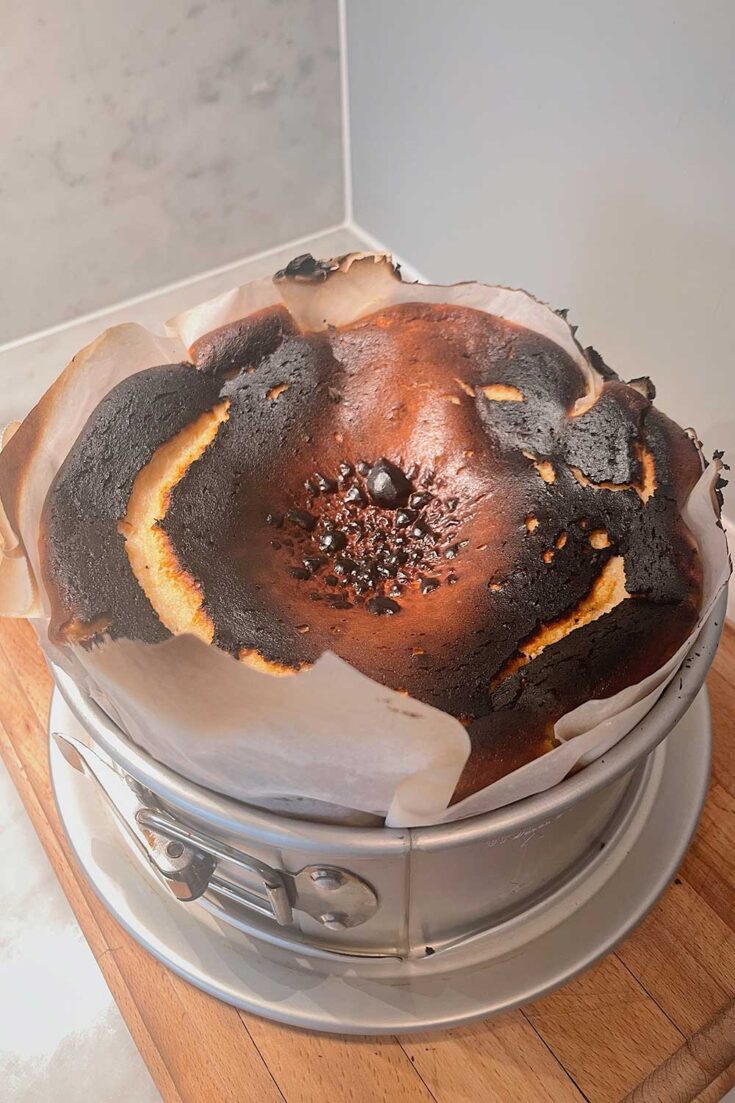
This cheesecake rises a lot during baking, so I recommend a springform pan with high sides.
Use a baking tray underneath to catch any potential drips.
To give it a strong coffee, almost tiramisu like flavor, I used both espresso and coffee liqueur.
Tips and Tricks for Baking Cheesecake
Use Room Temperature Cream Cheese
Since the main ingredient in this dessert is cream cheese (a whopping 2 pounds of it), make sure it’s at room temperature before you start.
I like Philadelphia cream cheese for the best flavor.
You want it to be spreadable, so that the batter has a nice smooth texture.
Cold cream cheese won’t mix as easily, will gunk up the mixer whisks and create lots of lumps.
If you forget to take the cream cheese out, you can zap it in the microwave to warm it up faster!
Use a Strong Espresso
To give the cheesecake its coffee flavor, I used two shots of espresso from my Nespresso.
I have this machine and use the espresso capsules (I don’t recommend the vertuo coffee-style capsules).
If I were to make this again, I’d use the ristretto setting for more intense espresso shots with less water.
If you have one of those Breville coffee machines, even better! The fancy professional coffee-shop machines make a much stronger shot of espresso.
If you don’t have a coffee maker, I think cold brew or instant coffee would be good substitutes.
You want something with as strong coffee flavor as possible, without too much liquid. I’ve been using this instant coffee from Blue Bottle lately and love it.
I also added a shot of Baileys Irish Cream, which is a type of coffee liqueur.
You can omit the alcohol if you don’t want it, but I think it’s a nice touch!
Baileys is Irish whiskey mixed with Irish dairy cream, chocolate and vanilla flavor which make the final cheesecake taste kind of like tiramisu.
You could also try Kahlua, which is a rum-based coffee liqueur. Kahlua is slightly sweeter, so just taste test the batter before baking to make sure you like everything.
How to Prevent Lumps in Cheesecake
For the best texture in the final cheesecake, you want the batter to be liquid-y smooth before baking.
Along each step of the recipe, make sure to mix thoroughly.
Since you’re adding flour at the very end (and very little of it), you don’t have to worry about over mixing!
Also make sure to scrape down the sides of the bowl so you’re always incorporating all the batter.
My mixer came with this handy scraper tool, but you can also use a rubber spatula.
Release Any Air Bubbles
After you pour your cheesecake batter into the springform pan, give the pan a little wiggle back and forth.
You can also gently bang it on your countertop to ensure that the batter settles evenly.
The batter should look smooth. If you see tiny bubbles on top, gently pop them.
To be honest, my cheesecake usually has cracks and air bubbles, ha.
Use Parchment Paper
Basque cheesecake is a soufflé style cheesecake that will dramatically puff and rise in the oven, then deflate.
I use a springform pan with 3″ high sides but the batter will still rise higher than the height of the pan, so you want to line it with parchment paper.
This helps the cake keep its structure.
Grease the pan with olive oil spray or butter. Then take two sheets of parchment paper and overlap them so that every part of the pan is covered.
If you’re having trouble getting the parchment paper to lay neatly, you can also grease in between the sheets.
But don’t worry – one of the great things about these cheesecake is that it’s meant to look rustic, with a burnt top and rough edges.
So if the parchment is a bit messy, it’s fine!
Crank your oven high.
Basque cheesecake is known for its signature brown crust.
If your cheesecake isn’t getting this, you may need to turn your oven hotter. Every oven temperature varies, so you can use an oven thermometer for the most accurate reading.
You can also try:
- moving the oven rack higher (just not too high, you don’t want the parchment paper to burn)
- pre-heating the oven extra hot (try 500ºF for 30 minutes before you bake)
- broiling the cake for 1 minute at the very end
Also, try not to open the oven at all during the baking process – even to check on the color.
Anytime you open the oven, you affect the temperature.
It’s OK if the cheesecake jiggles
The cheesecake should take roughly 50-65 minutes to bake.
Take it out when the center is still a little jiggly – it’s supposed to be like that!
In the beginning I made the mistake of thinking a non-burnt top and wobbly center meant the cake wasn’t done, so I kept baking it longer and longer.
Don’t make my mistake!
I ended up with overcooked cheesecake that tasted egg-y, which was awful ha.
Let the cake cool to room temperature, then place it in the fridge for at least 4 hours (but ideally overnight).
Cooling the cake in the fridge firms up the texture so the final cheesecake should be smooth and solid.
Troubleshooting Texture
This coffee flavored cheesecake should be creamy and custardy.
It needs to completely cool then be chilled before serving, so I usually make it a day in advance.
If you’re having trouble with the texture being too jiggly, you may need to adjust the baking time.
I’ve found that the sweet spot for my oven is 65 minutes, but you may need anywhere from 50 to 70 minutes for your oven.
Use an Electric Mixer
I’ve tried making this cheesecake multiple ways:
- hand mixing with a bowl and spatula
- using an electric mixer on low speed
- using an electric mixer on high speed
I’ve found that the last option (an electric mixer on high speed) works best.
You want as smooth a texture as possible so just mix, mix, mix at every step. It gets too tiring making this by hand!
I use this Swedish style mixer, which I really love.
The motor is in the base of the machine, so it’s bottom heavy and won’t ever tip over.
It also has an open bowl shape so it’s much easier to add ingredients compared to the Kitchenaid. It’s also more compact, so it fits in my small apartment kitchen!
The stand mixer comes with two sets of whisks, a single and a double, and I usually use the double whisks for making cheesecake.
Each whisk spins on its own, and the whisk attachment spins, so it can cream eggs and batter more quickly and thoroughly.
And finally, it comes with two bowls (one stainless steel, one clear) and is great at making both bread and desserts!
Coffee Basque Burnt Cheesecake
A coffee flavored version of basque cheesecake! With two shots of espresso and a dollop of Baileys cream liqueur, this burnt cheesecake tastes a bit like tiramisu!
Ingredients
- 2 lbs cream cheese, room temperature
- 2 shots espresso
- 1 shot of Baileys Irish Cream (optional)
- 1½ cups sugar
- 6 large eggs
- 2 cups heavy cream
- 1 tsp. kosher salt
- 1 tsp. vanilla extract
- ⅓ cup all-purpose flour
Instructions
- Grease pan (using either unsalted butter or oil spray).
- Line the pan with 2 overlapping sheets of parchment and make sure the parchment comes at least 2" above the top of the pan around the full circumference.
- Place a rack in the middle of oven and preheat to 400°F. Place pan on a rimmed baking sheet to catch any overflow.
- Beat cream cheese in stand mixer on medium speed. Make sure your cream cheese has been thawed to room temperature (you can zap it in the microwave to quicken the process).
- Add in sugar and continue mixing until fully dissolved (2-3 minutes).
- Occasionally scrape down the sides of the bowl so your mixture is very smooth, without any lumps.
- Start adding your eggs, one at a time. Beat each egg for roughly 15 seconds to ensure they're incorporated in the batter before adding the next.
- Add salt, vanilla and heavy cream. Beat on medium until combined, about 30 seconds to 1 minute.
- Pour 2 shots of espresso and 1 shot of Baileys coffee liqueur. Beat on low speed until the mixture is a light caramel.
- Sift flour into the batter and beat until the mixture is smooth and silky. Again, scrape down the sides of the bowl so everything is incorporated. We want a lump free cheesecake!
- Pour batter into your prepared pan.
- Ensure there are no air bubbles by tapping the pan on your countertop and jiggling it back and forth.
- Bake cheesecake until golden brown to burnt on top, roughly 50-65 minutes (depending on your oven). I baked mine for 60 minutes. It's ok if the center is still quite jiggly.
- Let the cheesecake cool until room temperature.
- Refrigerate cake until firm, then un-mold and carefully peel away the parchment paper from all sides.
- Slice and eat!
Recommended Products
As an Amazon Associate and member of other affiliate programs, I earn from qualifying purchases.


Nutrition Information:
Yield:
12Serving Size:
1Amount Per Serving: Calories: 555Total Fat: 43gSaturated Fat: 25gTrans Fat: 1gUnsaturated Fat: 14gCholesterol: 214mgSodium: 390mgCarbohydrates: 34gFiber: 0gSugar: 30gProtein: 9g
All information presented and written is provided as an estimate only. This information is intended for informational purposes only and comes from online calculators. Although we make every effort to provide accurate nutritional information, these figures are only estimates and should not be relied on for medical advice, diagnosis or treatment.
Follow me on
Youtube | Tiktok | Instagram | Substack | ShopMy
![]()

Exactly how much is a SHOT and a DOLLOP?
Author
a shot glass is 1.5 fluid oz
Thank you. I do not drink so I don’t have a shot glass!
I’m making this for thanksgiving dinner. I’ve made several burnt cheesecakes and they’re so yummy, can’t wait to try this recipe.