I’d been eyeing the Lettuce Grow farmstand for years.
It’s a vertical, modular hydroponic garden that can grow up to 36 plants in just 4 square feet of space.
So efficient! So futuristic looking!
And I finally got my hands on one.
Here’s how to set up the Lettuce Grow farmstand and whether I think it’s an indoor garden worth buying.
Lettuce Grow Discount Code
Use SHER125 for $125 off any farmstand
Keep reading, or jump to a section:
Lettuce Grow Farmstand
The Lettuce Grow system shipped in two gigantic boxes.
Although it can be used indoors or outside, I opted for the indoor model, which comes with grow lights.
Seedlings are also included with the Farmstand, but ship about 2 weeks after the device, to give you time to set up the garden first.
Setting Up the Farmstand

I’m not a handy person, so to be honest, I was dreading setting up the system.
But the two massive boxes were taking up so much space that one afternoon, I decided to tackle the project.
I shouldn’t have worried, because setting up the Farmstand was incredibly easy and straightforward.
The entire set up process takes about 20 minutes.
Note: Lettuce Grow gives you a 90 day risk free guarantee. So you can try out the Farmstand and see if you like it. But, make sure to keep the huge shipping boxes. If you don’t want it for any reason, you’ll need the containers to ship back the machine and all their parts.
When you open the box, there’s a QR code printed right on the interior.
You can scan that with your phone camera and pull up the Lettuce Grow’s step by step instructions.
They have both a pdf guide (which I prefer) as well as video instructions.
Being able to switch between written steps and video made it all very doable!
Lettuce Grow Indoor Farmstand Assembly Guide
Here’s a video I made setting up the Lettuce Grow Farmstand.
Watch it on YouTube, or keep reading below for a more detailed setup guide!
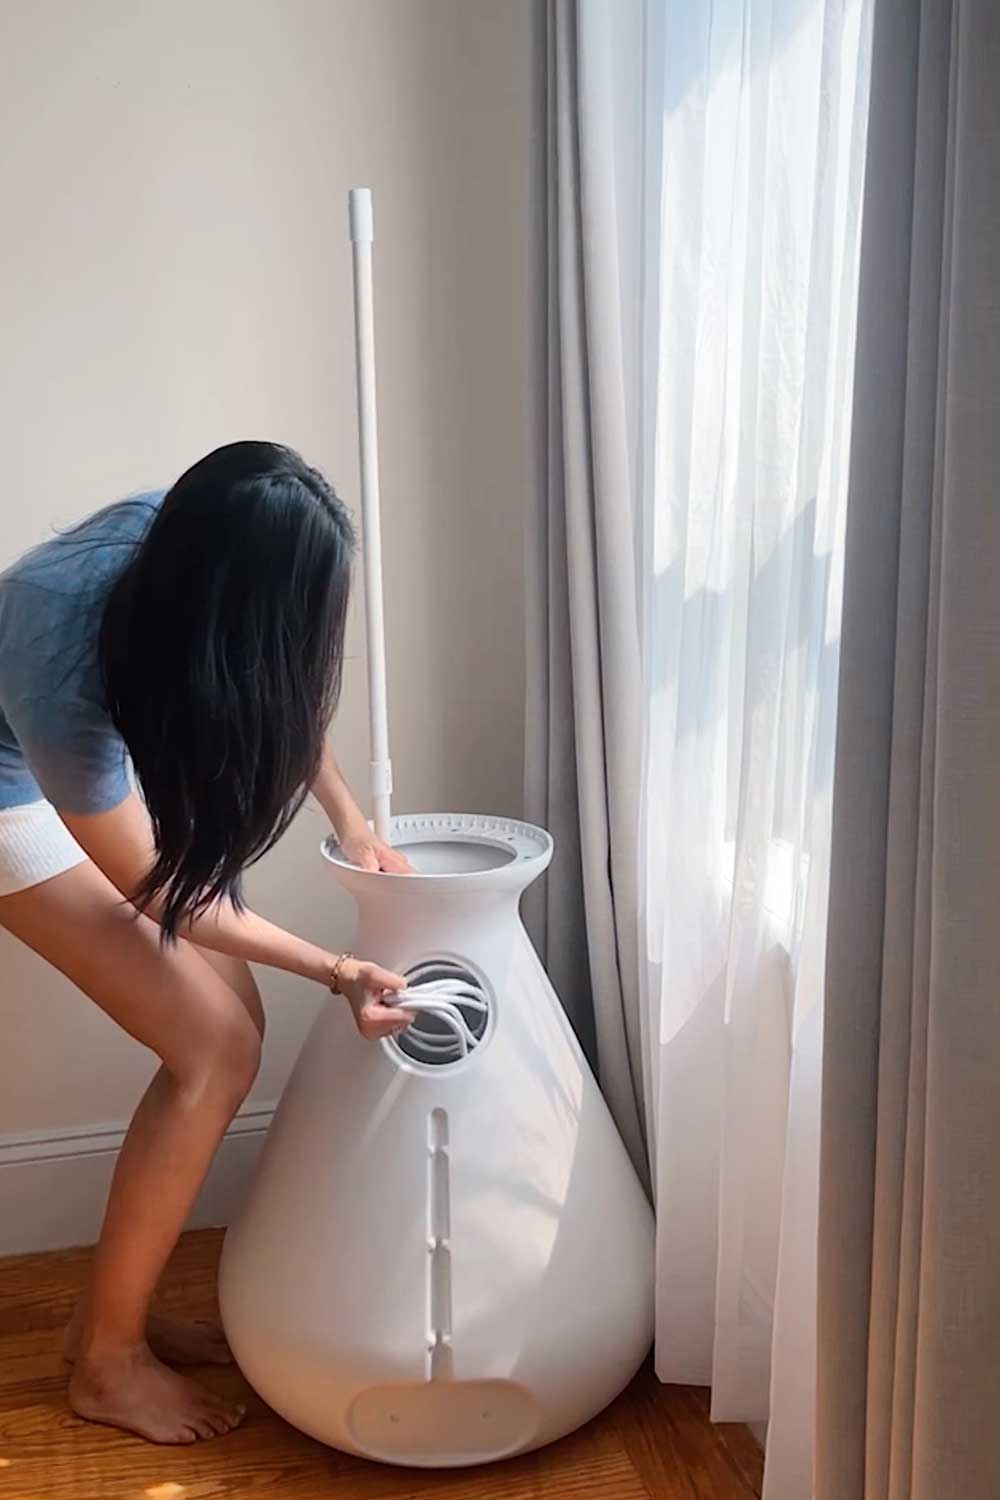
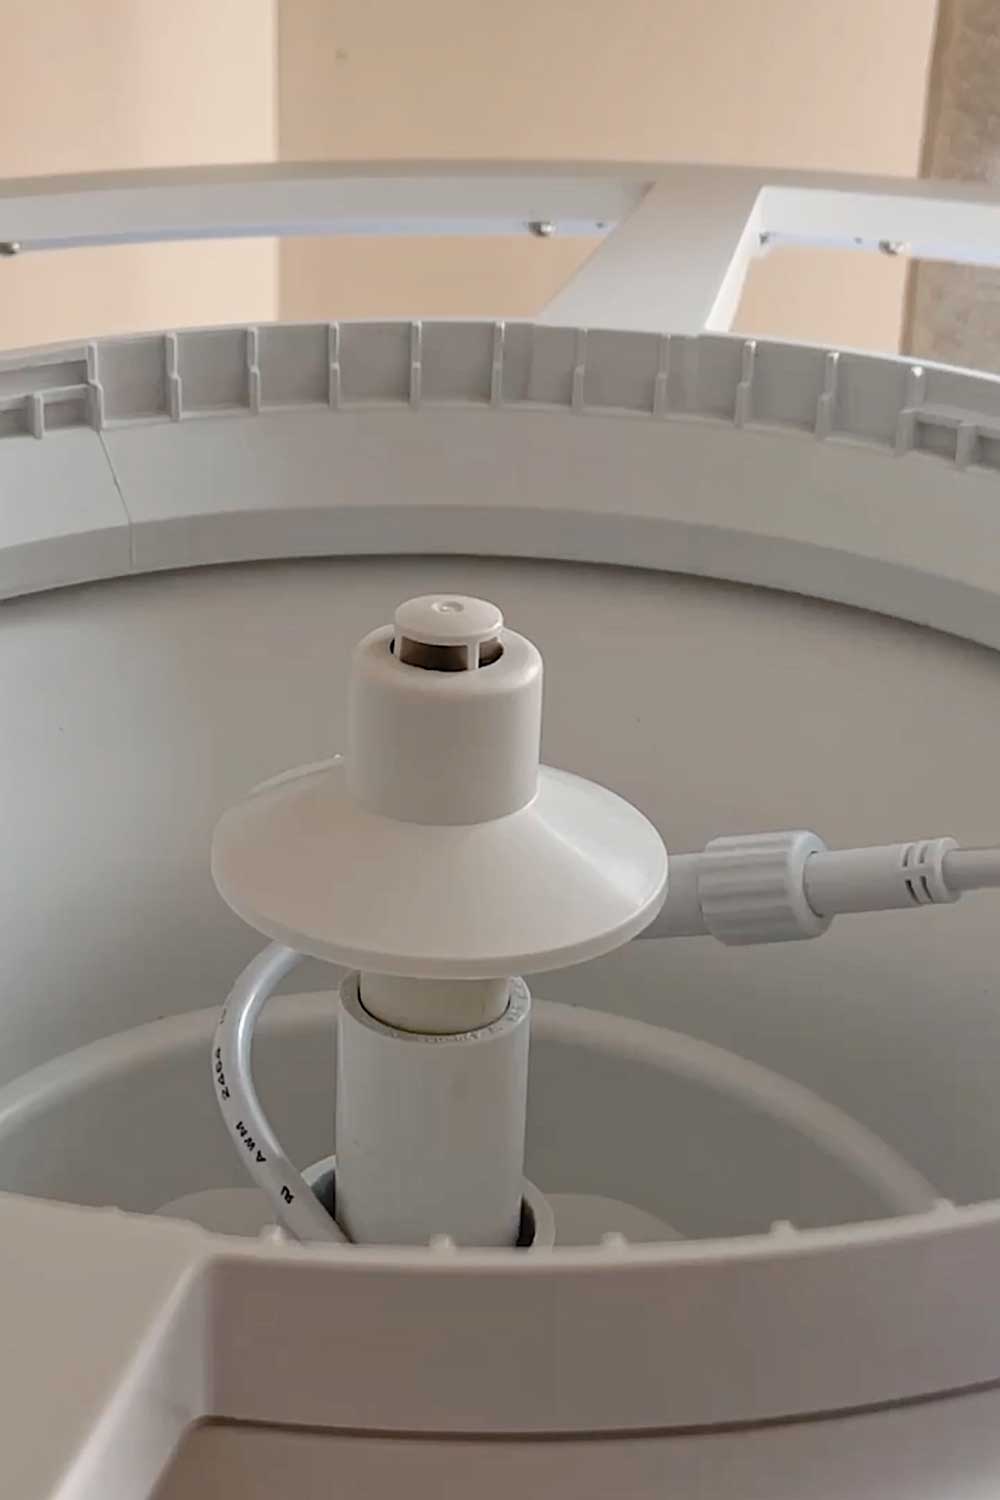
Lettuce Grow Pump
First, you want to set up the pump.
The Lettuce Grow Farmstand is a unique style of hydroponic tower.
At the base, there’s a huge water tank that can hold 20 gallons of water.
The pump (a heavy duty aquarium pump) takes the standing water in the tank and pumps it up the the top of the garden, dripping it through each garden tier.
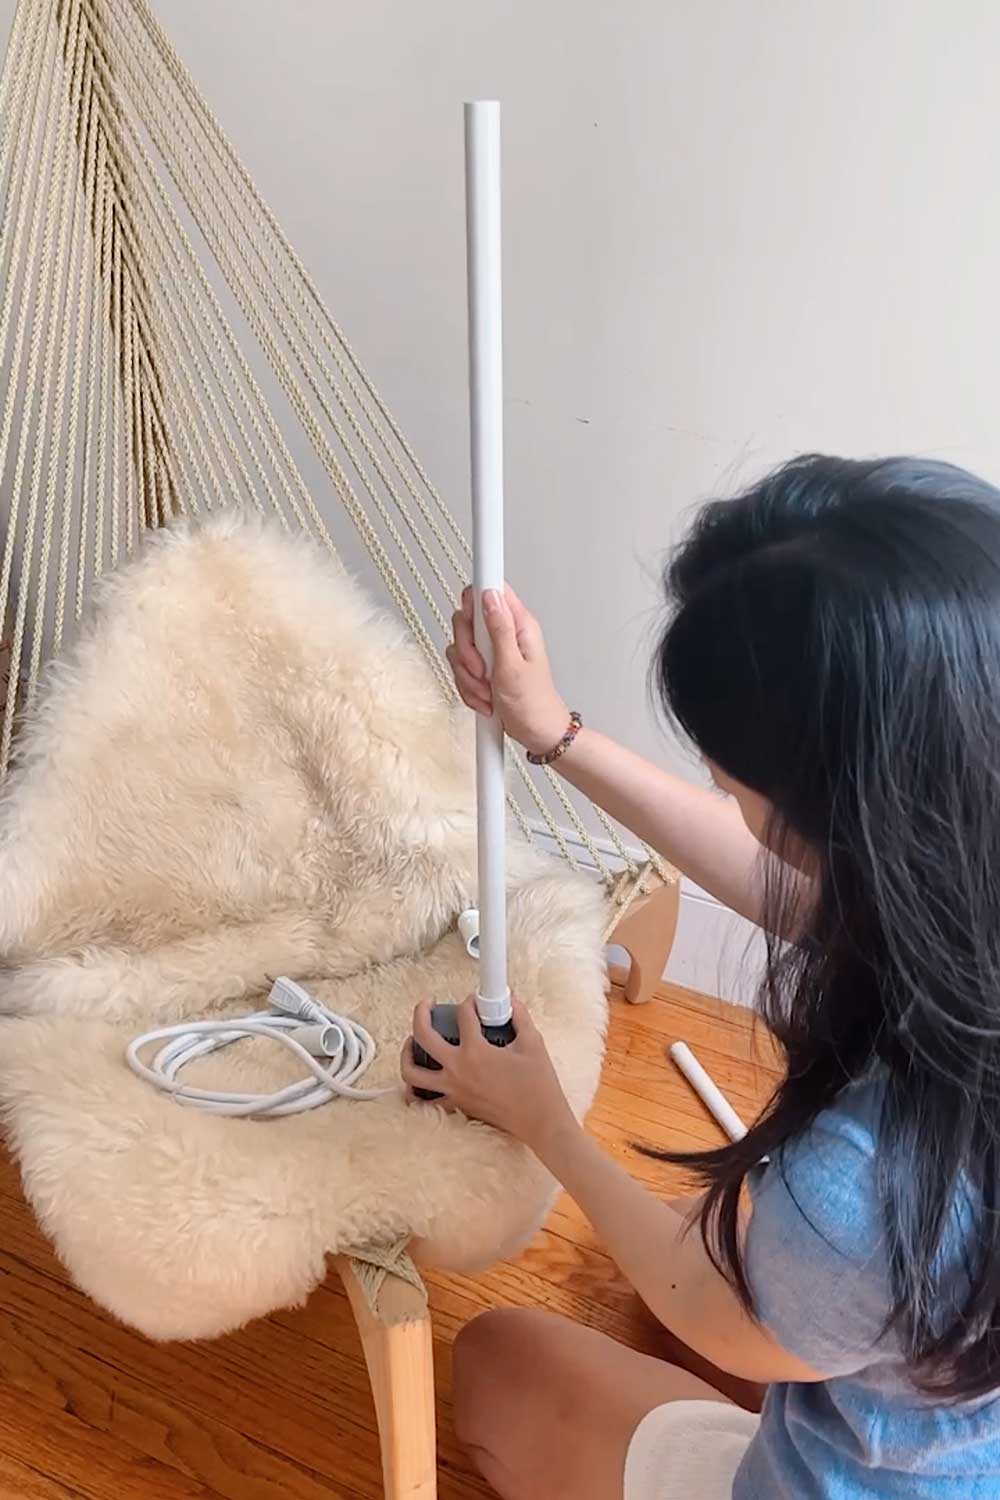
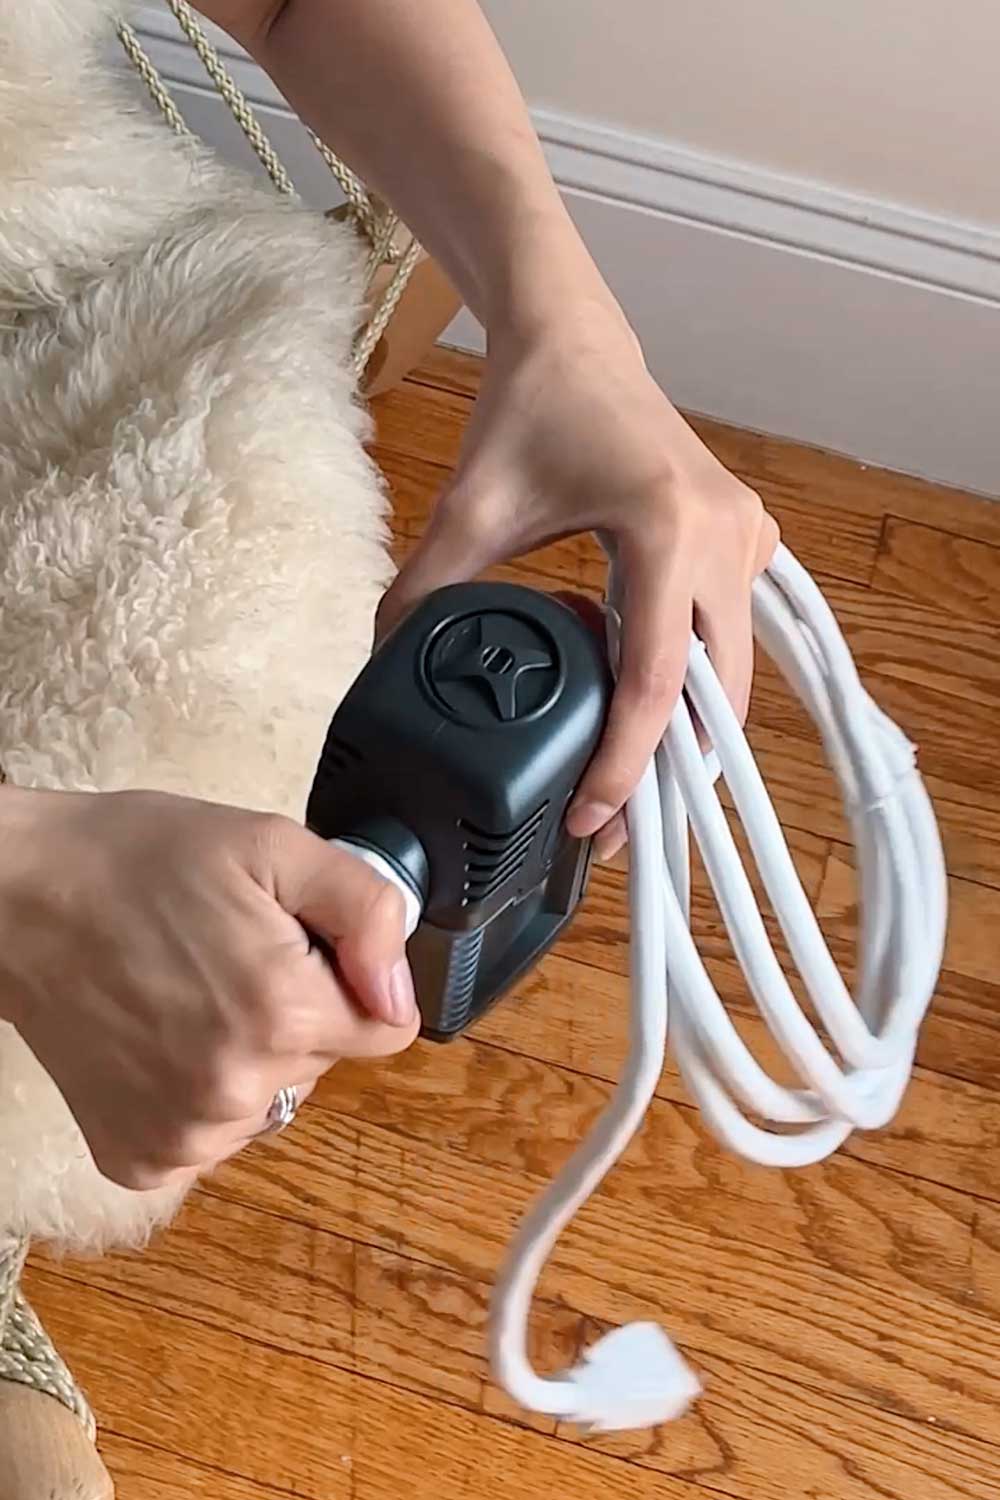
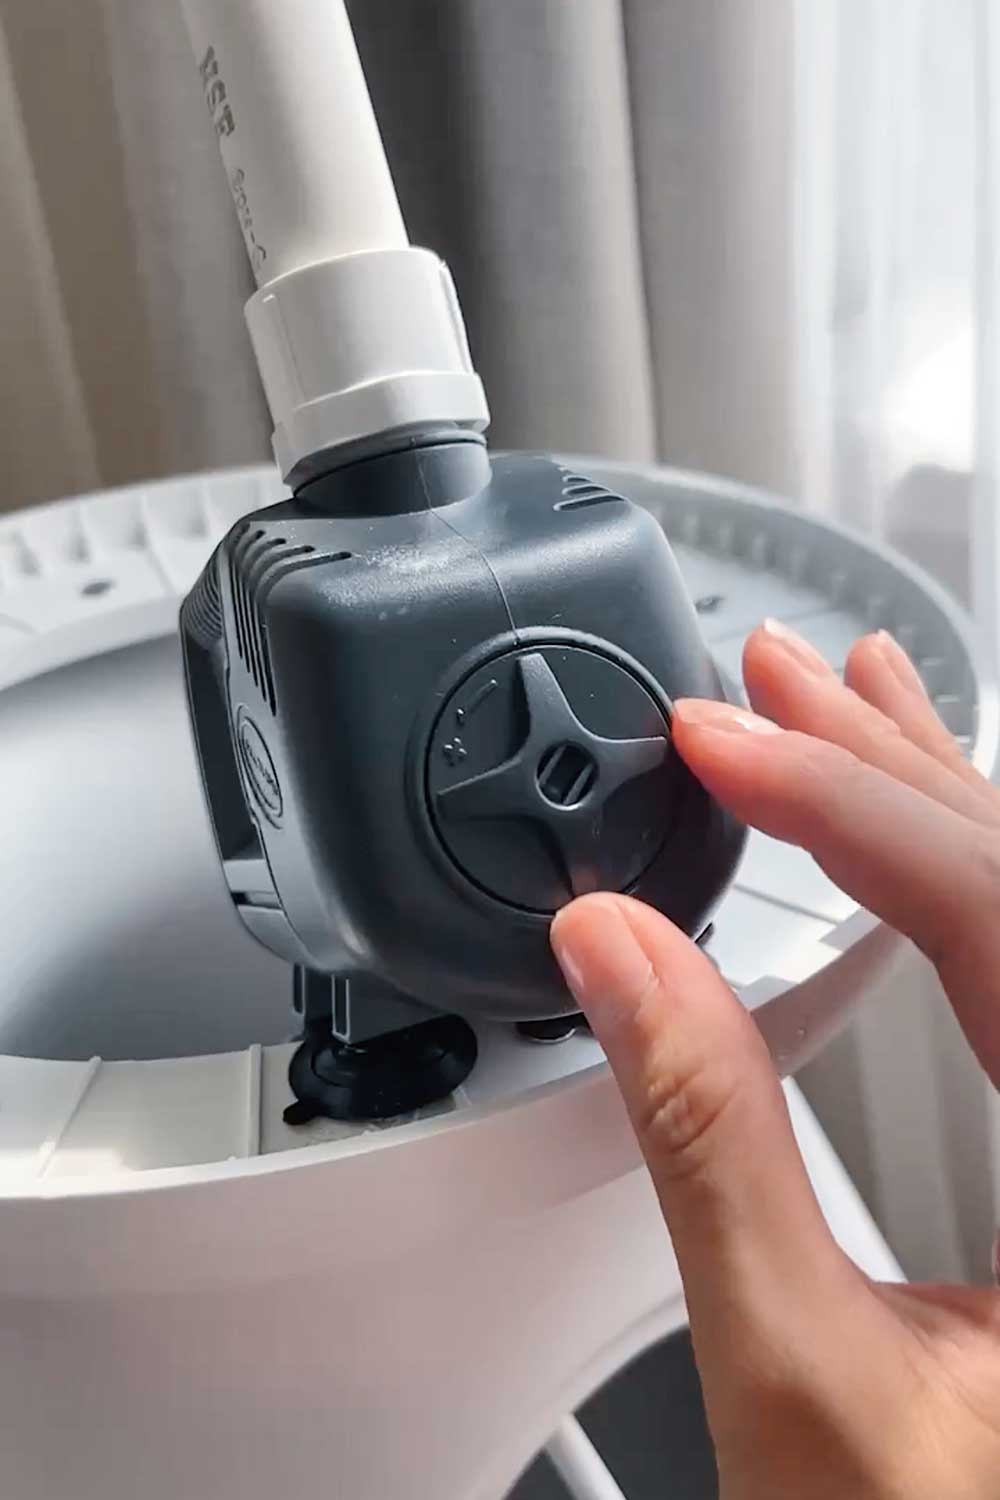
the Farmstand uses a standard aquarium pump and some tubing
So to put it together, you’ll need to screw on some fittings so that you can connect the pump to some thin vertical tubing.
Then you simply plop the pump into the base of the Farmstand.
The pump has little suction feet so it can stick to the tank, but the tubing itself may lean towards one side since it’s very tall.
Lettuce Grow Sizes
The Lettuce Grow Farmstand comes in 3 sizes: small, medium and large.
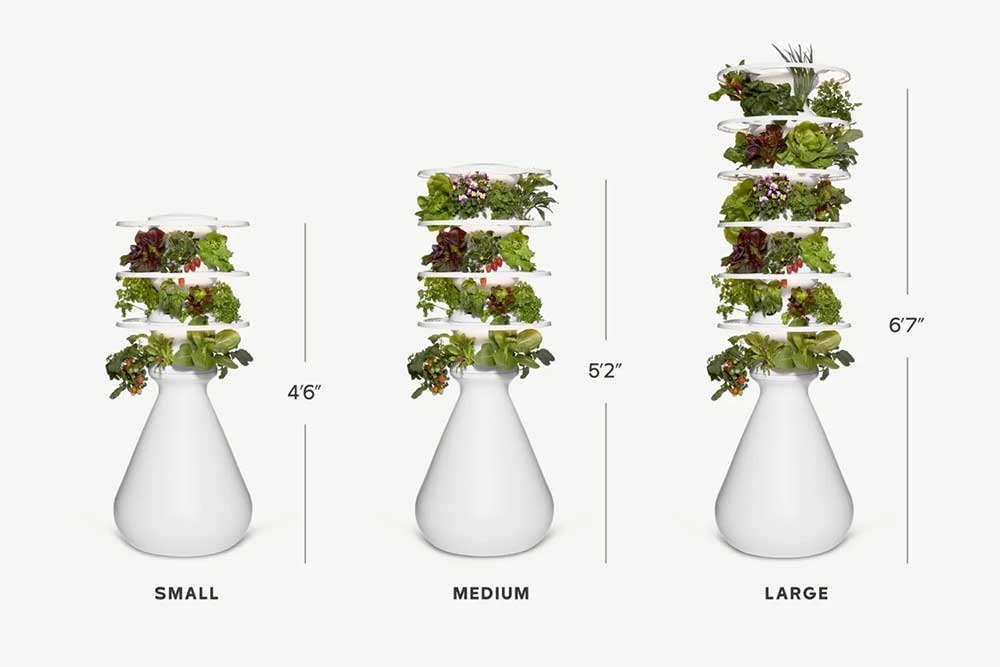
- The Small is 4’6″ tall, with 3 tiers that can hold 18 plants
- The Medium is 5’2″ tall, with 4 tiers that can hold 24 plants
- The Large is 6’7″ tall, with 6 tiers that can hold 36 plants
Lettuce Grow Discount Code
Use SHER125 for $125 off any farmstand
Modular Design
The nice thing about the Farmstand is that it’s modular.
Each tier holds 6 plants and as you move up in size, you’re simply stacking more tiers.
So if you want to try out the system, you can start with the Small and upgrade later by purchasing additional tiers.
I went with the Medium model, to give the system a go and test it out.
Although secretly, I wanted the Large (I always have the itch to grow as much as possible)
Spoiler – I like the Farmstand so much that I’ve since gotten two more tiers so now I do have the Large!
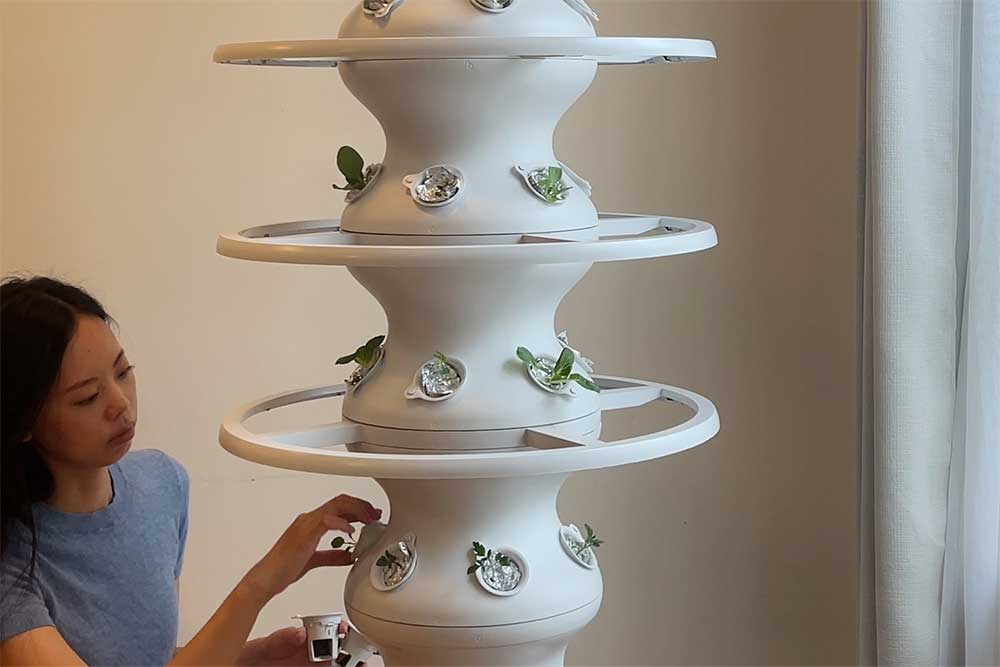
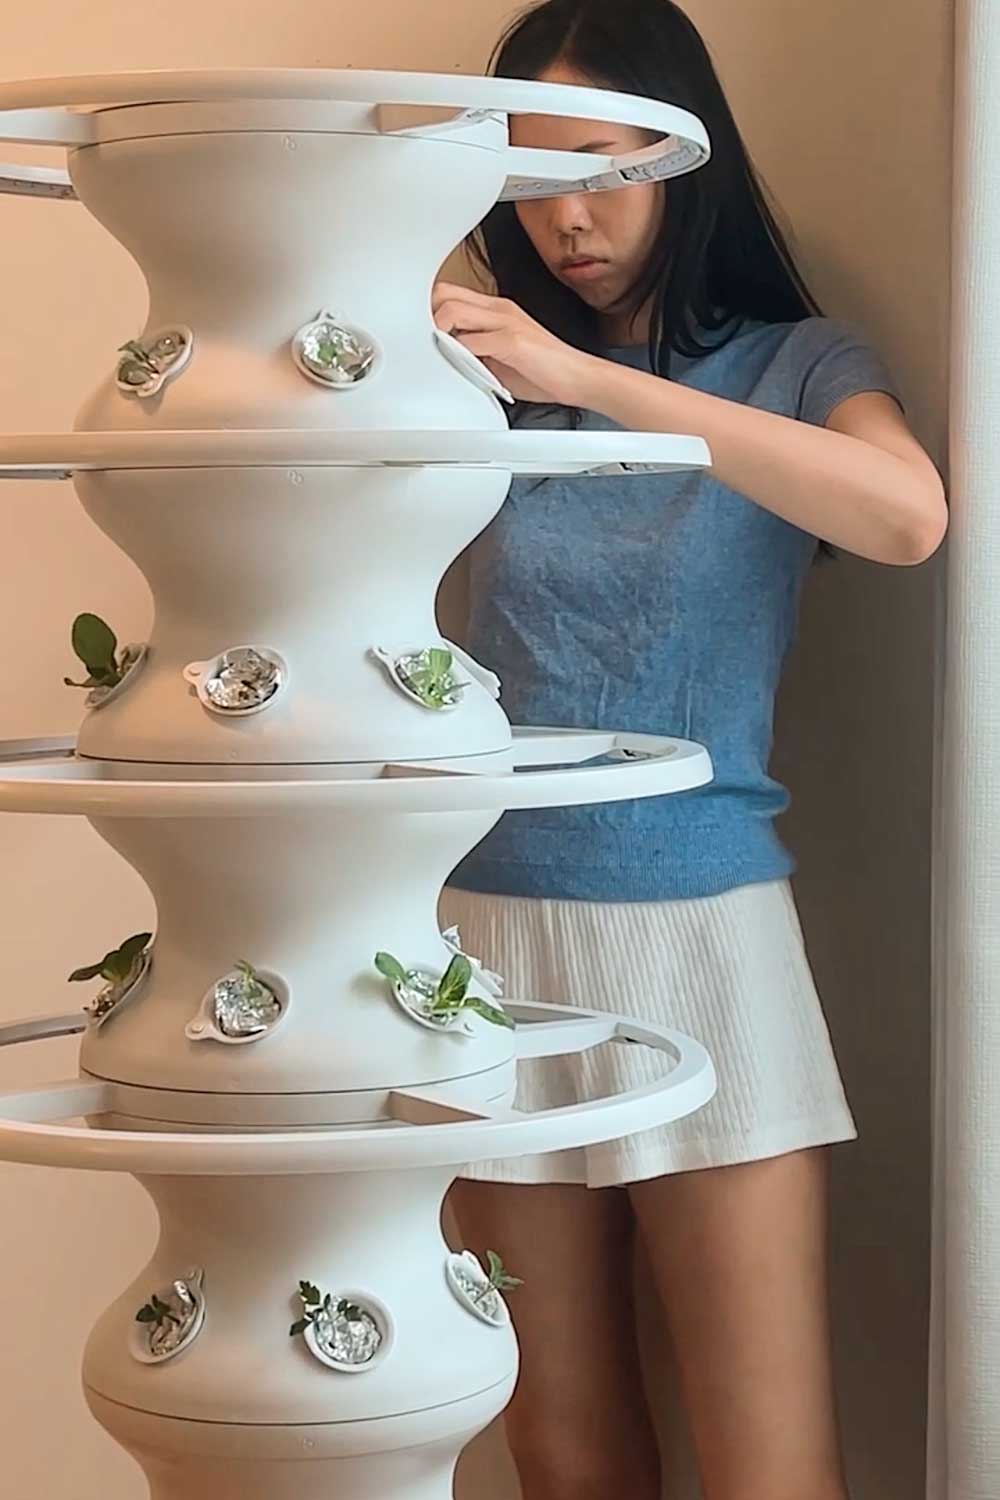
the indoor farmstand is made of modular ‘tiers’
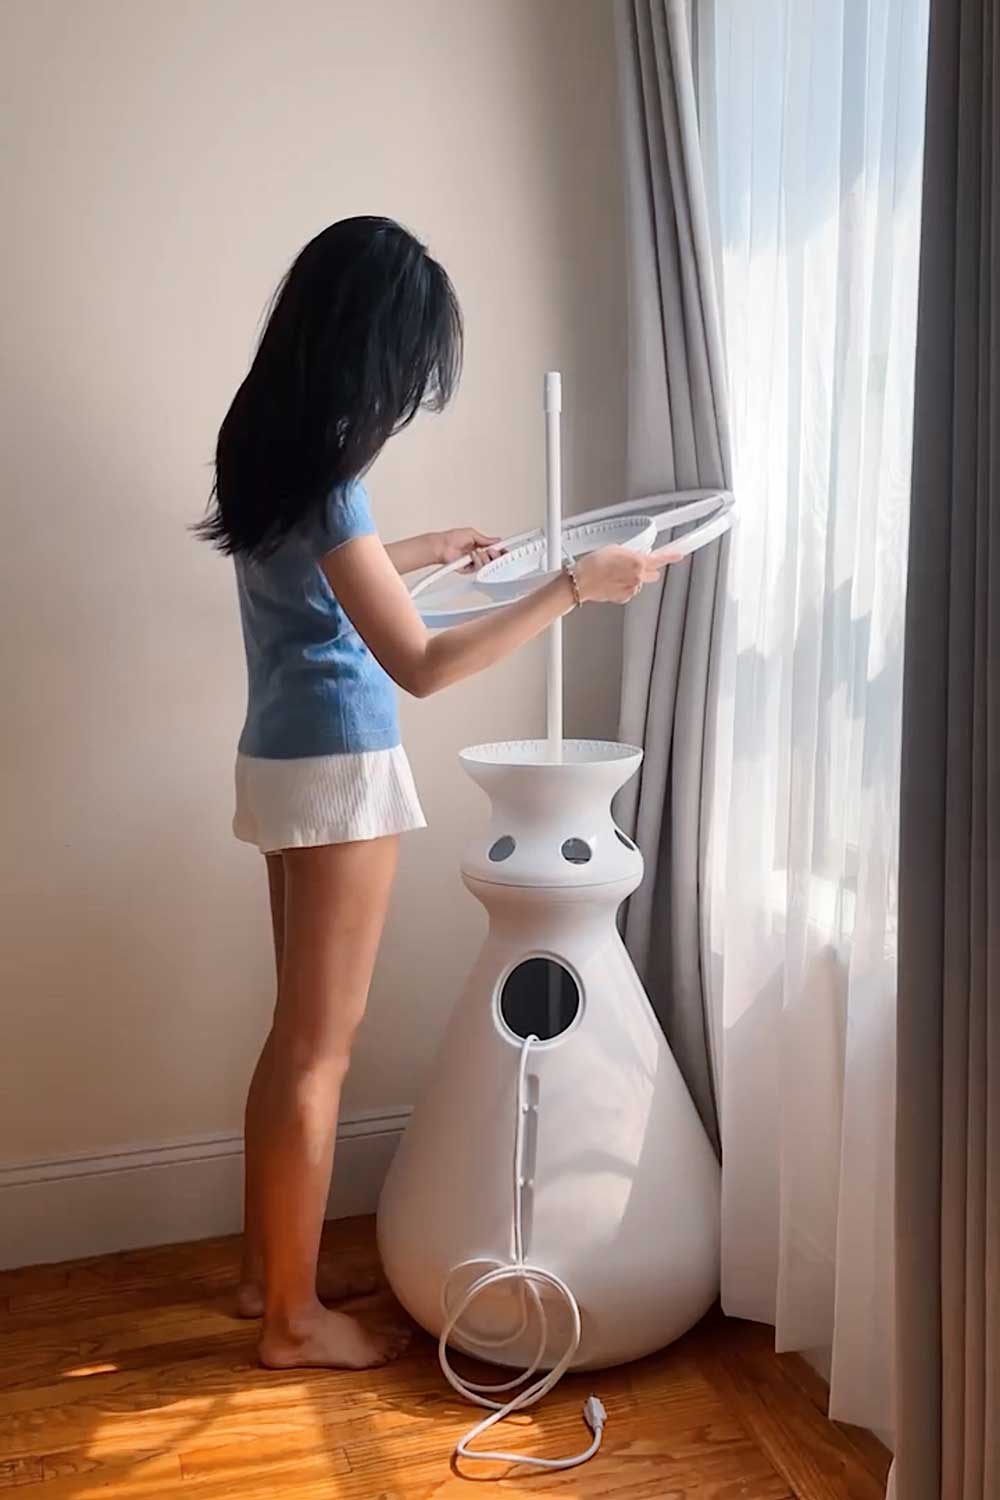
Lettuce Grow Levels
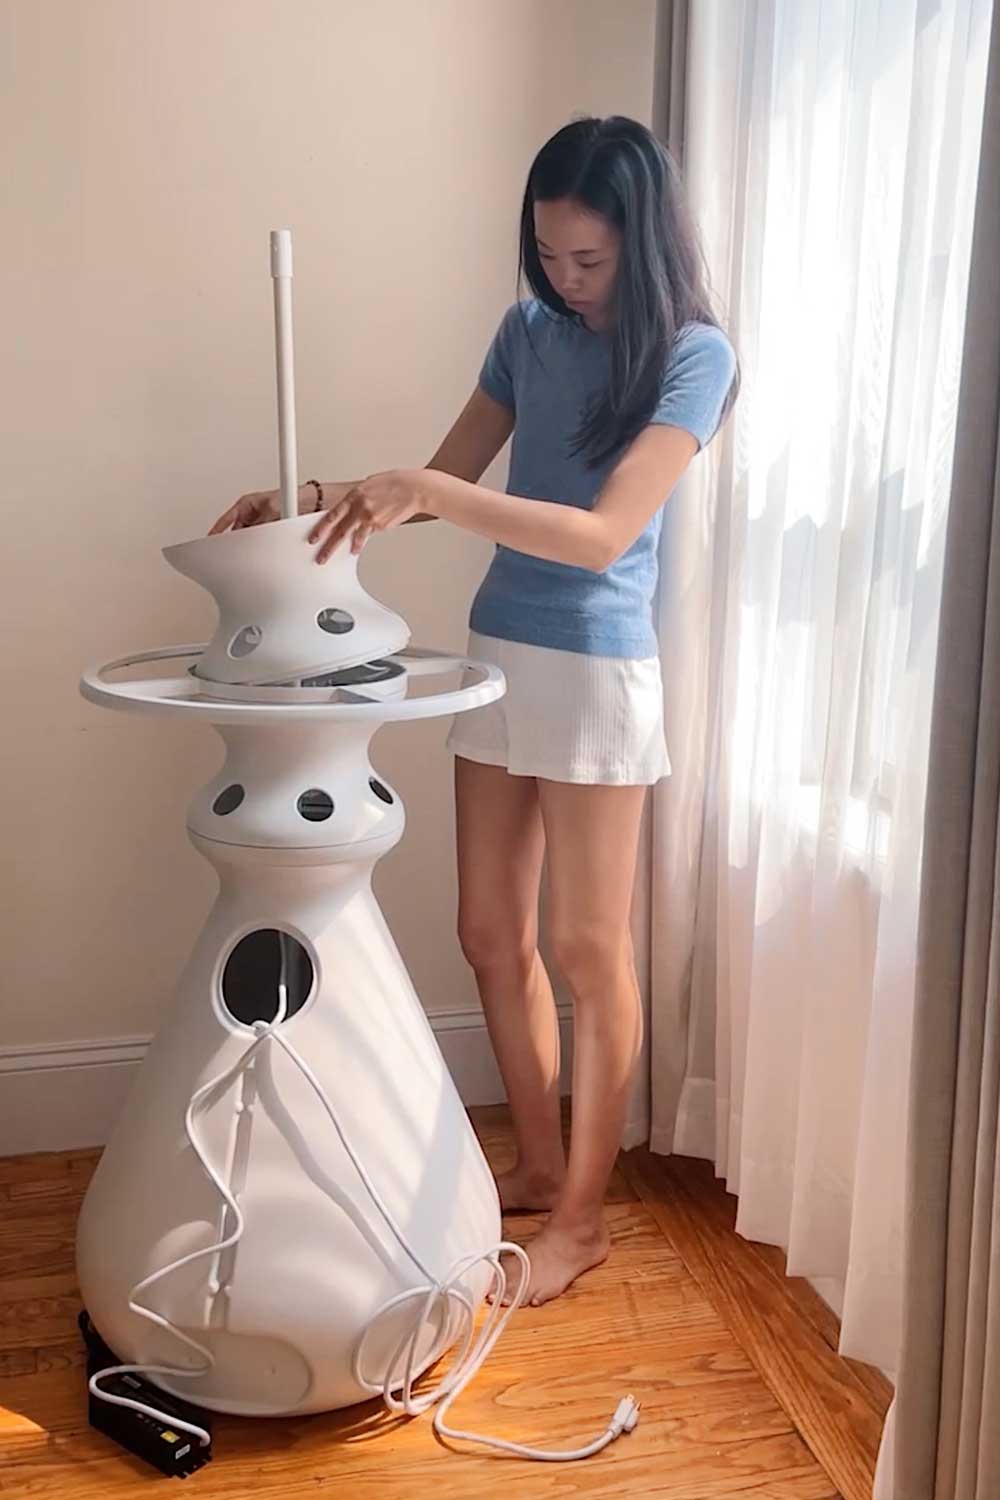
But back to the assembly process.
Each growing level has 6 plant holes evenly spaced around the outer circumference.
I like that design, because it means I grow in a full 360° direction and really maximize every square foot of space.
It also gives plants room to grow both outward and upward, which should be nice for plants that require more room!
The tiers plop right onto the Farmstand base and click to lock in place.
There’s handy symbols to guide you to ensure you’re matching everything up correctly.
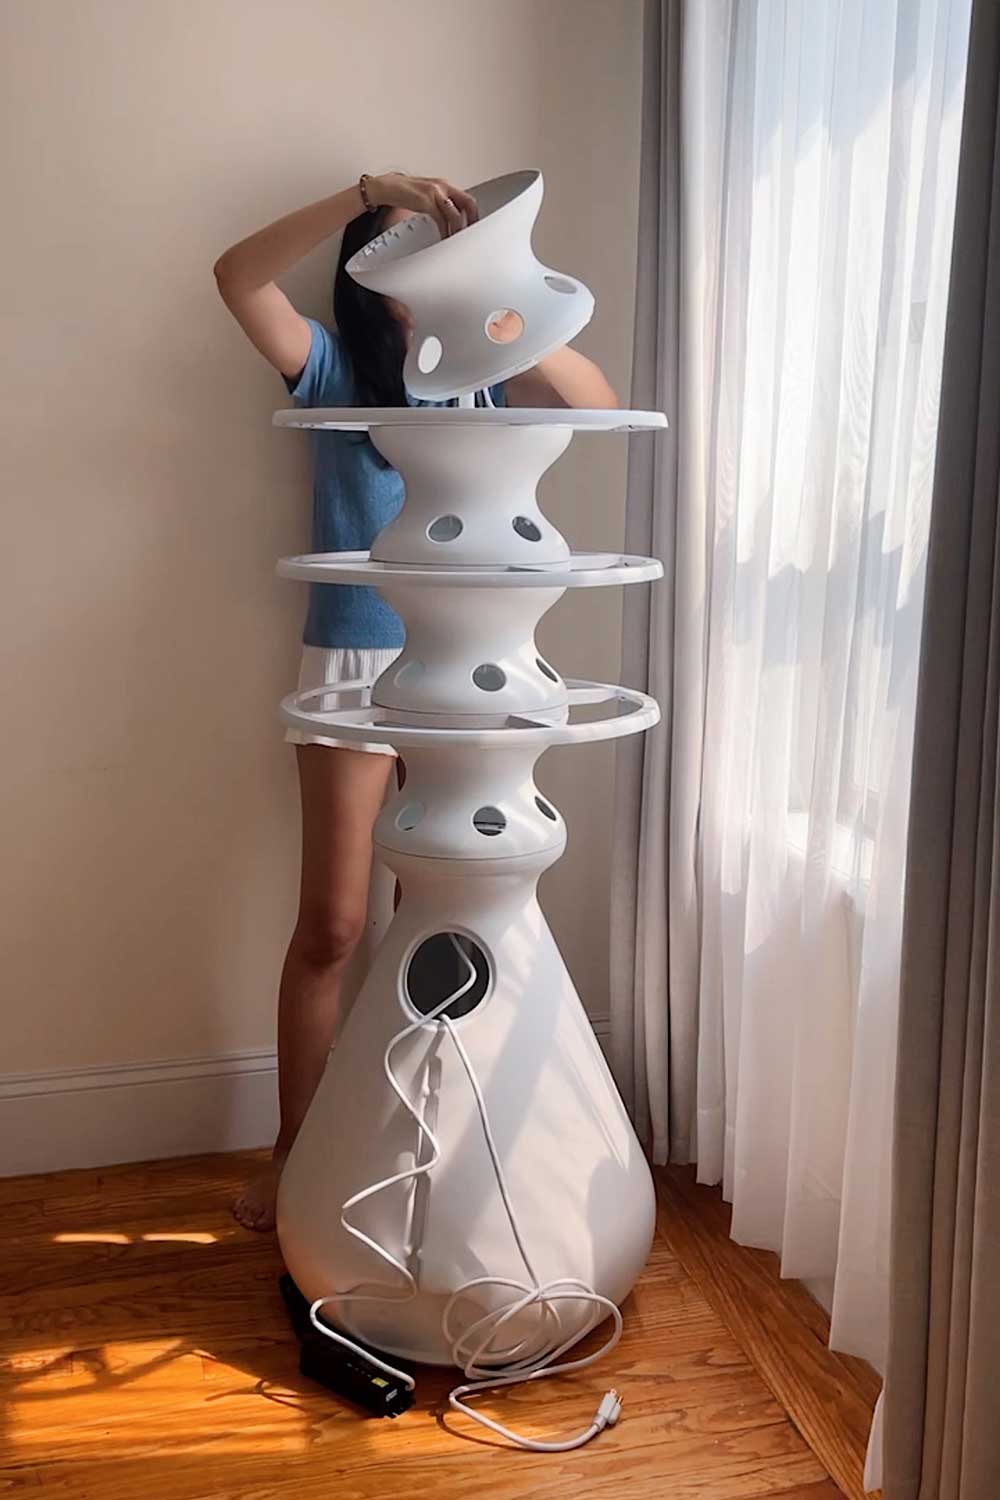
layer by layer until all 4 grow tiers were set up!
Lettuce Grow Grow Lights
The Farmstand is unique in that it can be used both indoors and outdoors.
If you want, you can grow outside during the summer months, then bring it indoors for the winter.
(But, I don’t recommend doing that if you’re bringing it indoors into your home because it’s easy to bring in bugs that way. Instead, bring it ‘indoors’ into a greenhouse or garage)
I plan to use mine entirely indoors.
For indoor usage, you’ll need to set up grow lights.
These full spectrum LED lights give the plants enough sunlight so that they can grow indoors, from seed to harvest.
In between each grow level, you’ll add a grow light.
It felt a bit like assembling a cake – add a plant tier, add a grow light, another plant tier, another grow light… until you’ve stacked on all your levels.
The grow lights assemble in the same easy method as the grow levels – by clicking into place.
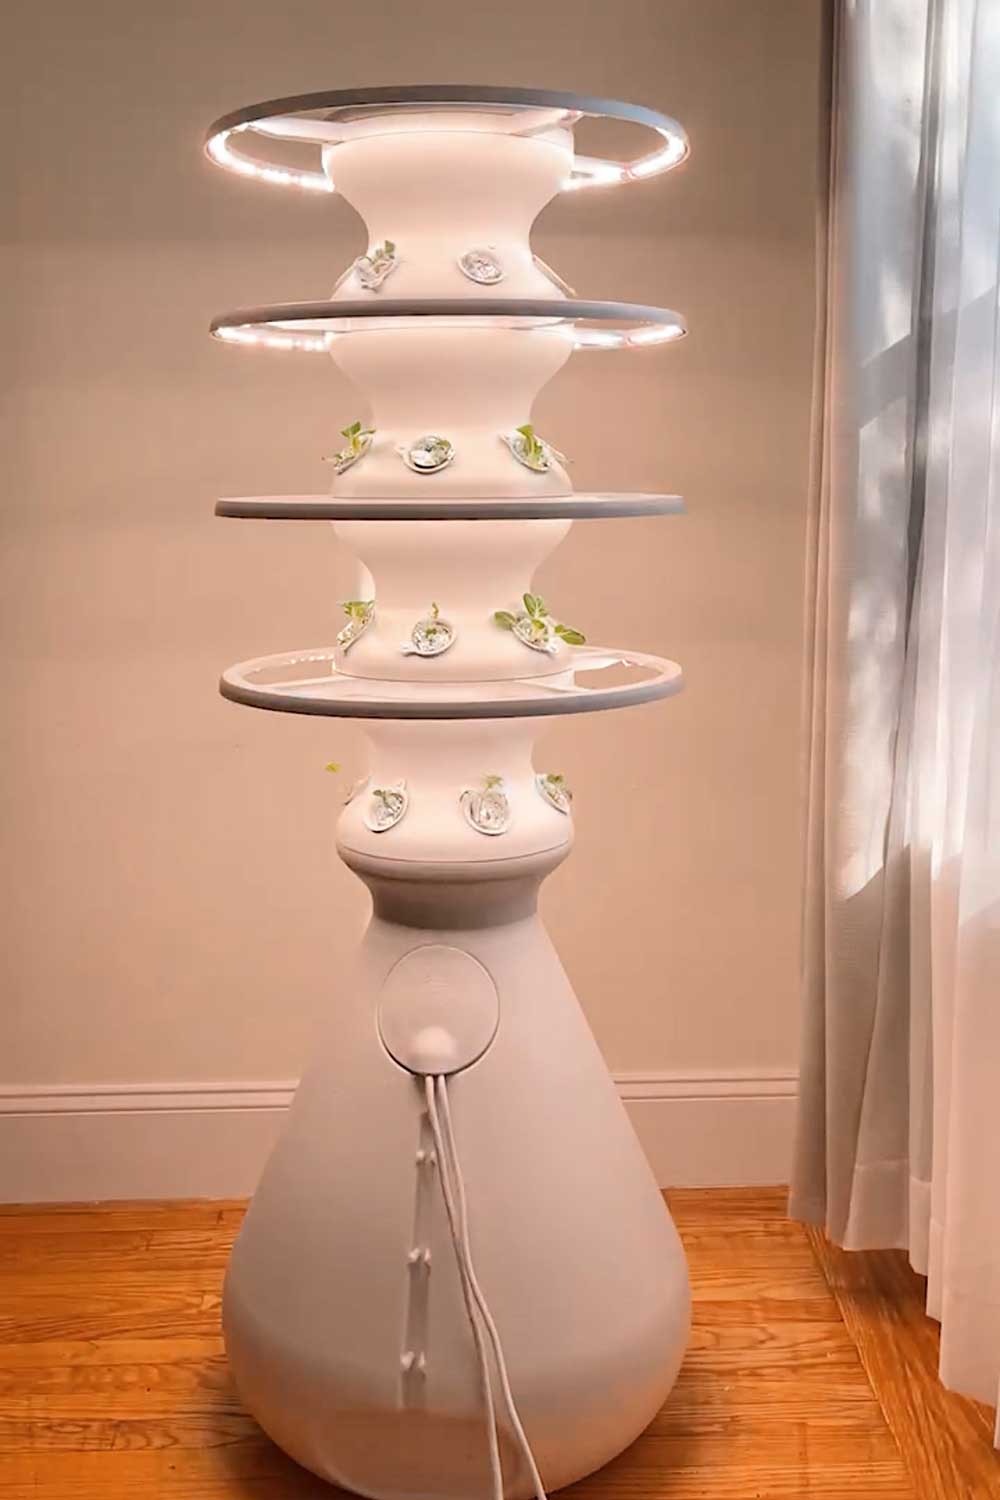
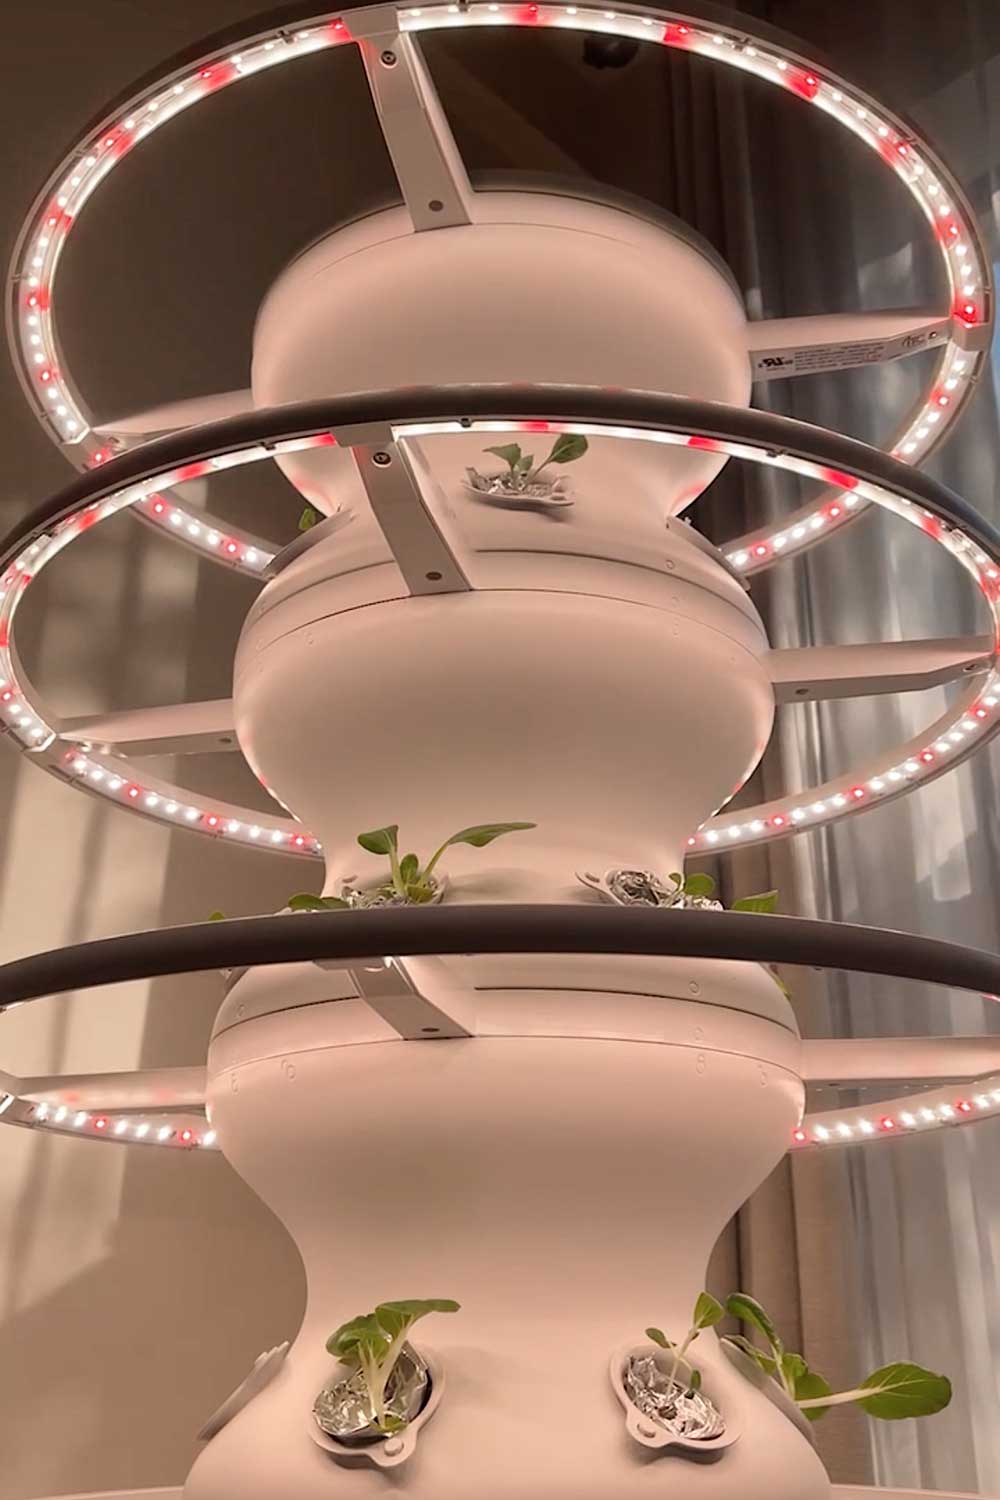
if you use the Farmstand indoors, you’ll need to add glow rings between each grow tier
Lettuce Grow Timer
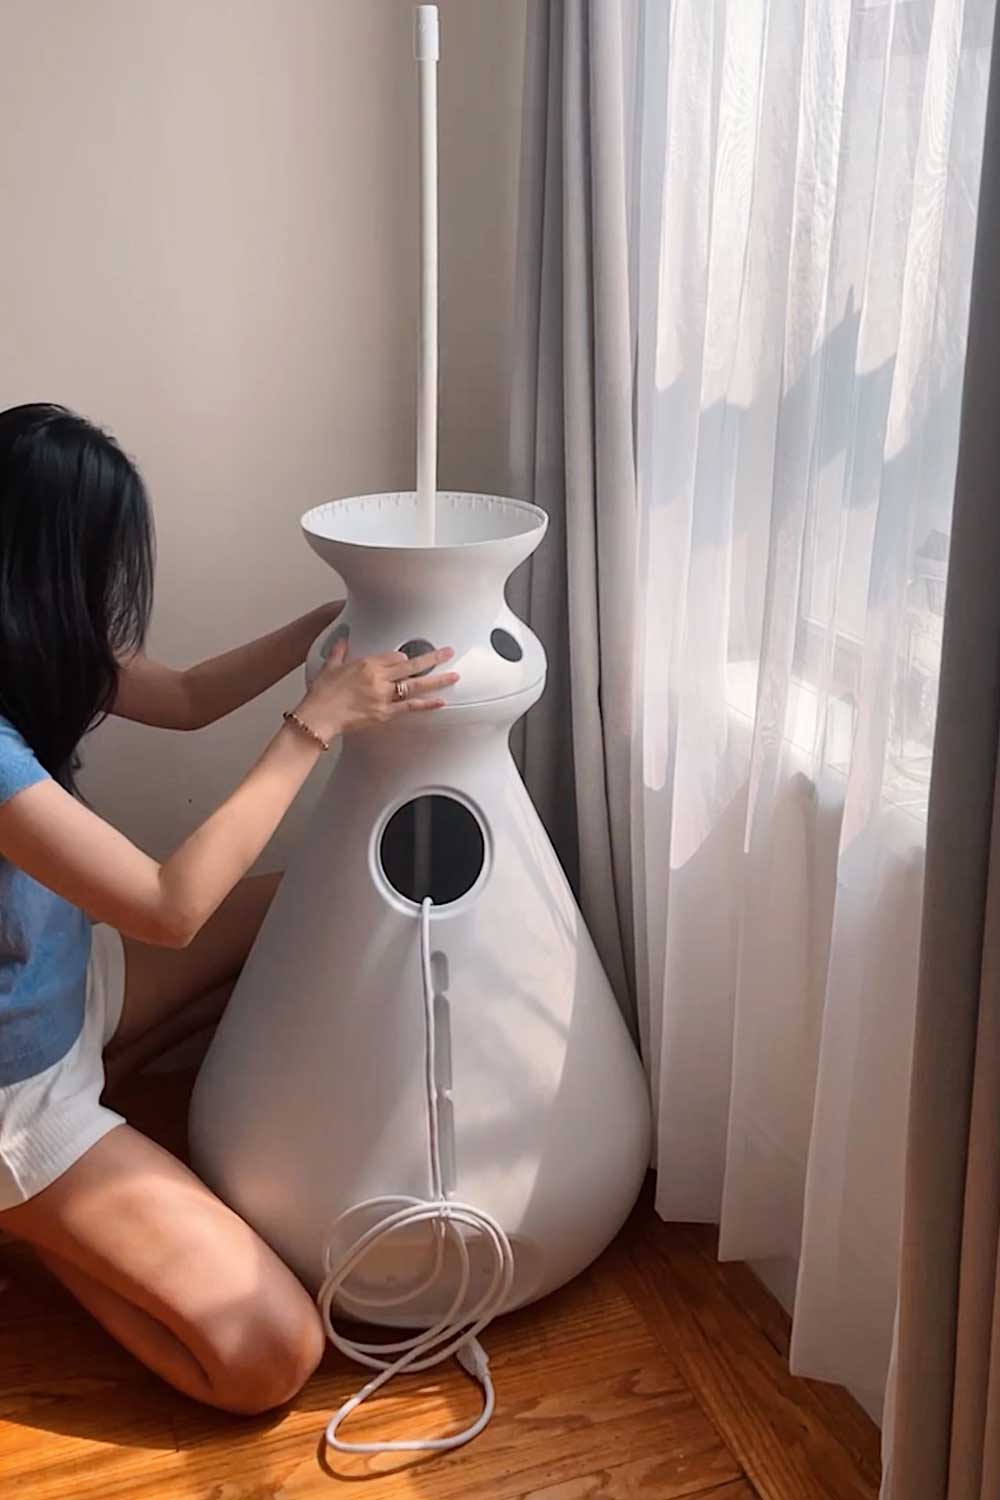
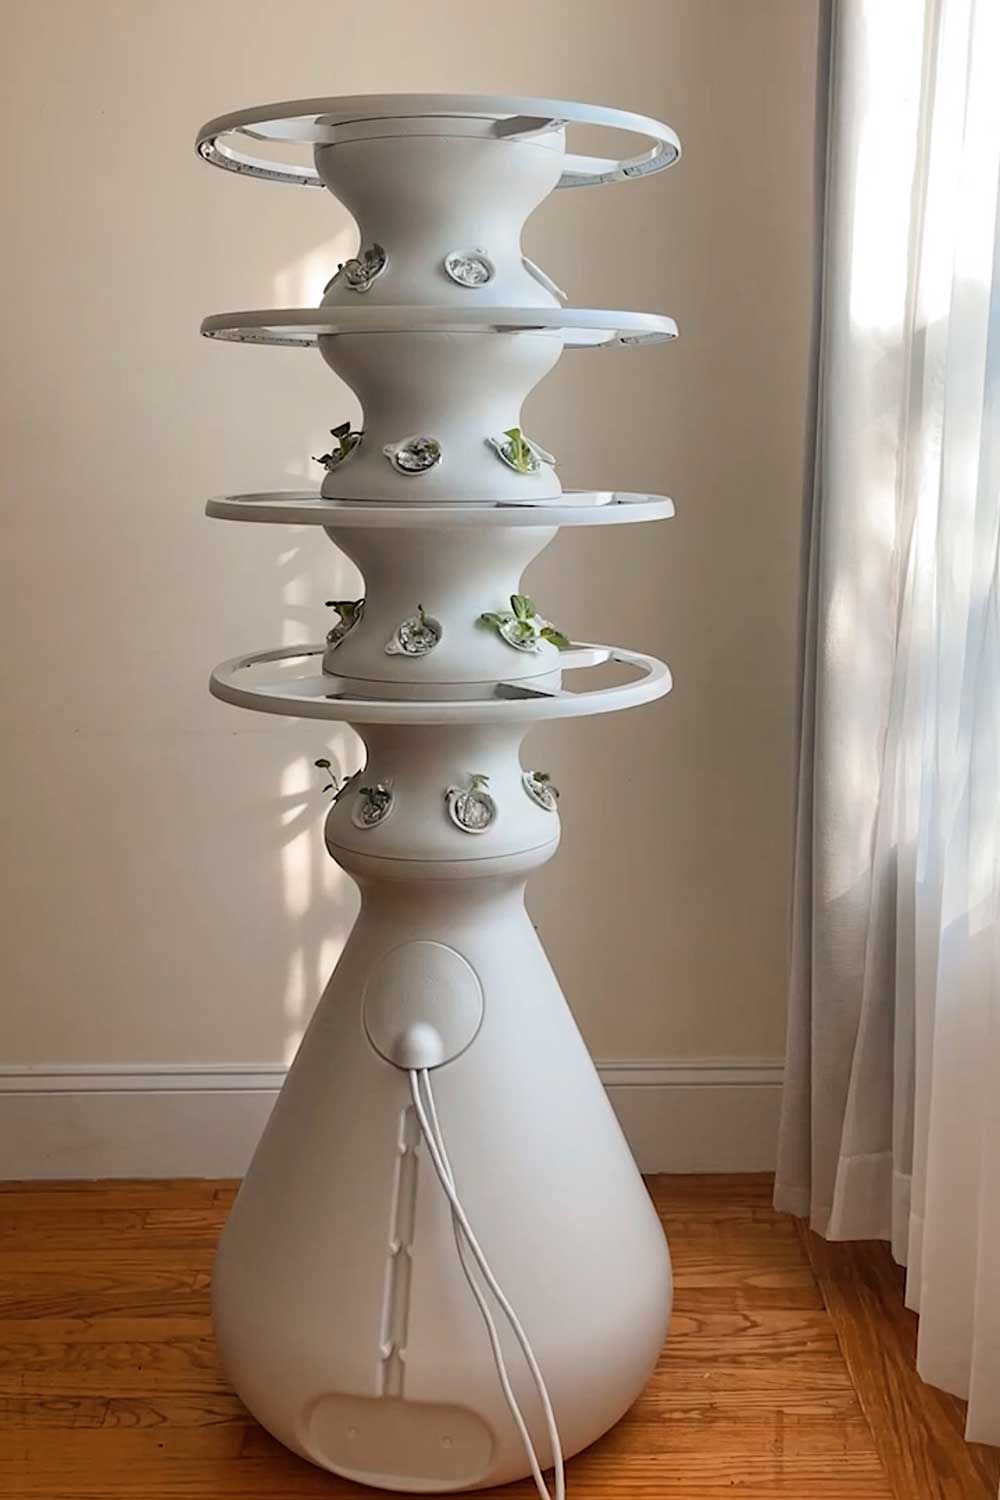
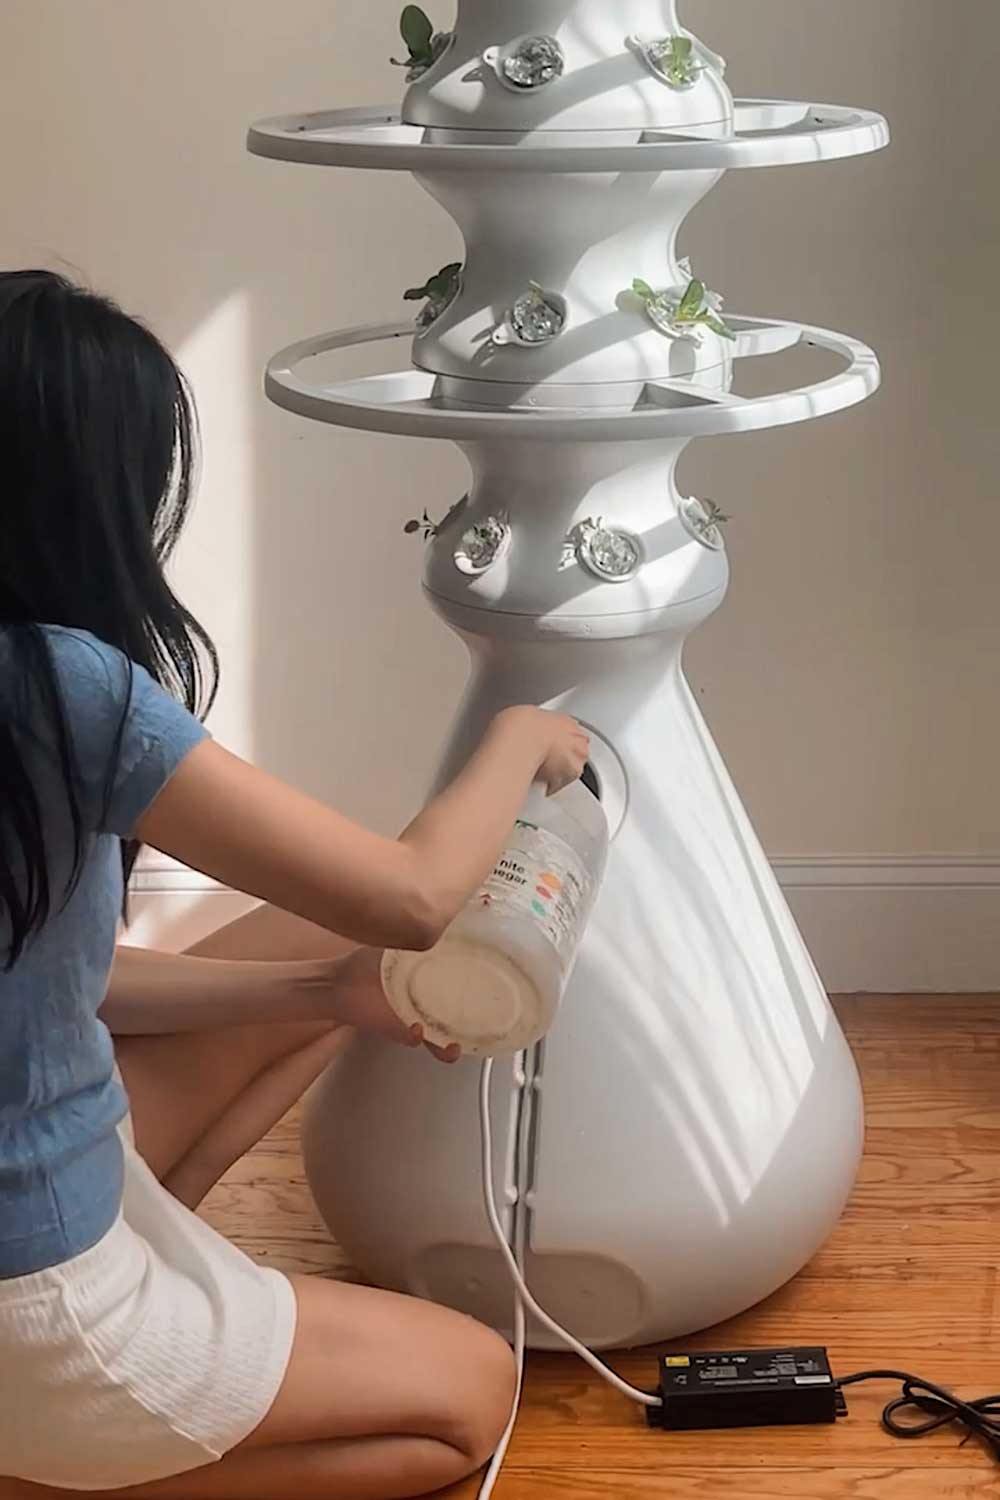
Once all your tiers are assembled, you’ll add the sprinkler and cap to the top of the Farmstand.
Then you’ll move to the base of the machine to set up all the timers and electrical cords.
There’s a round opening in the base of the tank.
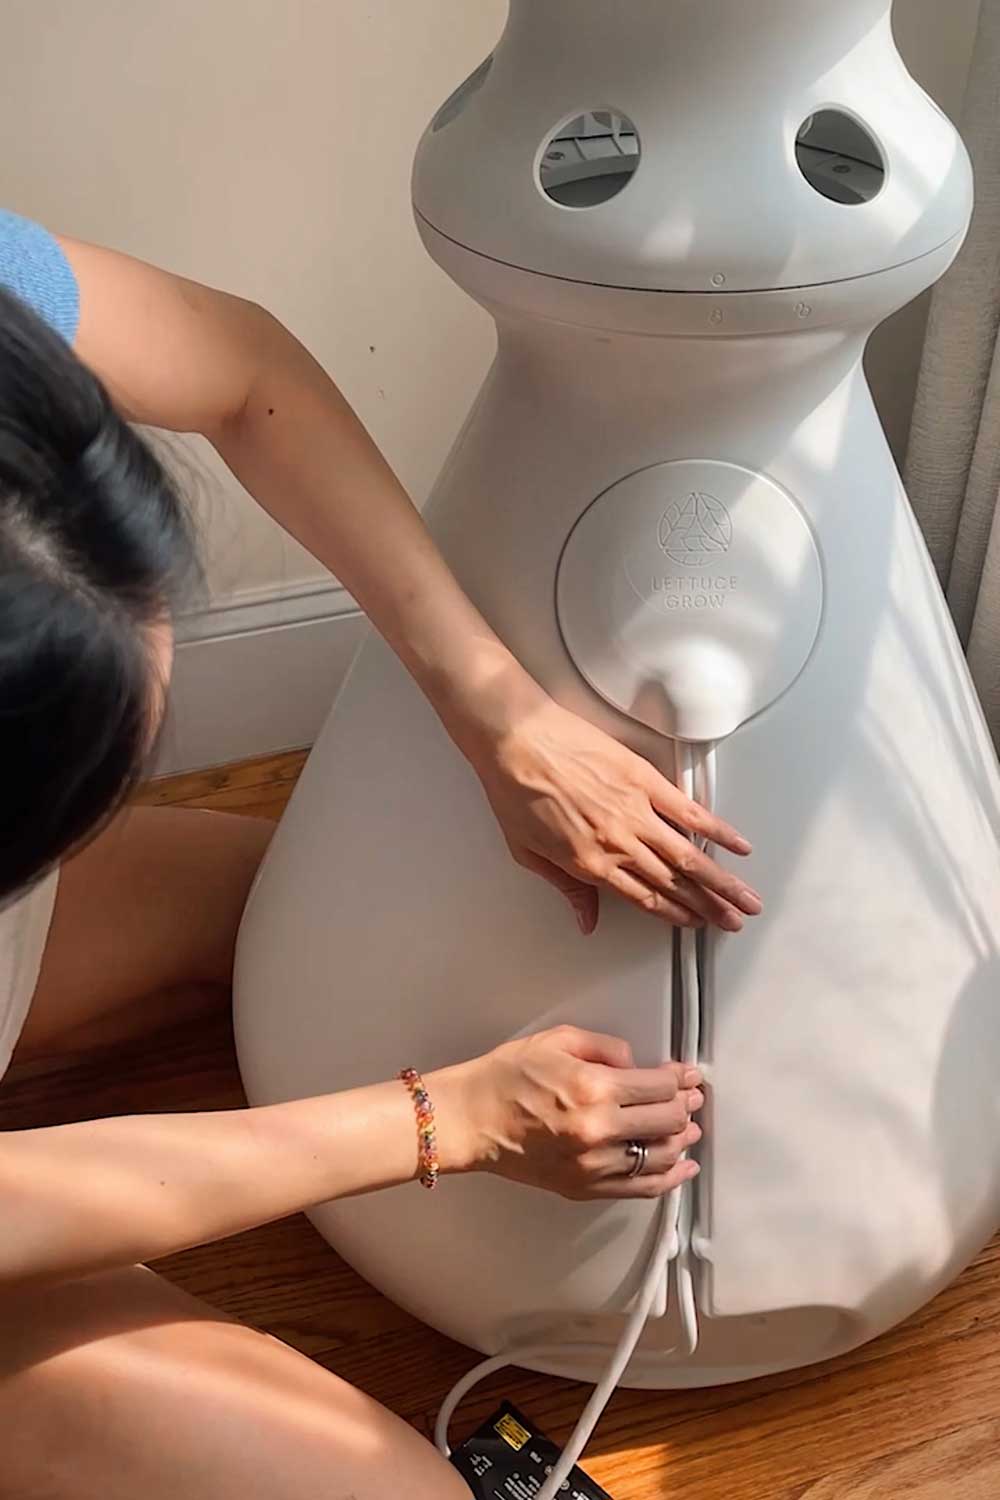
I like that Lettuce Grow includes a cap and groove to neatly tuck and hide the cords – because there are a lot of cords.
Pull the electrical cords out through the opening, and start setting up your timers.
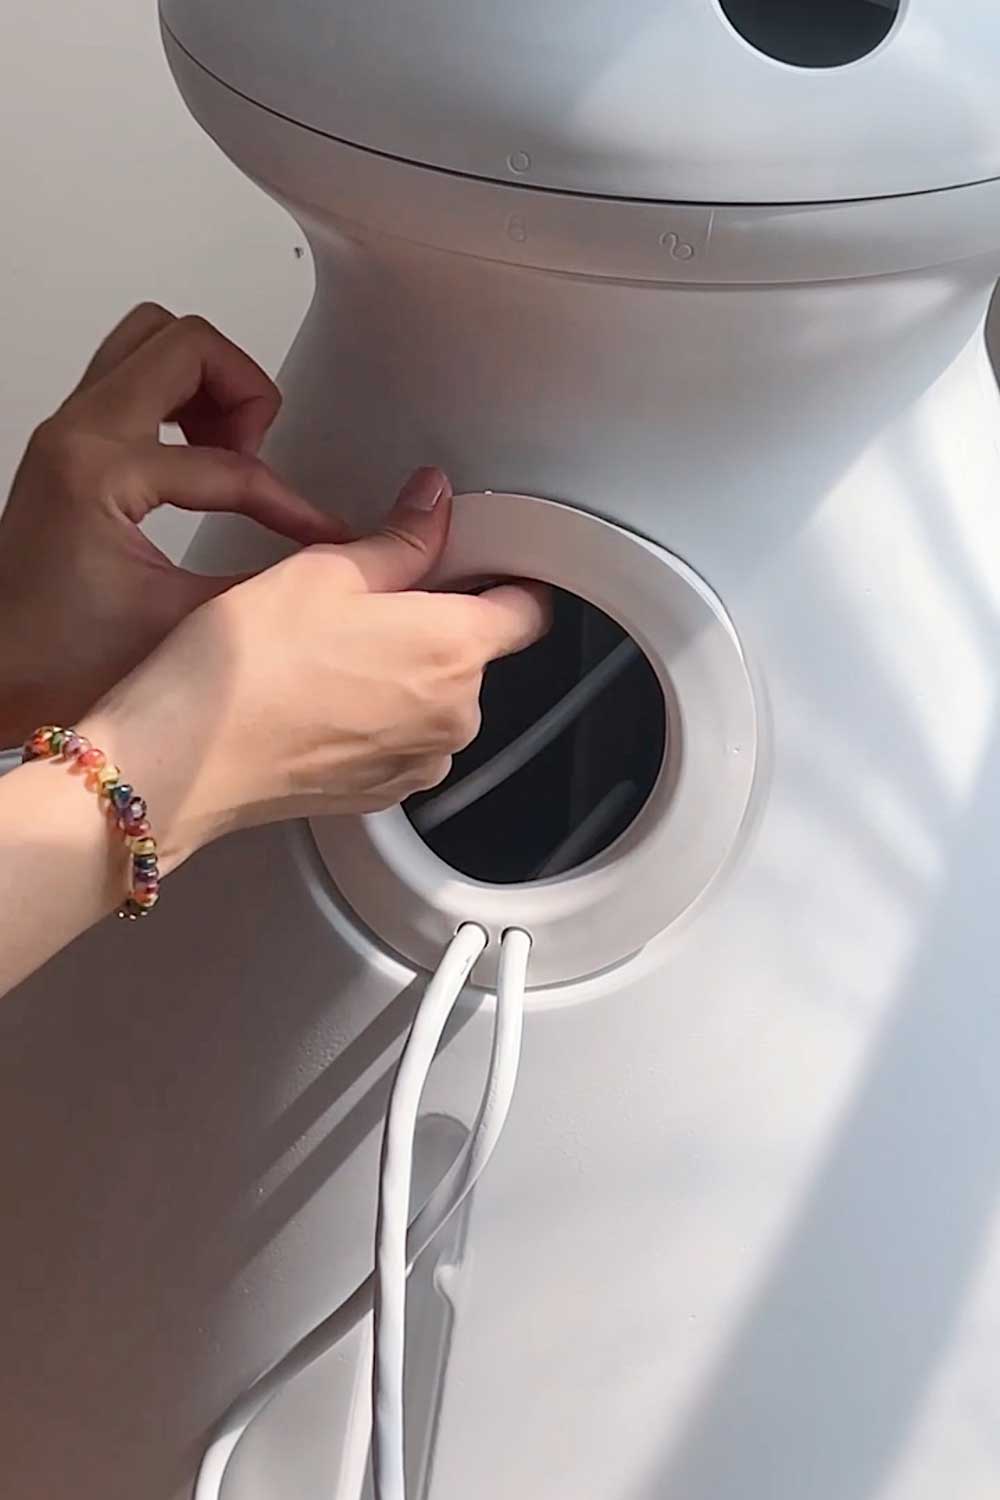
moving to the bottom of the Farmstand to finish setup
For the Indoor Farmstand, you’ll have two timers:
The timers are interesting, and took me a second to get used to.
Each dial represents 24 hours, with the light half marking ‘day time’ and the dark half marking ‘night time’.
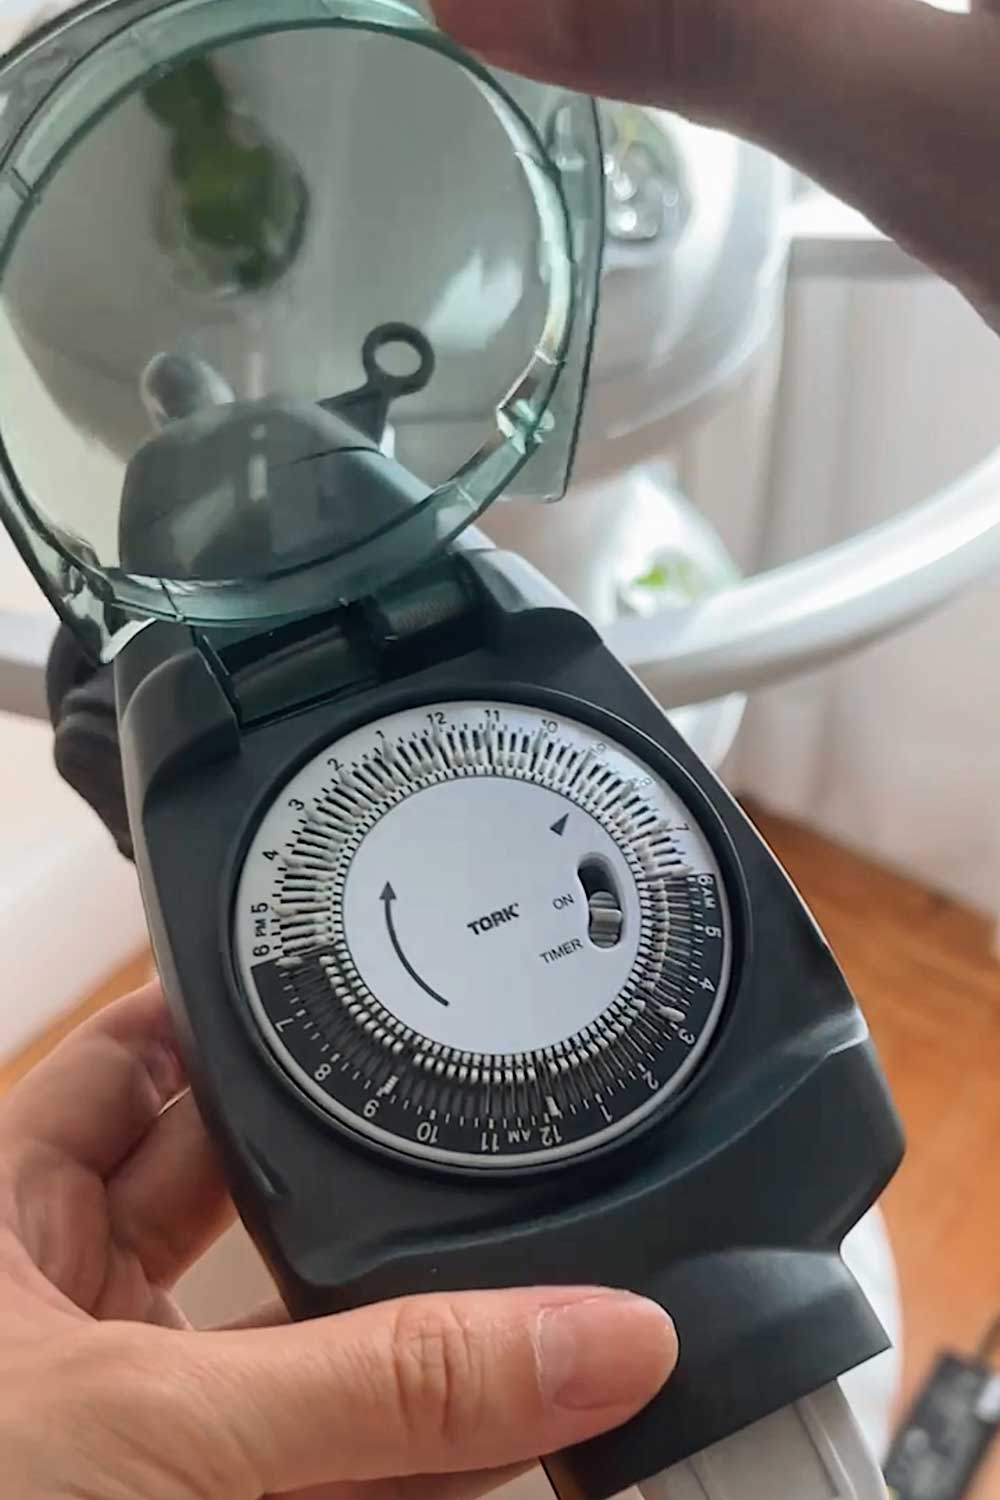
The timers run counterclockwise.
Each tiny toggle represents 15 minutes of time.
To designate ‘on’, you’ll push the toggle up. Leaving the toggle down designates ‘off’.
The toggles are very tiny so if you have a pencil or something small and skinny, you can use that to push the toggles.
Timer Settings
Watering Schedule
For indoor usage, you’ll want to set the water pump timer to run for 15 minutes at a time.
Here’s the watering schedule for an indoor farmstand:
| Day | Night | |||
| Timer | On | Off | On | Off |
| Indoor | 15 min | 45 min | 15 min | 165 min |
Light Schedule
Generally, indoor grow lights need to run for at least 15 hours a day in order to properly grow plants.
Here’s the light schedule for the Farmstand:
| Lights On | Lights Off | |
| 2-4 Glow Rings | 14 hours | 10 hours |
| 5 Glow Rings | 15 hours | 9 hours |
| 6 Glow Rings | 17 hours | 7 hours |
The lights give the Farmstand a very futuristic look – as if the tower could grow plants on Mars!
They’re also very bright.
I prefer to set all my indoor garden lights to turn on at night.
And with the Farmstand glow rings on, the vertical garden completely lights up its corner of the room. They’re significantly brighter than any of my other indoor gardens.
It’s actually quite nice!
If you live in a small space, I’d recommend placing the Farmstand in a room with a door so you can block out the lights if you think they’ll bother you.
Once both your timer schedules are set up, you want to make sure to set the timers to the current time.
Gently rotate the dial clockwise until the marker is pointing to the current time.
Be careful not to accidentally push any of the toggles to a different on/off setting!
Then you can plug in the timers to the outlet.
I also found it helpful to use a power strip like this and a sleek box like this to hide all the cords and keep everything looking neat.
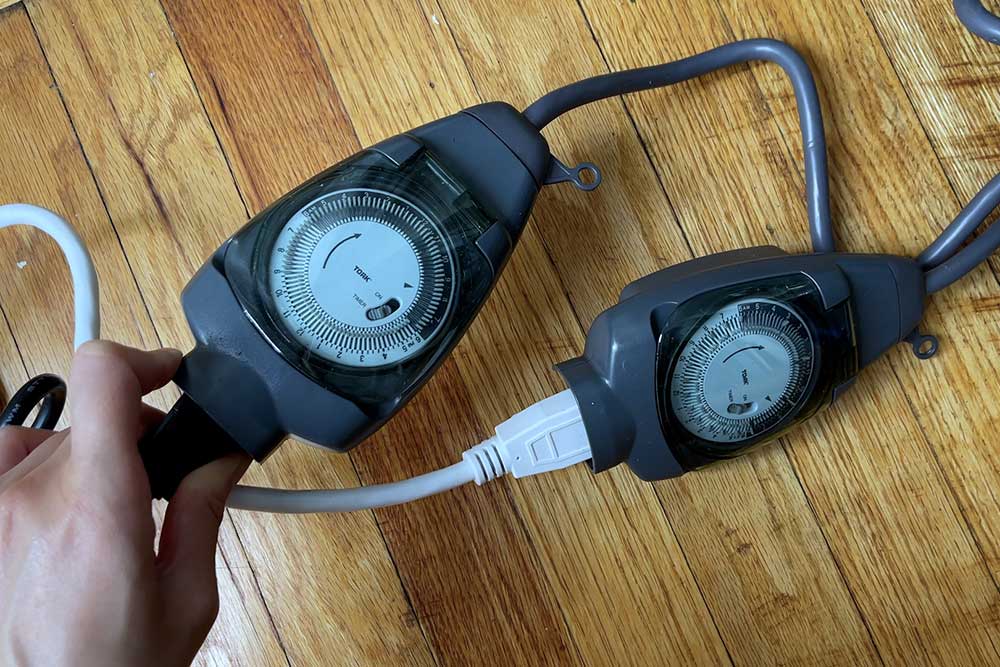
I wasn’t expecting quite so many cords
Seedlings
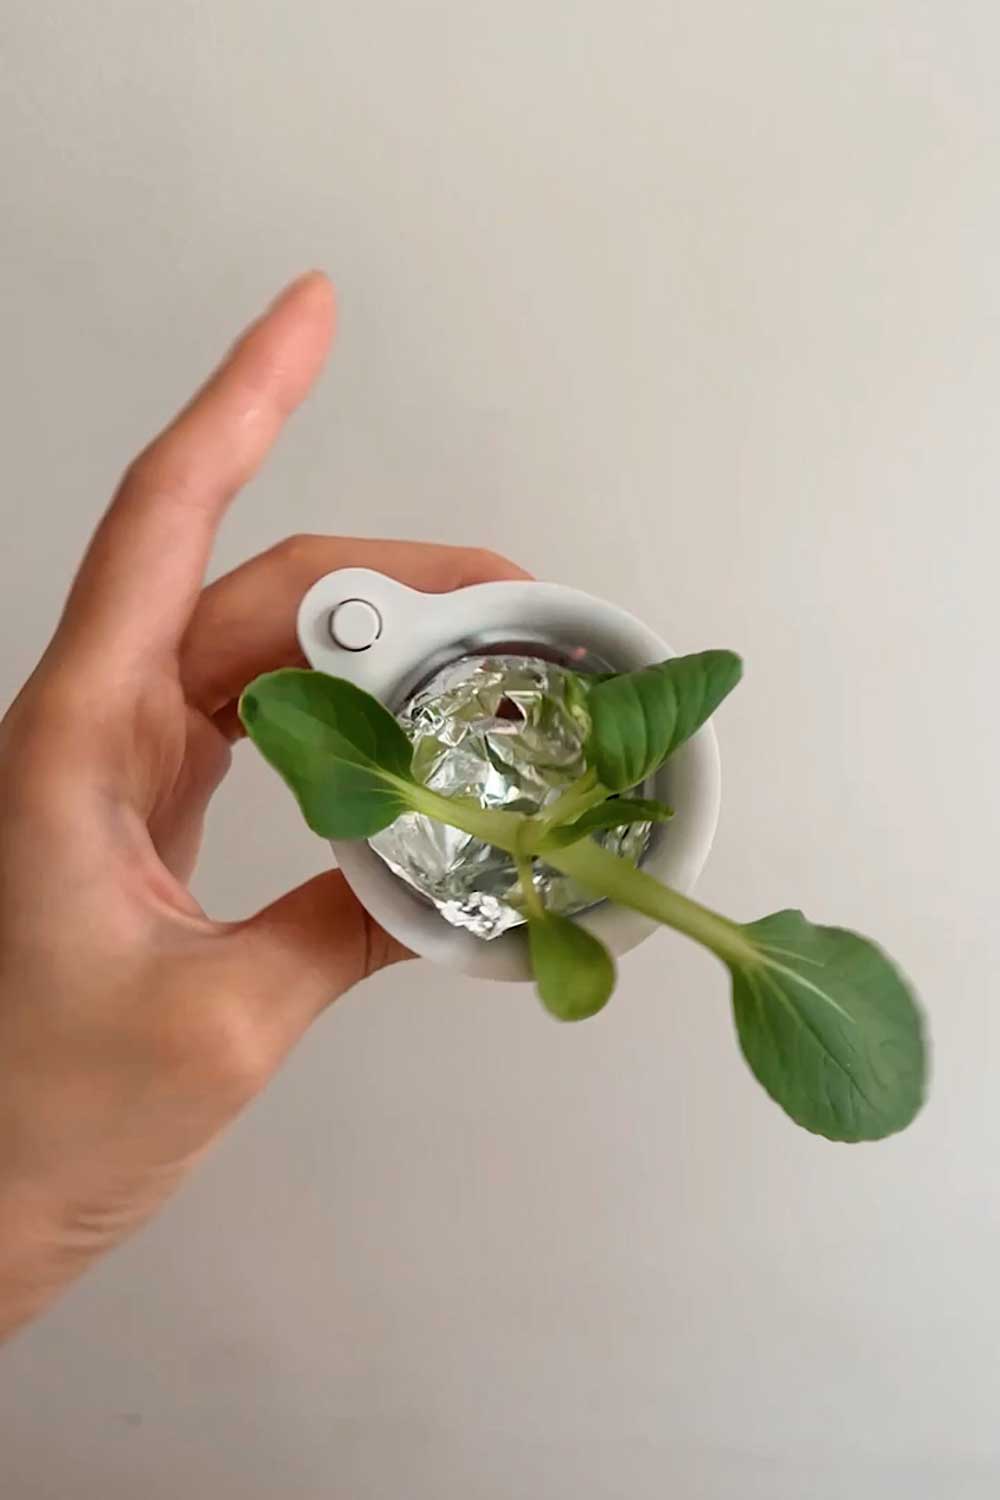
At this point, the Farmstand is ready to go and just needs plants!
If you picked seedlings, just wait for those to arrive before filling up the tank with water and nutrients.
I opted to skip the seedlings, since I like to grow my own plants from seed.
(I’ll make a separate post on how to grow your own seedlings for the Farmstand)
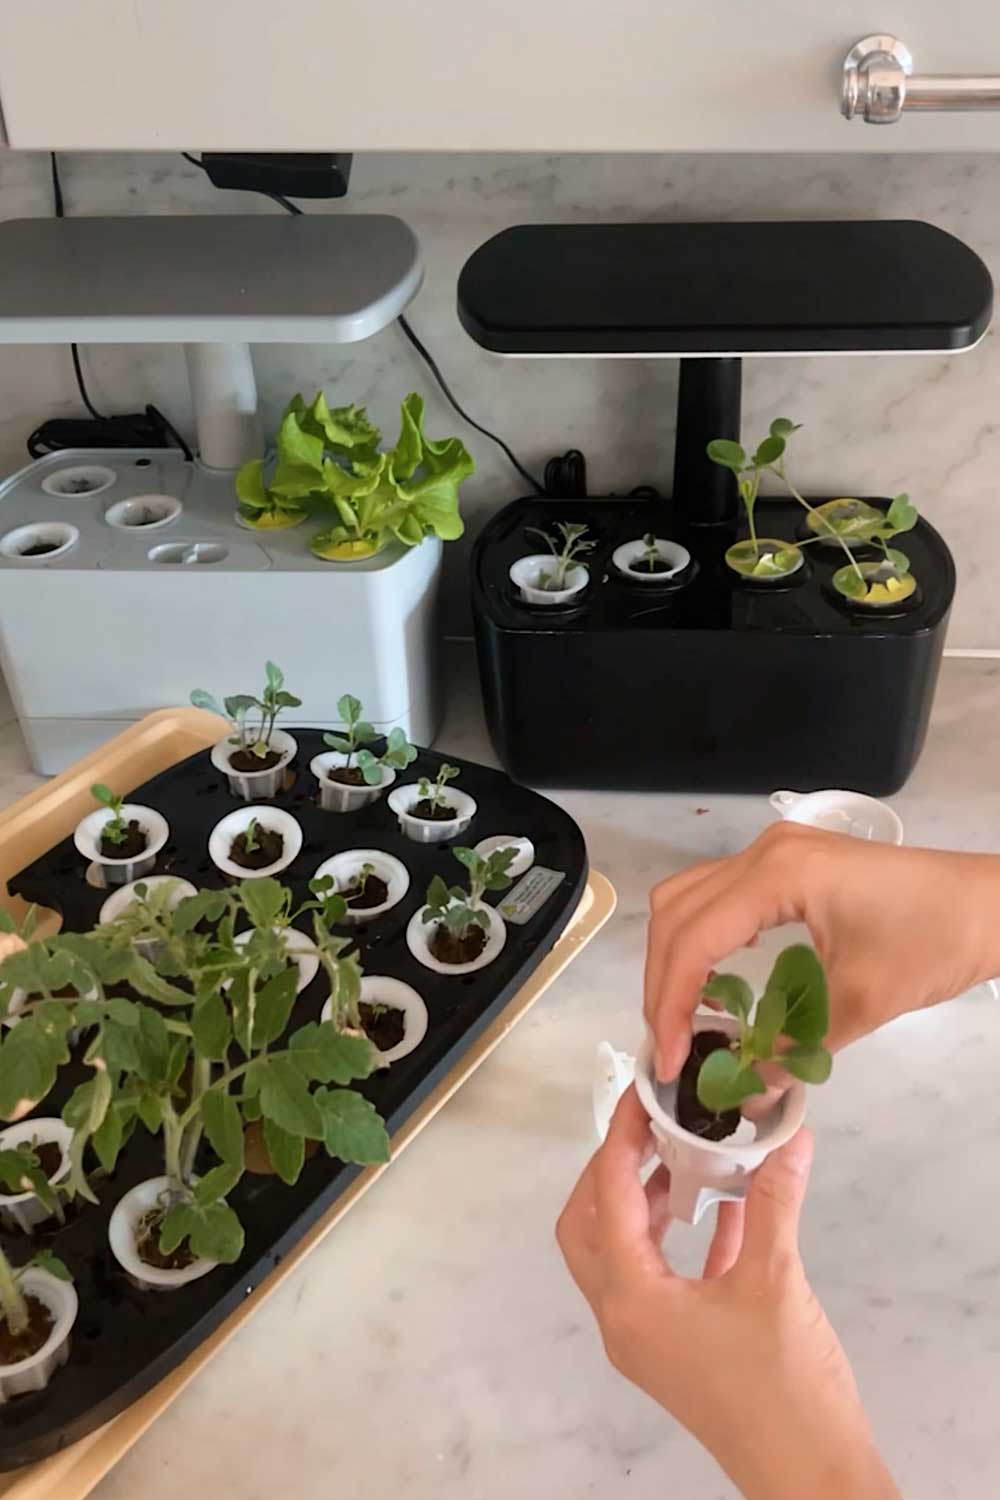
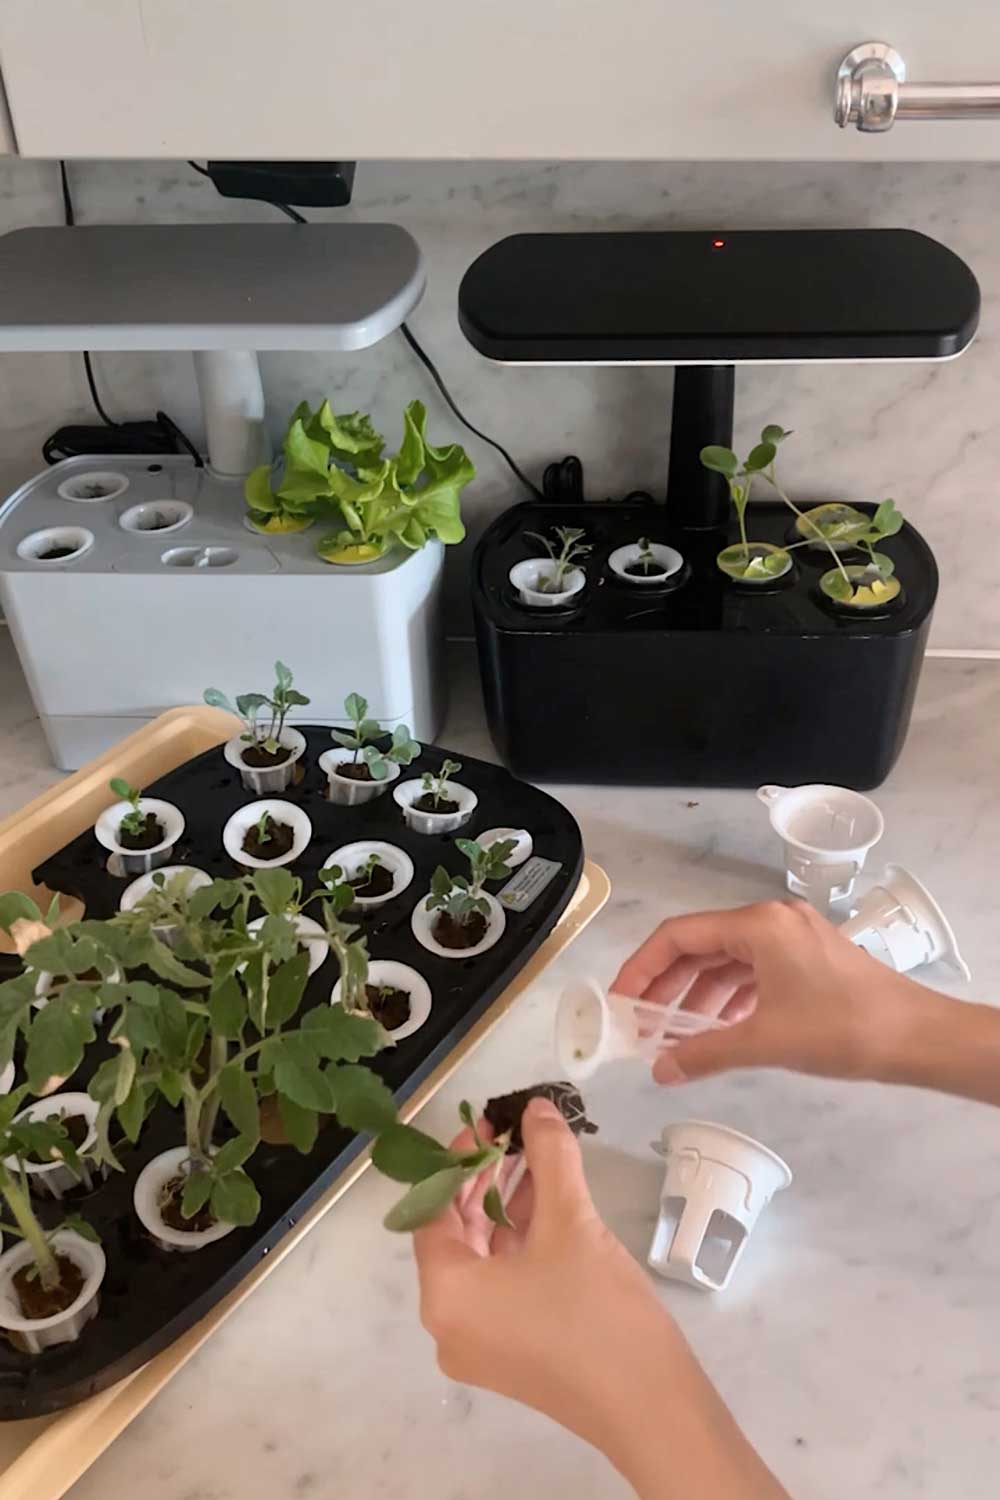
I grew my own seedlings in a smaller machine, then transferred them to the Lettuce Grow baskets
If you’re a beginner to indoor gardening, you’ll find it much easier to use Lettuce Grow’s seedlings.
They’re free with your Farmstand order anyway!
Plus, they’re optimized for growing with the machine. Not all plants will do well in an indoor environment.
Lettuce Grow pre-selects compact, hydroponic-friendly herbs, vegetables and flowers so it makes it much easier to get started as a beginner when you use their seedlings.
There’s also an app that sends you garden maintenance reminders (for pruning, adding nutrients, and harvesting) and contains helpful growing info on all the plants.
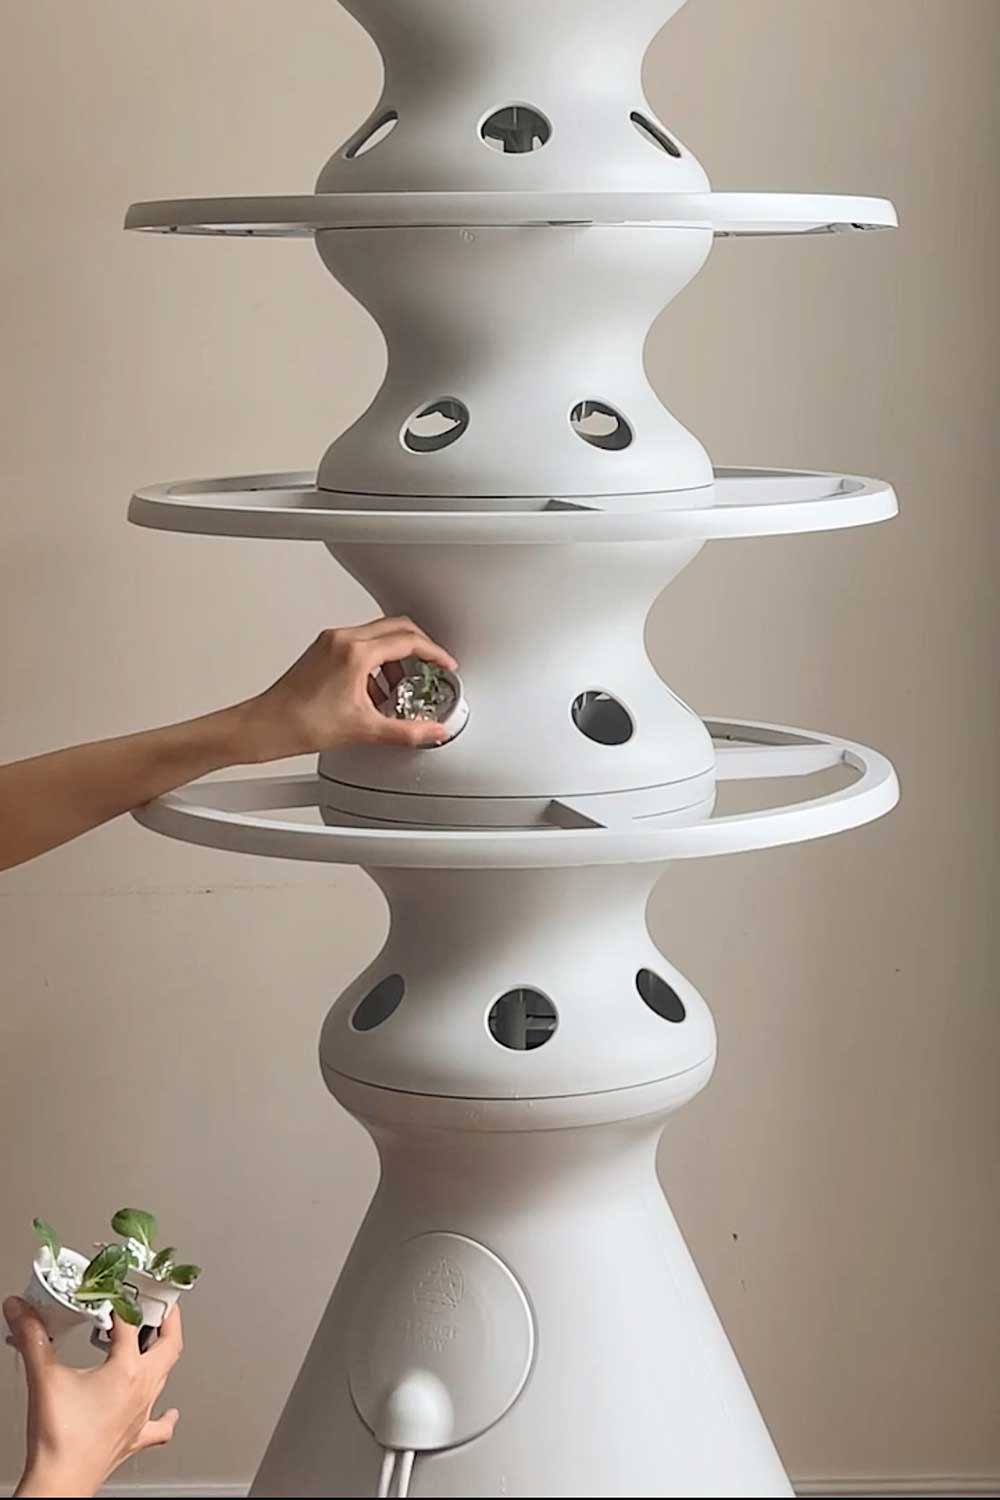
transferring my DIY seedlings to the Lettuce Grow
Adding Nutrients
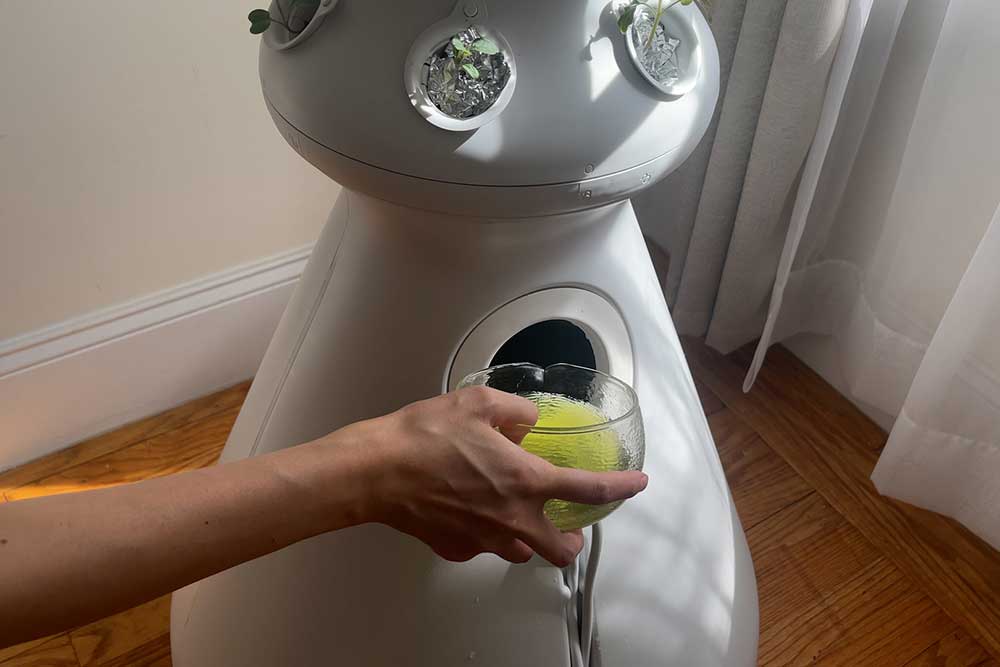
Once your seedlings are planted, you’ll want to fill up the indoor garden with nutrient water.
The Farmstand has a huge reservoir that can hold 20 gallons of water.
It took me a while to fill up the tank, going back and forth with my small 1 gallon jug.
If you have a hose or detachable sink faucet, that should make the process go by much quicker!
Add water until it’s just below the base of the opening circle.
Then it’s time to mix up your nutrients.
Lettuce Grow includes nutrients with the Farmstand. They give you Jack’s Nutrients, a two-part bag of dry nutrients.
Mix each up separately in small jars.
Since the nutrients come in powder form, you’ll want to mix them with water so that the minerals fully dissolve into liquid form.
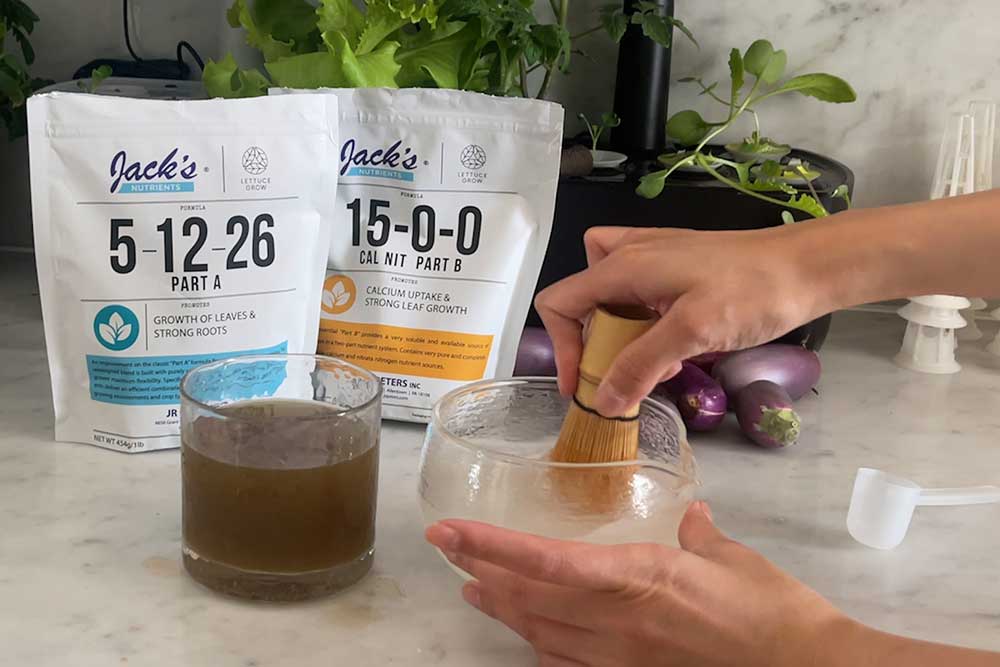
dissolving nutrients in water to add them to the Farmstand
Nutrient Schedule
Here’s the Farmstand nutrient schedule:
| Farmstand Size | 12 | 18 | 24 | 30 | 36 |
| Initial Dose | 4 tbsp | 4 tbsp | 4 tbsp | 4 tbsp | 4 tbsp |
| Top Up | 0.3 tbsp | 0.3 tbsp | 0.3 tbsp | 0.5 tbsp | 0.5 tbsp |
Jack’s nutrients are very concentrated, more so than any other hydroponic nutrients I’ve used.
So while you start with 4 scoops at setup, you only need a tiny bit during each biweekly top-up.
I found it helpful to get a kitchen scale like this to weigh out the nutrients and more accurately measure.
pH Testing
After each weekly top up, you’ll want to test the nutrient solution’s pH.
The optimal pH balance for hydroponic gardening is around 5.5 – 6.5. Outside of this range, plants find it difficult to absorb nutrients.
So Lettuce Grow also includes a pH testing kit, making it easy for you to monitor the pH of the Farmstand solution.
If the nutrient water is out of range, you can add pH up or down to adjust the solution.
But, before adding pH up or down, make sure to turn the pump timer to ‘on’ so that the Farmstand can mix up the nutrients and pump it evenly throughout the tank.
Assembling the Farmstand required a couple stages but overall, I found it very manageable!
Farmstand Accessories
I did end up getting several accessories that I think make for an easier indoor gardening experience.
This gripcut makes it possible to cut and harvest one-handed, leaving another hand free to hold a bowl.
This floor mat helps catch water spills.
This dolly is crucial for being able to move around the Farmstand.
Once the garden is full of water, it’s like a ton of bricks and pretty impossible to move.
Since the plants grow in a full 360°, the dolly makes it easier to turn the Farmstand around so you can check on the plants in the back.
Farmstand First Impressions
So far, I’ve been using the Indoor Farmstand for 30 days.
The pump noise has been a little loud (much louder than my counter gardens) and the lights are bright – but I’ve gotten used to it.
I stocked the tower with an assortment of Asian greens, like bok choy, chijimisai, and tatsoi and they’ve exploded.
I’m impressed with how fast everything’s grown, as it’s only been a month (typically Asian greens take 45-60 days).
I’m a huge fan of how the Lettuce Grow Farmstand has held up so far, so I picked up this double extension kit to add on to the garden.
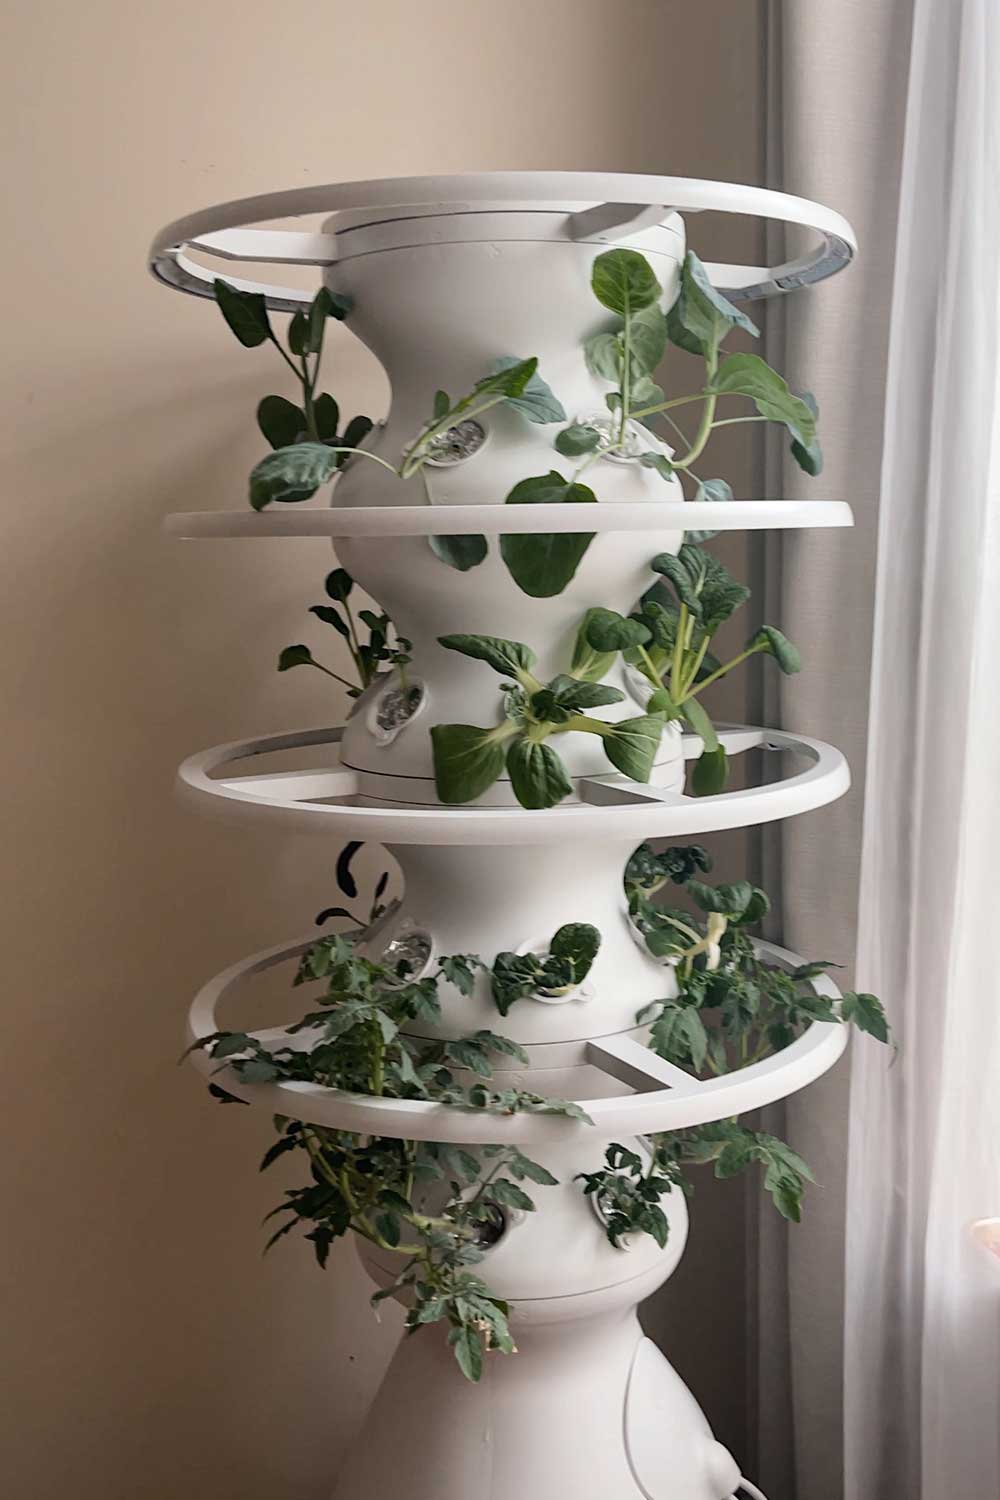
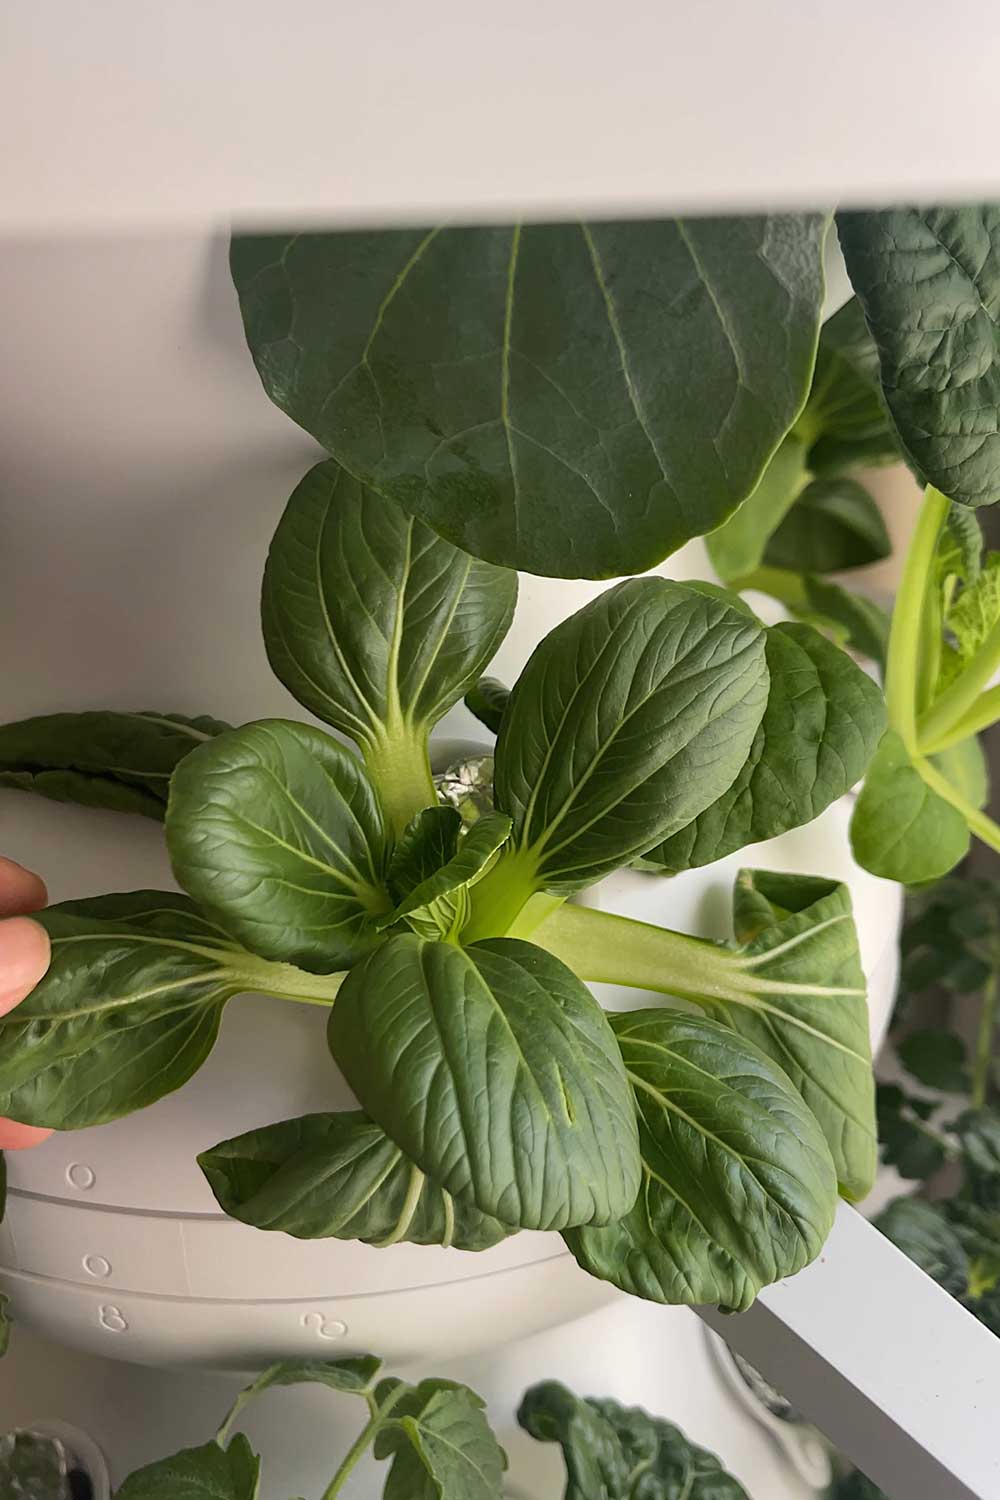
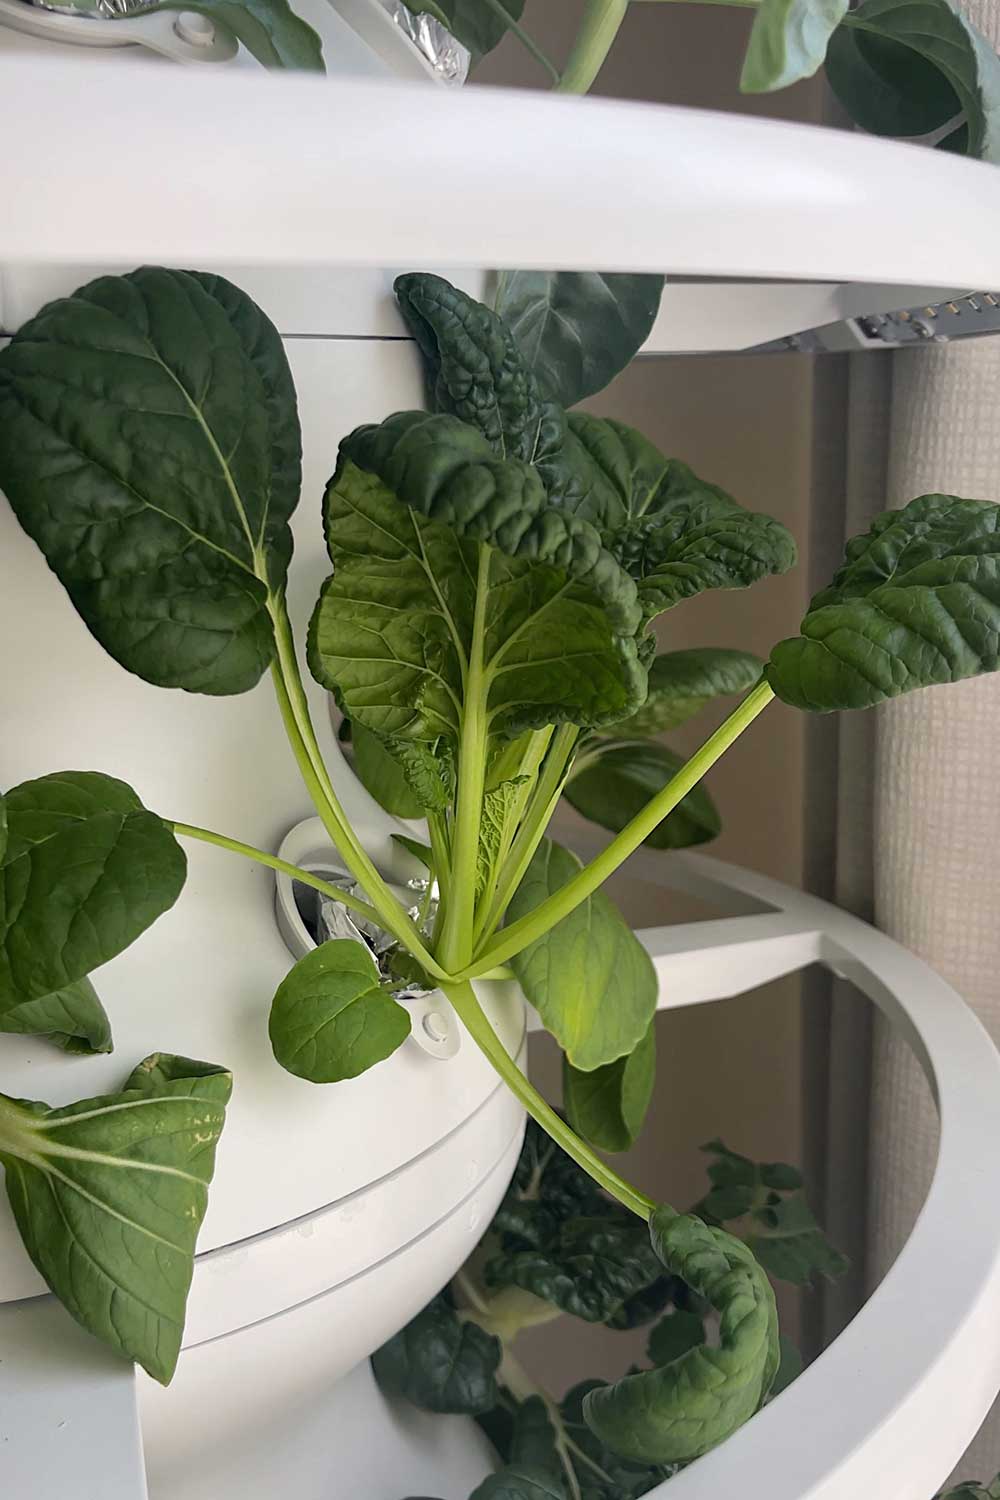
explosive growth in just 30 days, without any nutrient top up – I’m impressed!
Update: I posted a 60-day garden progress video and a recipe video for how I’m using the Asian greens.
I also answered some reader questions in this post.
Stay tuned for more updates!
Read more: Answering Your Questions About the Lettuce Grow
Follow me on
Youtube | Tiktok | Instagram | Substack
