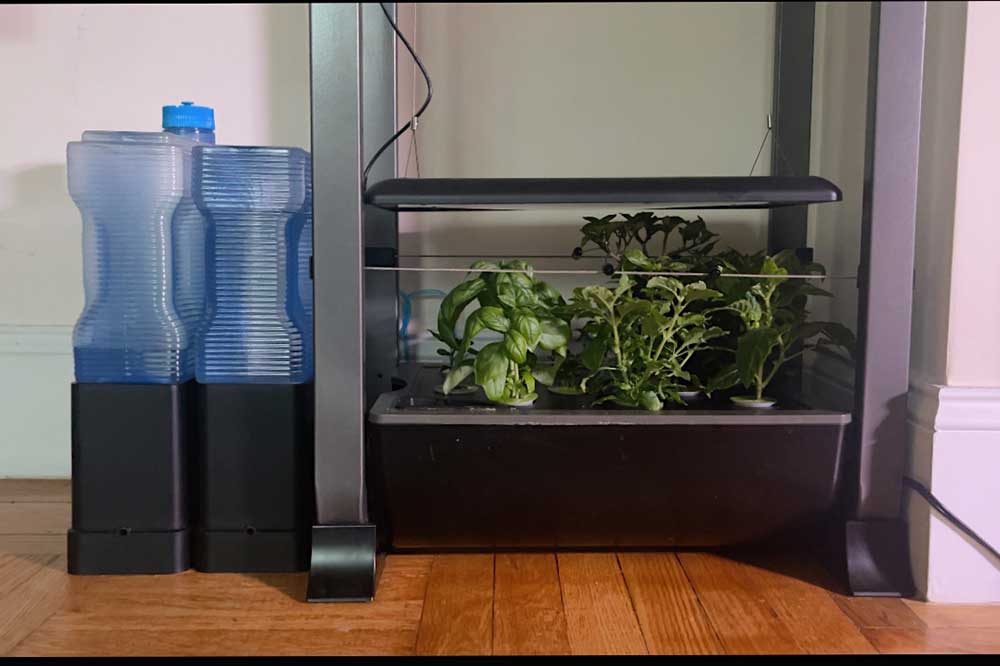
The Aerovoir is an Aerogarden accessory that acts as an additional water tanks. It’s perfect for low maintenance hydroponic gardening or those who want to keep their plants alive while on vacation. Here’s a complete review of the Aerovoir, including troubleshooting tips if you’re having trouble setting up the water reservoir!
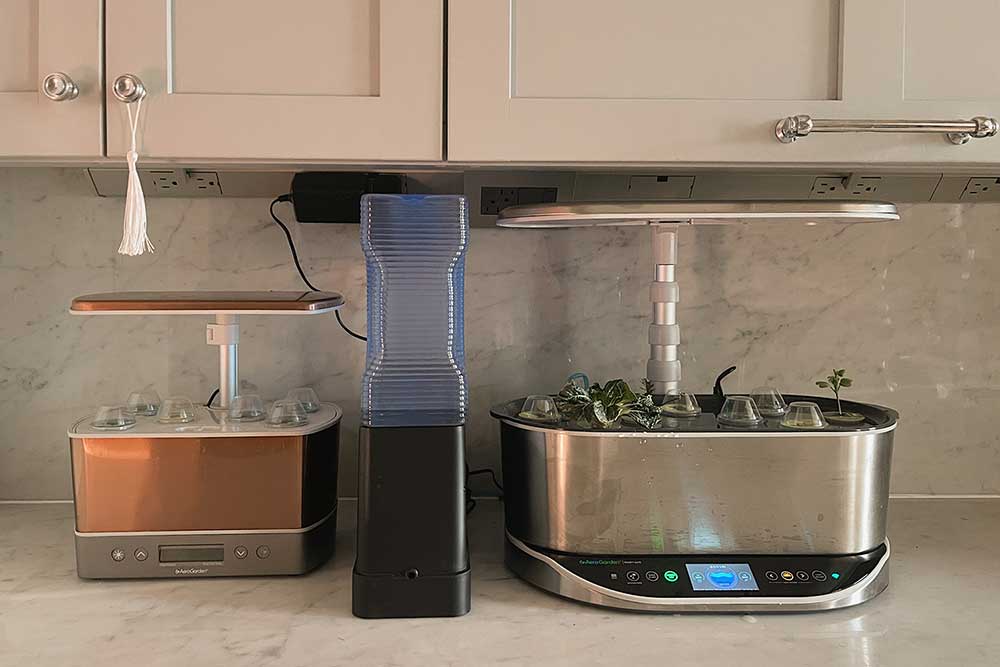
Aerogarden Aerovoir
Indoor gardening with the Aerogarden is really easy – the hydroponic kits are basically set it and forget it, and take care of all the hard work for you.
But have you ever wondered if you could spend even less time watering your plants?
Or are you going on vacation and want to ensure your plants will have enough water?
The Aerovoir is a separate water tank that can automatically refill your Aerogarden. Here’s everything you need to know about it, including if it’s worth the money!

What Is the Aerovoir
The Aerovoir is a separate water tank accessory that compliments the Aerogarden hydroponic gardens.
With the extra water reservoir, you can keep your Aerogardens automatically filled with water if you go on the vacation.
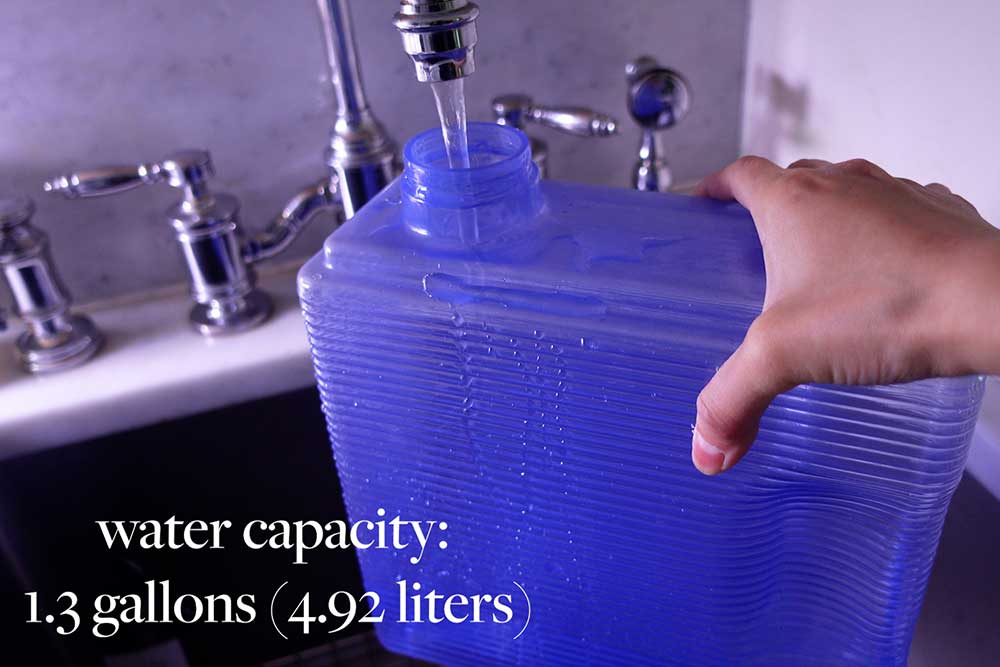
They can also be used when your plants are full grown and drinking lots of water. Because the Aerovoir holds 1.3 gallons of water, it helps extend the time between refilling the Aerogarden to up to two weeks!
How the Aerovoir Works
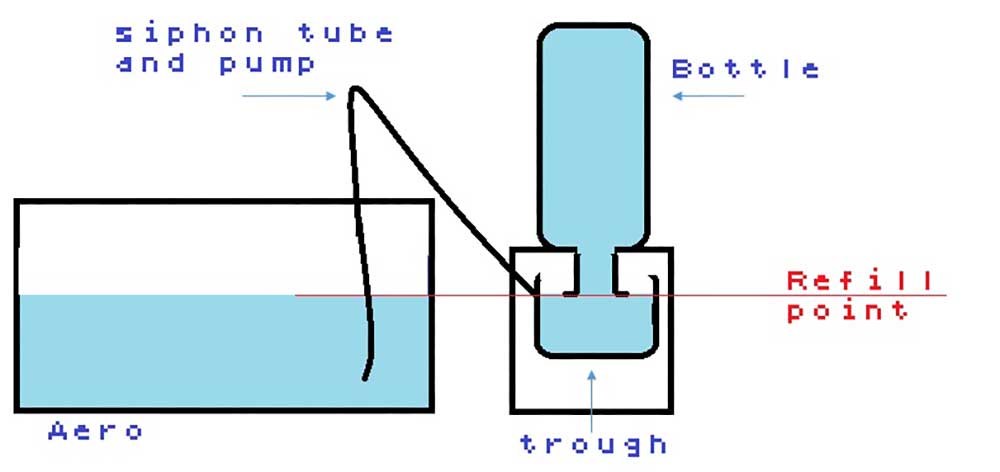
The Aerovoir works by using gravity.
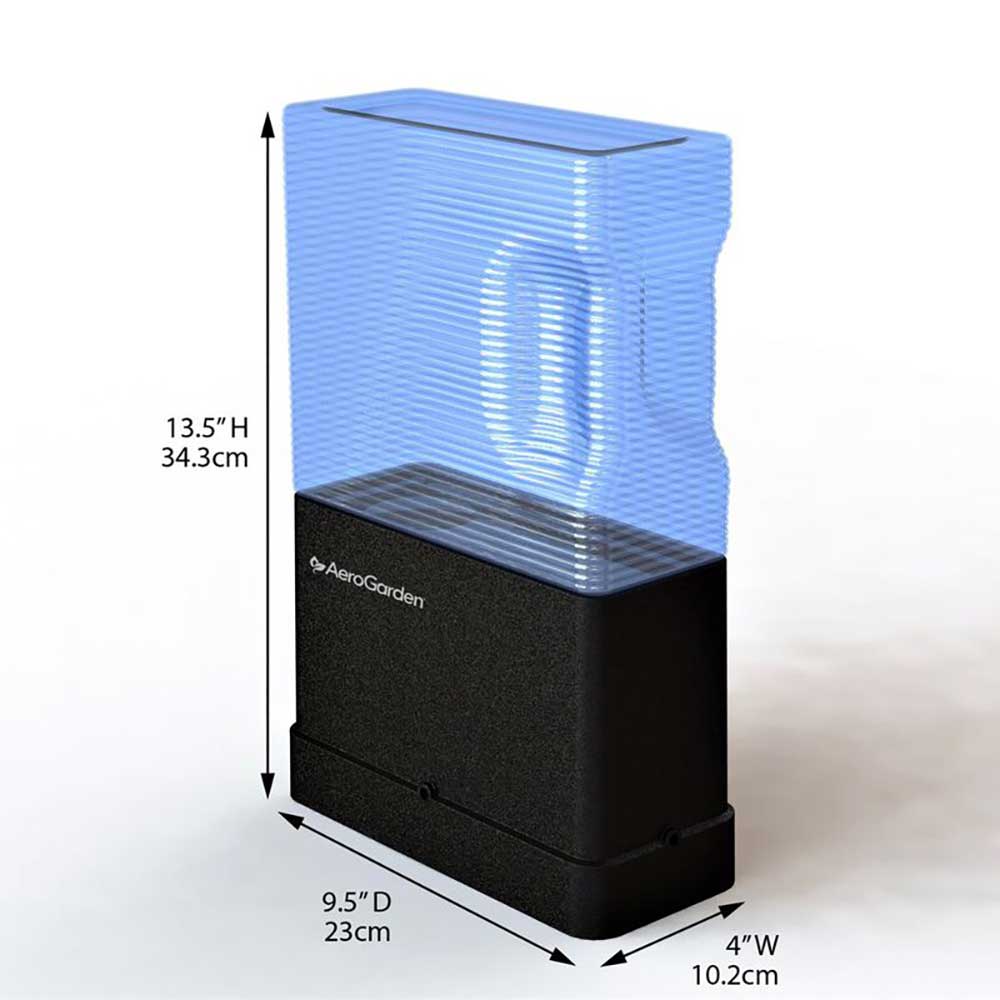
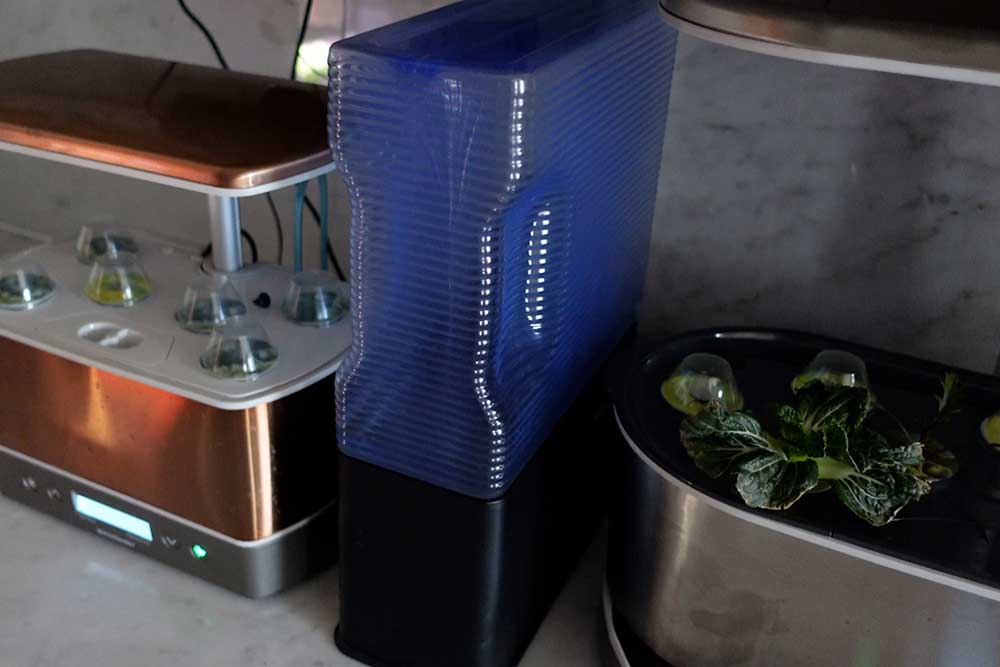
It’s a simple design, consisting of a water tank, base, tubing and air pump.
You place the Aerovoir side by side with your Aerogarden, and as water is used up by your plants, the Aerogarden will pull in water from the reserve tank to fill the grow basin.
Buy it: Amazon, Aerogarden
Aerovoir DIY
If you’re handy, you can definitely make your own Aerovoir!
I’ve seen people use empty wine bottles, plastic tubs and all sorts of things to create their own DIY water tank since no electronic parts are needed. From what I understand, it’s a similar concept to pet water bowls, where when the tank is upside down, a pressure cap tip opens the flow of water.
You can try to make your own by using airline tubing and an empty container. I recommend this black tubing on Amazon. It’s inexpensive, colored black to prevent algae from growing inside the tube, and also comes with splitters if you want to use it with multiple Aerogarden machines.
I’m not handy, so I went with the ready made option!
I also think the Aerovoir looks nice and sleek. The new 2020 design is a slim, tall box that can easily be tucked away behind the Aerogarden.
How to Set Up the Aerovoir
The Aerovoir is really straightforward to set up.
1. Fill up the water jug.
I use tap water, but you may want to use distilled water depending on your local water source.
2. On your Aerogarden model, look for a raised stopper on the back of your unit.
There should be at least 2, one on each side of the Aerogarden. The Bounty elite has 6 slots!
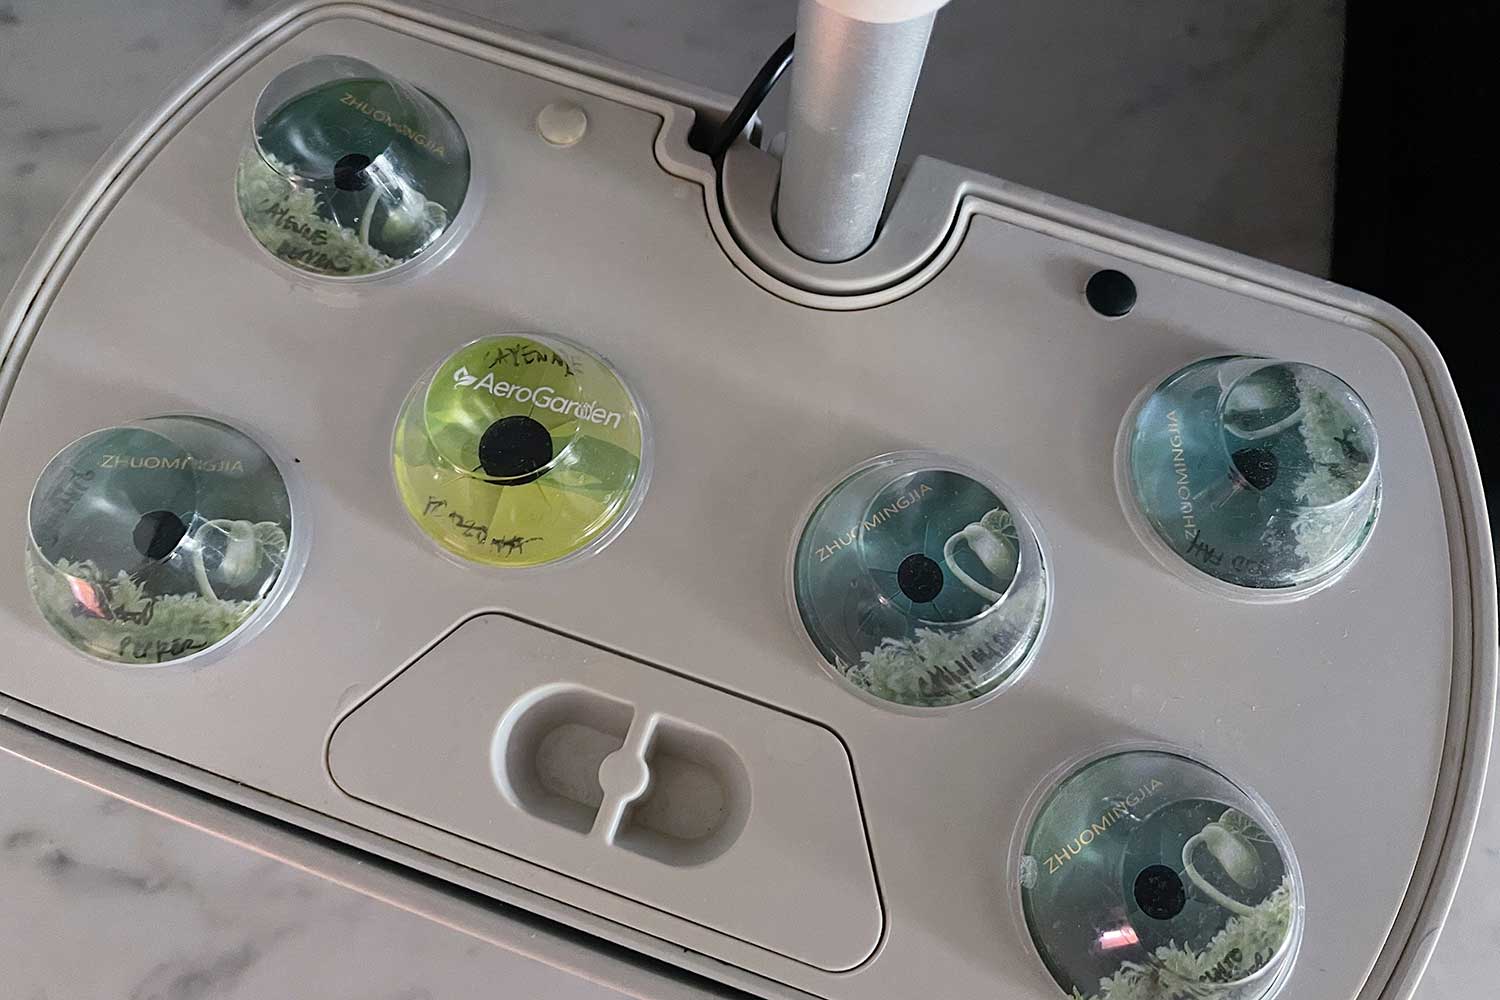
3. Remove one stopper and insert the L-shaped outlet tube of the Aerovoir into the grow deck.
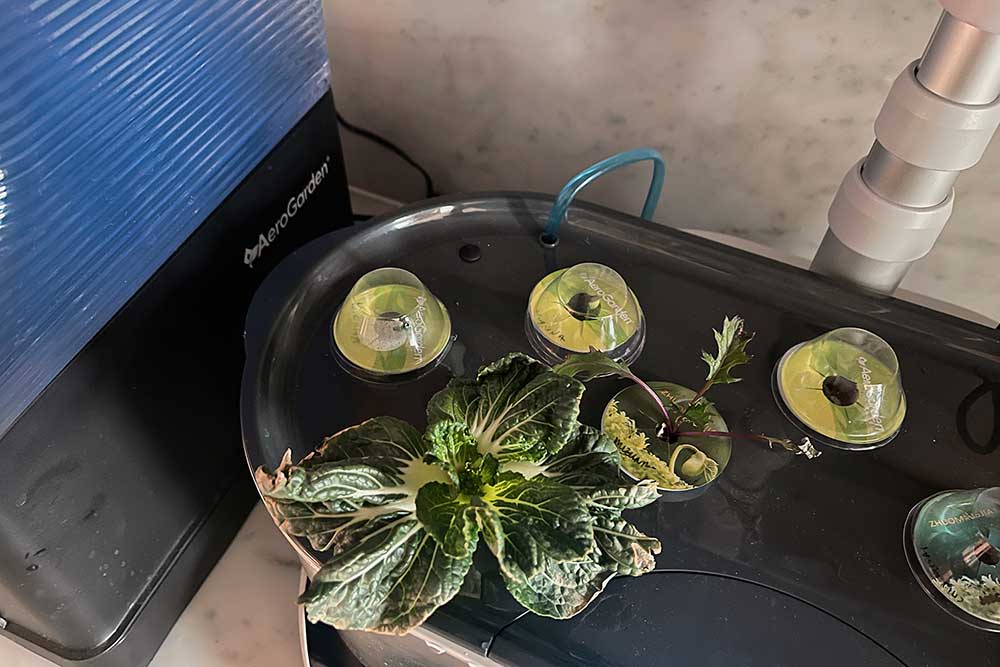
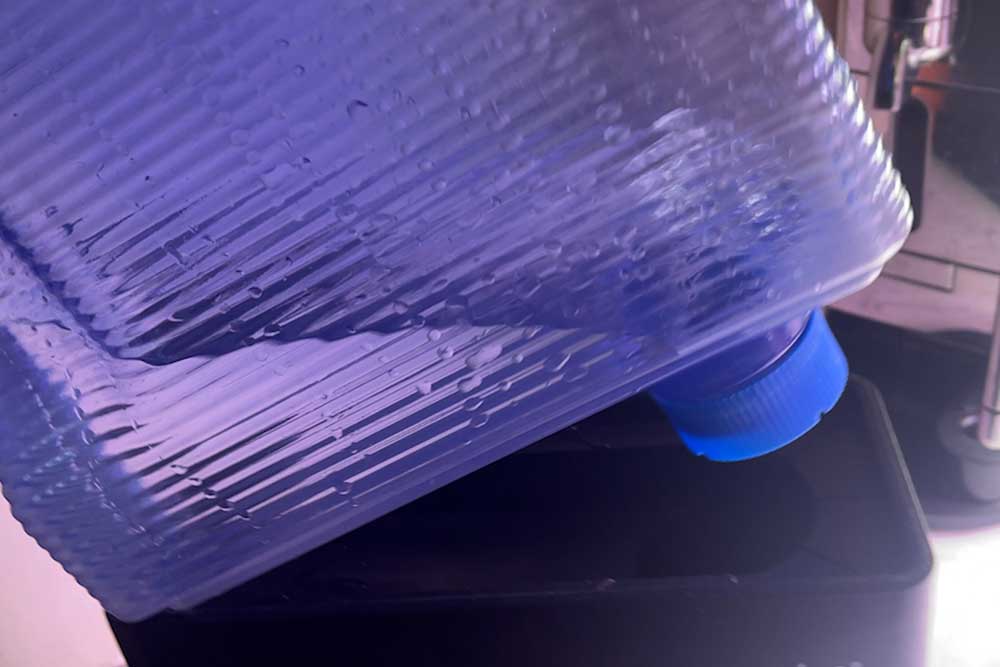
4. Turn the water tank upside down and fit it into the plastic base.
It should immediately begin to flow water from the Aerovoir into the Aerogarden.
Make sure to place the outlet tube into the grow deck before you place the Aerovoir upside down into the base – otherwise water will spill out everywhere!
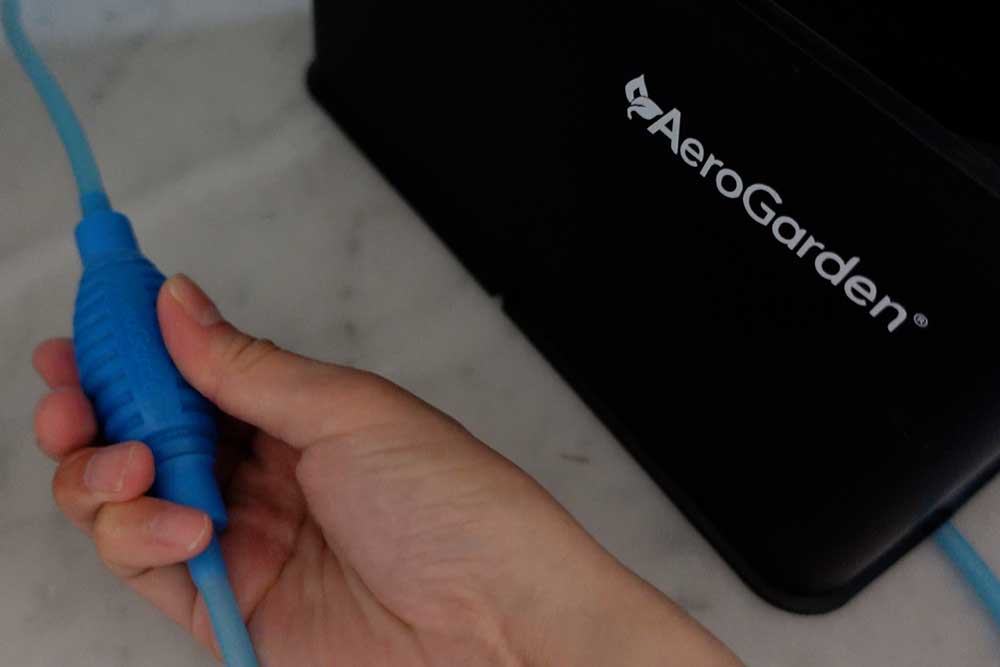
5. Squeeze the pump about 5-10 times to get out any air bubbles
Which Aerogardens Can the Aerovoir Be Used With
The Aerovoir is designed to work with any Aerogarden unit!
But, depending on the height of the Aerogarden model you have, you may or may not need to use the extra base (included with the Aerovoir). Because the Aerovoir relies on gravity to pull water from the reservoir into the hydroponic unit, both need to sit at roughly the same height.
So, for the shorter models (like the Harvest and Sprout), the plastic base isn’t necessary.
But for the larger, taller models (like the Bounty and Farm), you will need to raise the Aerovoir on the extra base so both objects sit at the same height.
Aerovoir Troubleshooting
I also filmed a tips + tricks video on the Aerovoir, which you can watch on Youtube here!
Aerovoir Not Working?
While the Aerovoir is very simple to set up and use, the system is a little finicky.
I recommend setting it up a day or so before you need the Aerovoir to work. So if you’re headed on vacation, give yourself some wiggle room to make sure the Aerovoir is functioning properly before you leave!
If the Aerovoir isn’t working, here are some tips:
Aerovoir Tips
Make Sure the Aerogarden is low on water
If your water tank is full, it’s not going to draw on any water from the Aerovoir. Set up the Aerovoir when the Aerogarden grow basin is low on water.
Make Sure There Are No Kinks in the Tubing
The tube needs to be inserted all the way in and reach the bottom of the Aerogarden. Double check that the tube is straight (not pinched beneath the stand or twisted).
Give the pump a couple extra squeezes, and make sure to press out any air bubbles.
Give It Time
The Aerovoir works pretty slowly.
I thought at first that if the Aerogarden needed water, it would just quickly suck in water from the additional reservoir, but it actually draws the water quite slowly.
When my Farm 12XL water tank is ~50% full, it takes about 30 minutes for the Aerovoir to fill up the grow bowl.
Look for Bubbles
You can tell the Aerovoir is working when you notice little bubbles inside the blue tank. They’ll slowly float to the top. If you listen carefully, you can also periodically hear bubbling sounds.
I show both of these indicators in my Youtube tutorial video, if you want a visual.
The bubbles will become less frequent and eventually stop once water in the Aerogarden has reached the fill line. Like i said, it all works pretty slowly, so set this all up a day beforehand so you’re not in a rush.
And hopefully that works for you!
How to Prevent Algae in the Aerovoir
I made the mistake of placing my Aerogarden and Aerovoir in a spot that gets a lot of sun.
So when I came back after several weeks away, I was horrified to see algae growth inside the water reservoir! Prevent my mistake and make sure your Aerovoir isn’t in direct sunlight (or close your blinds before you leave).
How to Clean the Aerovoir
In most cases, you won’t really need to clean the Aerovoir because it’s just holding water. But if yours develops algae like mine did, you’ll want to give it a deep clean to prevent additional bacteria from growing.
Unfortunately the mouth of the water tank is quite small, so it’s difficult to simply wipe away the green algae.
Instead, mix up a 5% chlorine bleach solution by adding 1 tablespoon of bleach to the tank and filling the rest up with water.
Screw the cap on tight and shake the Aerovoir to make sure the solution fully reaches all the corners. Leave the chlorine bleach inside the water tank for a couple hours to deep clean, then empty it out and rinse the Aerovoir with fresh water.
Let the Aerovoir fully dry out and ensure all the algae is gone before re-using it.
And it should be back to new!
Follow me on
Youtube | Tiktok | Instagram | Substack | ShopMy
![]()

How can I purhase this Areogarden Reservoir product? Amazon has them unavailable.
Thank you
Author
with aerogarden going out of business, im not sure.
AeroGarden is back in business. Aerovoirs are in stock.
Hi Sher, does the Aerovoir work with your other hydroponic systems? e.g. Click & Grow, Letpot?
How do you maintain Lettuce Grow whilst you’re away? I imagine that with the larger models, you would require someone to come to your apt and help?
Love your content! Would love to see more recipe videos. Thanks :)
Author
Hi Jasmine!
no the aerovoir doesn’t work with the other systems. I think Letpot has a watering system that you can use for their gardens but I haven’t tried it.
The Lettuce Grow is actually pretty good for someone who travels! The tank holds 20 gallons, so it can last about 2-3 weeks (or more) depending on how big your plants are. The Aerogarden Farm tank holds about 2 gallons in comparison, so it needs more frequent watering.
I have some old posts here and here on what I do when I go away, but now that I have a bird I have someone come to my apt to watch him.
Thanks for the nice comment, will work on some more cooking content :)